teaching sewing confidence, tip by tip
Showing posts with label NYC Mod Bee. Show all posts

Saturday, 25 October 2014

Wonky Log Cabin Block Tute - NYC Mod Quilt Guild Bee


Hi, Chris here, catching up with my NYC Mod Quilt Guild Bee Blocks - this one's for September and our Queen Bee is Andrea Deal of Gotham Quilts.  


If you haven't heard of Gotham Quilts yet then do check out their website - it's a brand new online fabric store owned by my two friends Andrea Deal and Ivete Tecedor, based in Manhattan but shipping internationally.

Not surprisingly Queen Bee Andrea picked some pretty gorgeous new fabrics for her blocks with her whole store to choose from!   

Forest Frivolity, Moonshine in Strawberry by Tula Pink for Free Spirit
Stitch Circle in Candy by Michael Miller
Chicken Coop in Egg Blue by Joel Dewberry for Free Spirit
Stampede Lawn, August in Mint by Sarah Watts for Cotton+Steel


Our instructions for the block:

"do a 12.5" wonky log cabin variation like the one pictured... . I have a cool new Tula Pink print for the feature fabric, but don't feel like you have to use it in the center. ... ".

I choose two images from the Tula Pink fabric and fussy cut them - first the tent as the central starting point for the block


and a long strip that included the two pink deer.


Time for the my Wonky Log Cabin Block tute -
click the image below to take you to the tute I wrote for the June 2014 NYC Mod Quilt Guild Bee Block.


I've used exactly the same process to make this latest block.  The only thing I did differently this time that I don't normally pay attention to was keeping the fussy cut central Tula Pink tent section totally horizontal to the finished block.

This was simple to do, I just made the block larger than necessary and then using the grid on my cutting mat and my long quilting ruler made sure this section was horizontal by wiggling the block between the mat and the ruler to line it up perfectly before trimming the block back with my 12.5" square ruler.  Wishing I'd taken a pic of how I did it now :(


Oh dear, yet another block that I wish I didn't have to hand back!  I'm particularly enjoying how I've cut away a lot of the pink round of fabric so you only see a really small section of pink down the right hand side of the block.  The trick is not to worry about cutting away a fair amount of a strip you've just sewn on - it's the best way to get large sections and unusual angles within the block.

I just love making wonky log cabins - anything that doesn't involve measuring and yet looks so precise in the finished piece is okay by me.


Two final questions for you:
1: How do you like your log cabins, wonky or straight?
2: Have you visited the Gotham Quilts online fabric store yet?

As always you can check out all the blocks that our Bee make for Andrea on my Quilty - Wonky Log Cabin Pinterest Board - I'll add more pins as each person in the Bee posts photos of their finished blocks and you can see my NYC Mod Quilt Guild post here too.

And you can click this link to see all of my NYC Mod Quilt Guild Bee Blocks and Challenge Blocks/Quilts.


Featured On:
Saturday Spotlight


Follow on Bloglovin


Tuesday, 19 August 2014

Fabric Cut Out Art - NYC Metro MQG Bee Block June 2014


The start of another year for my NYC Metro Mod Quilt Guild Bee - we took a break for May then in June Queen Bee Earamichia started us off again for another round with a couple of new Bees on board.

Our packages included a square of charcoal grey solid cotton and some black Misty Fuse.  Queen Bee E asked us to create a Fabric Cut Out Art Block based on Silhouettes and Scratch Art - remember when you were young and you'd colour a rainbow with crayons then cover the whole piece with thick black crayon then scratch away a picture into the black crayon to reveal the rainbow of colour beneath? - I loved doing that.


I quickly set about fusing the Misty Fuse to the back of the charcoal grey solid and then I thought and thought about what design to make.  In fact, in between my travels I've thought about this block for 2 months and finally settled on my design this week. 

If you haven't used Misty Fuse before you might want to read this helpful Tip Sheet written by artist/author/teacher Sue Bleiweiss, she's got some great Misty Fuse project tutes here on her blog too.


I cut the solid down to a 10" square and sketched out this peacock feather using white chalk.


I carefully cut out the feather and border design.


Here's strips of 'peacock' colours I pulled from my scrap boxes.


Queen Bee E asked us to create a background block that's 3" on all sides larger than the cut out block so I cut out a 16" square of paper and starting sewing the strips onto it ...


then pressing each strip open ...


and cutting away the excess.


 And the finished square looked like this.


Time to place the Feather and Frame on the block, Misty Fuse side down. I marked 3" in from each block edge and lined the frame edges up with it then ironed to fuse the pieces together and fix the design in place.


The finished block from the left ...


and the right ...


I'm really pleased with the finished block though I'm intrigued as to how Queen Bee E is going to quilt all the blocks and hold the fused designs permanently in place. As and when I find out I'll let you know!

As always you can check out all the blocks that our Bee make for E on my Quilty - Fabric Cut Out Art Block Pinterest Board - I'll add more pins as each person in the Bee posts photos of their finished blocks and you can see my NYC Mod Quilt Guild Post here too.


And you can click this link to see all of my NYC Mod Quilt Guild Bee Blocks and Challenge Blocks/Quilts.


Follow on Bloglovin


Tuesday, 15 April 2014

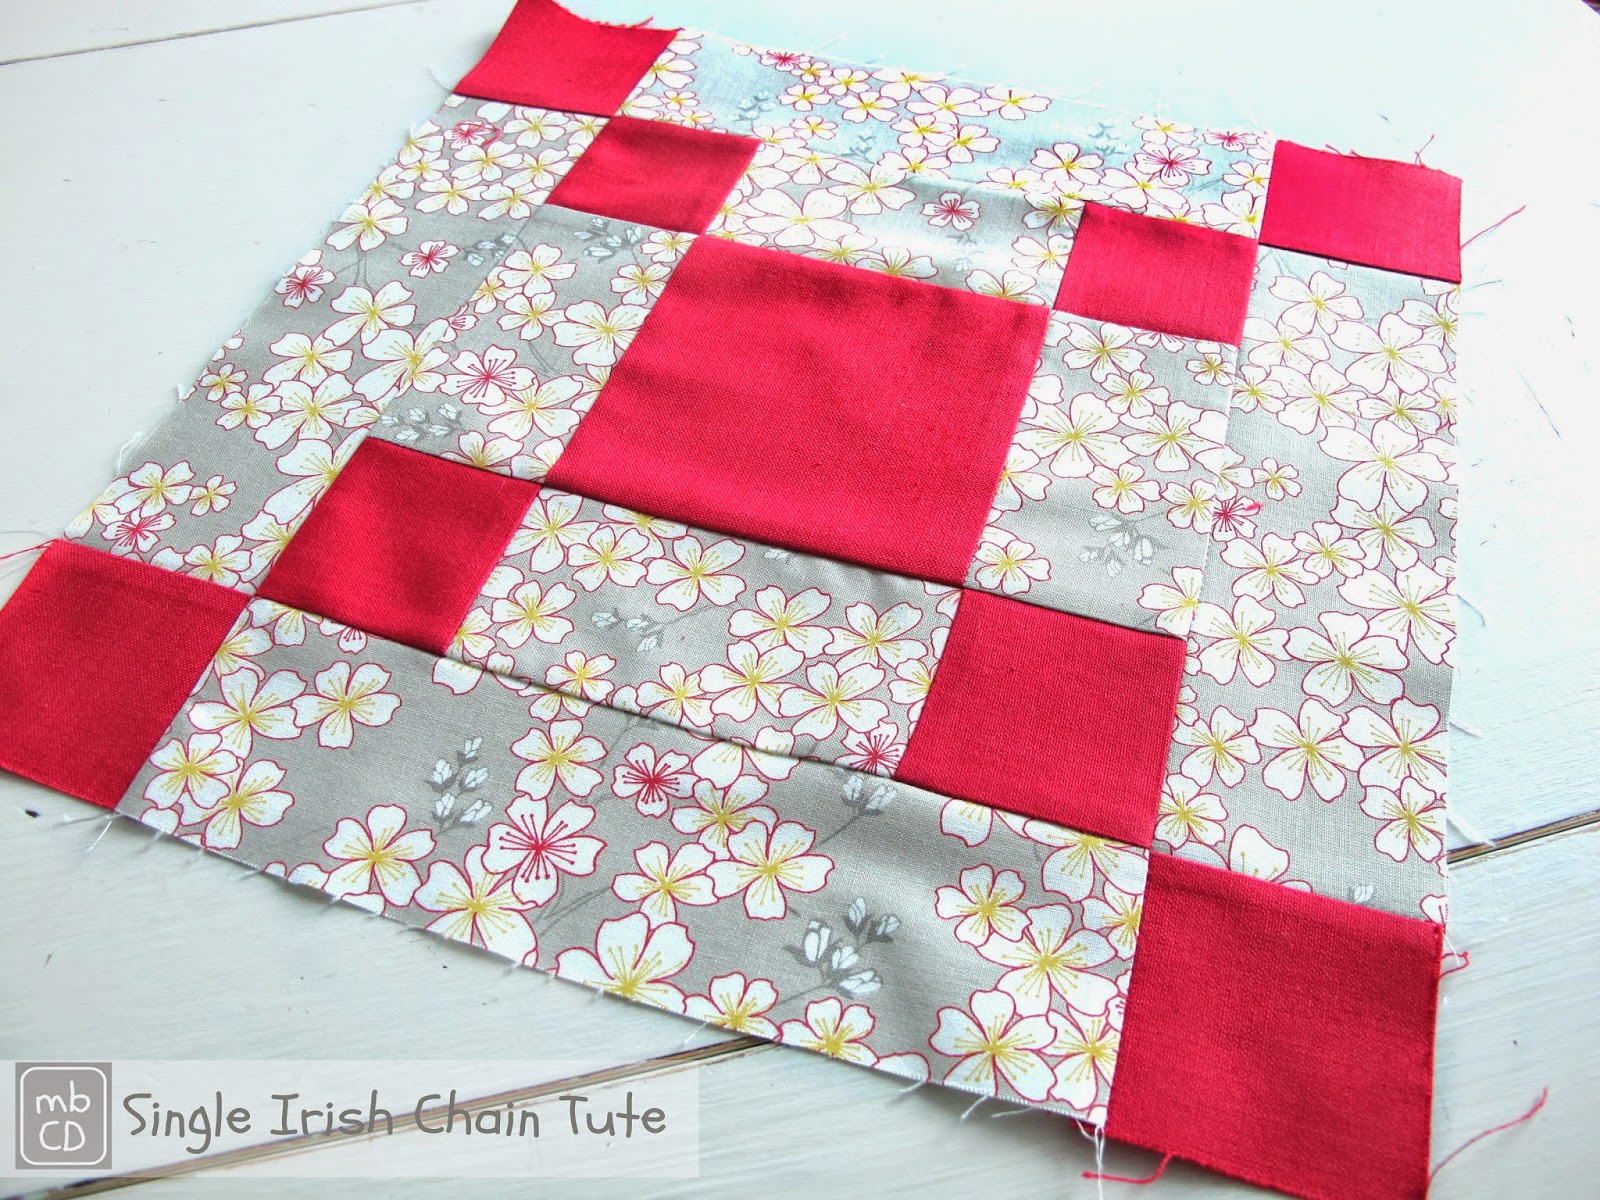
Single Irish Chain Block Tute: My April 2014 NYC MQG Bee Block

Single Irish Chain Block Tute by www.madebyChrissieD.com

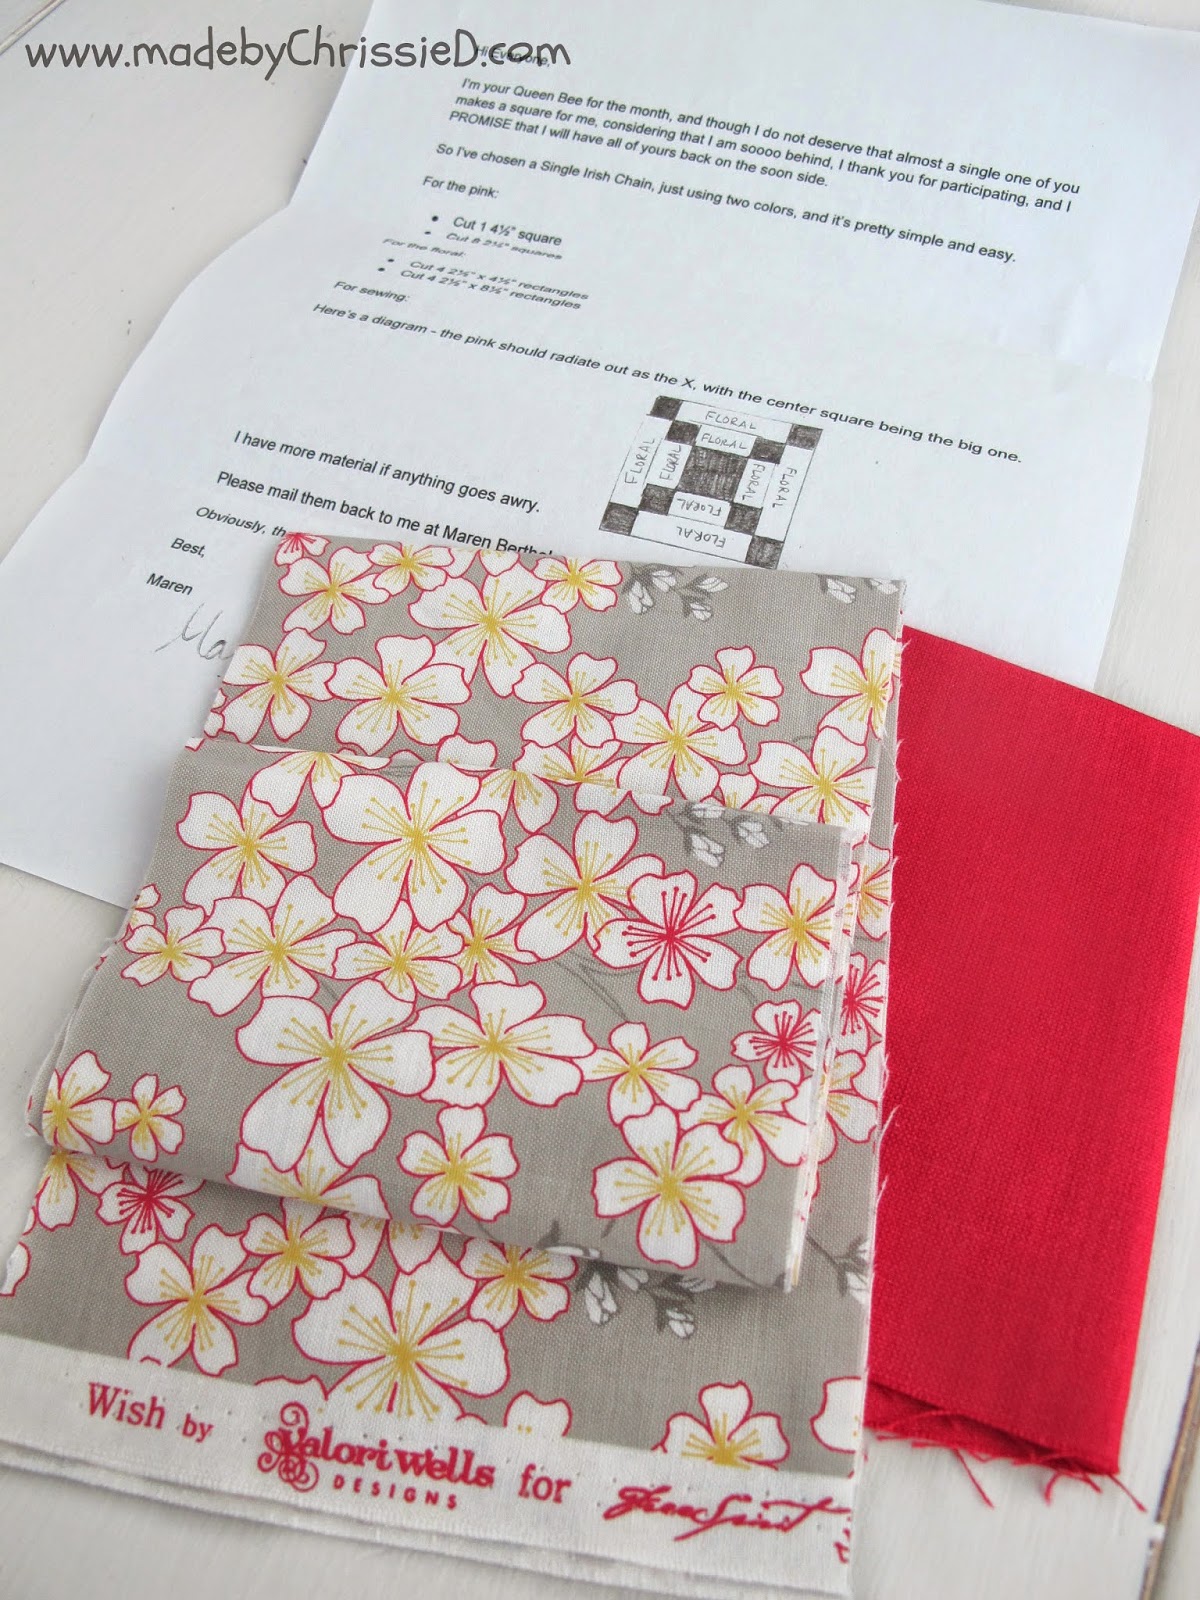
Maren is the final Bee Block of the Bee year and April's NYC Mod Guild Queen Bee. Her fabric selection is Treasure - Patience from the Wish Collection by Valori Wells for Free Spirit. A yummy raspberry pink solid. She's chosen a Single Irish Chain block for us to make.

Single Irish Chain Block Tute by www.madebyChrissieD.com

If you'd like to have a go at making the block yourself, here's my photo tutorial

Single Irish Chain Block Tute

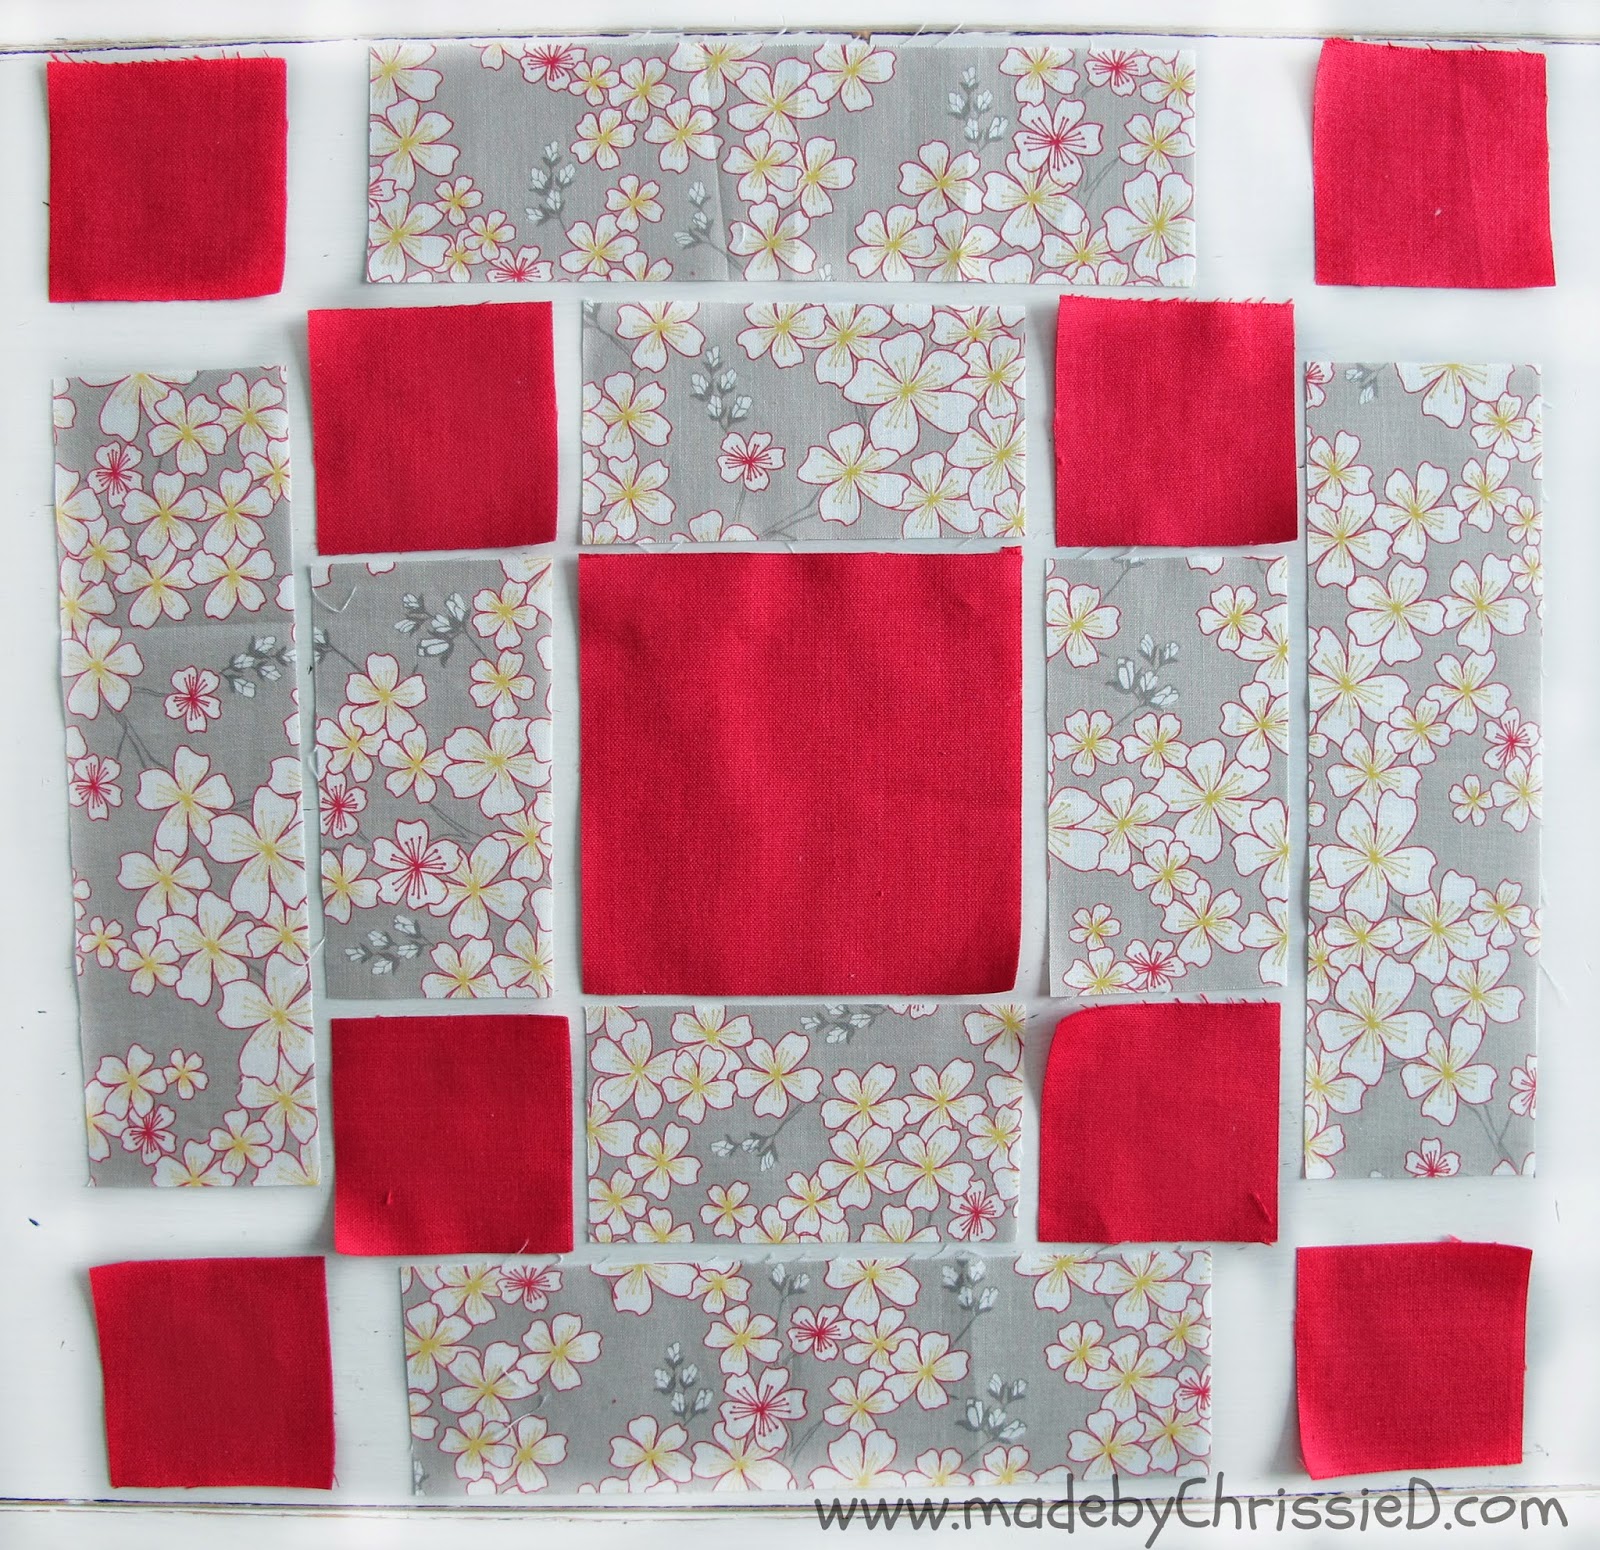
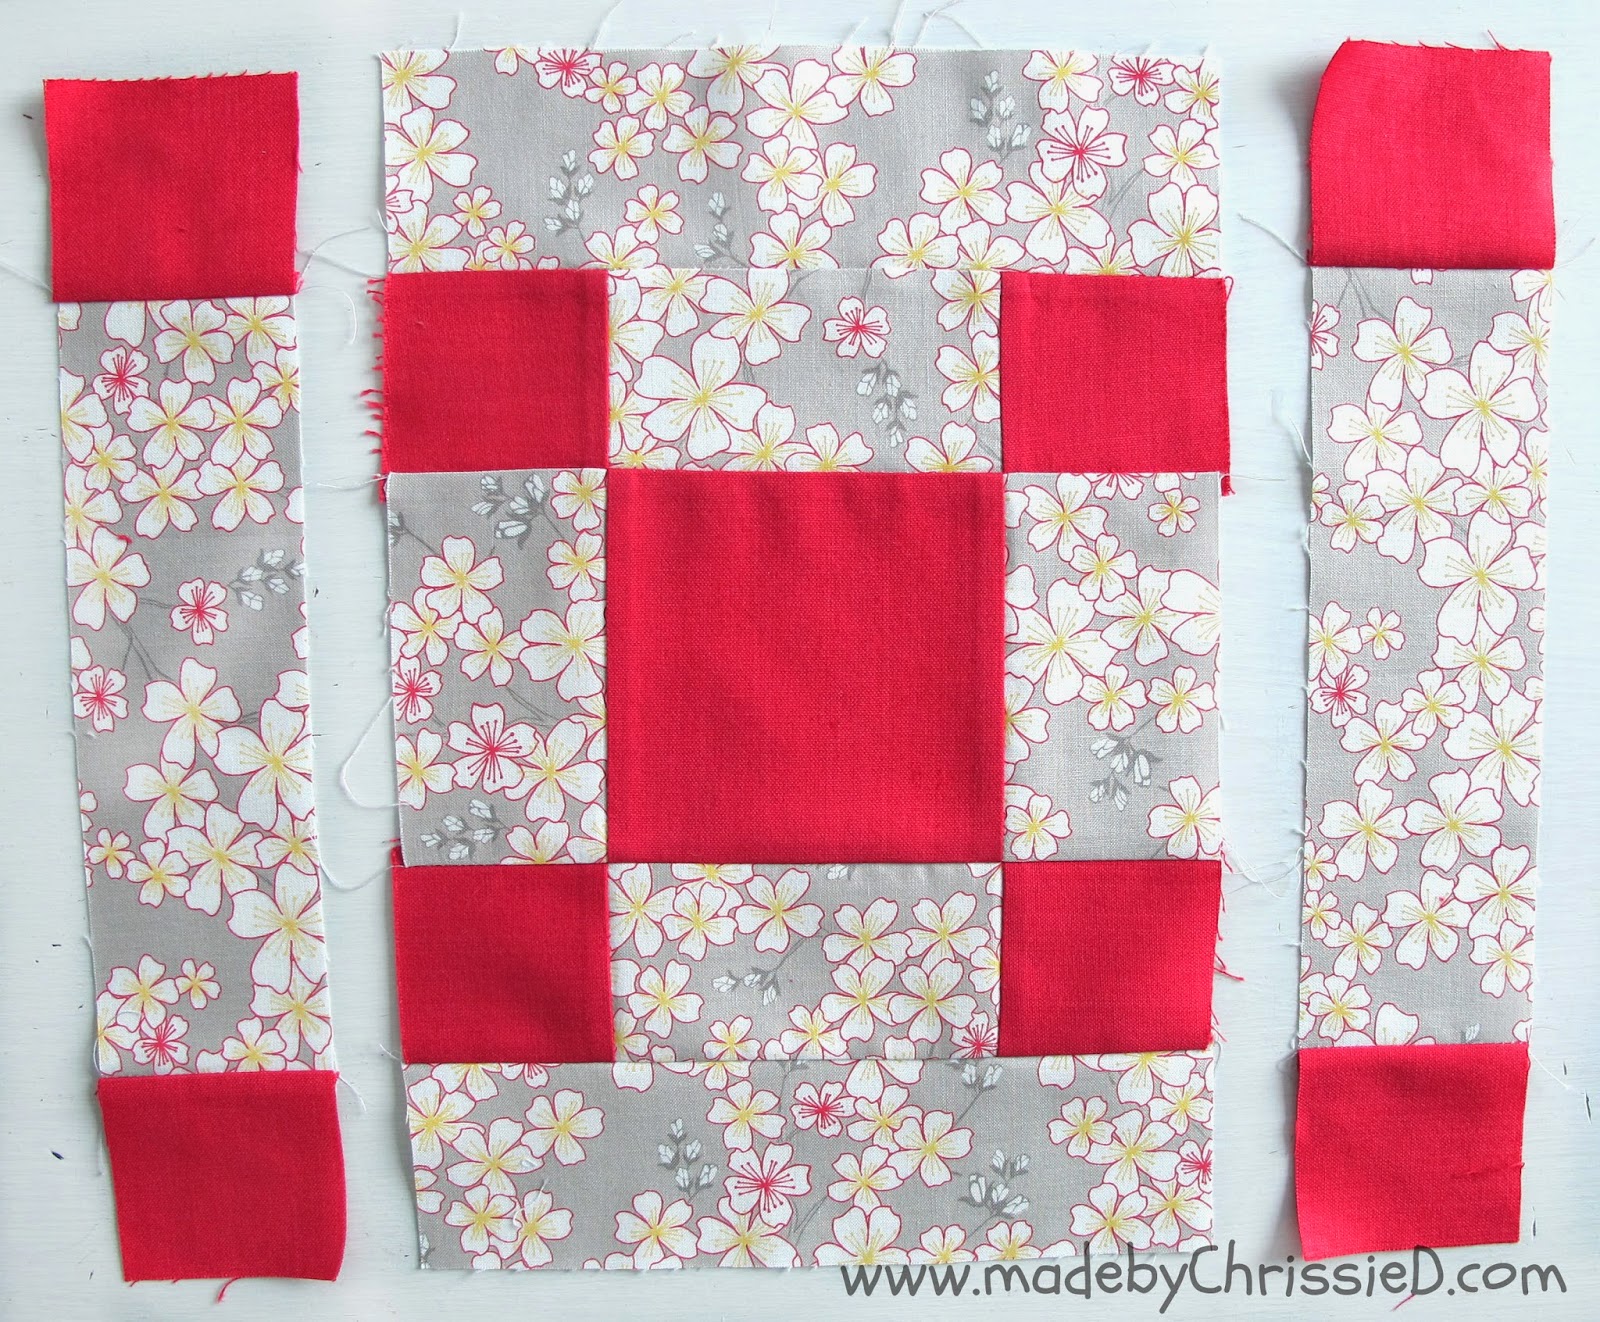
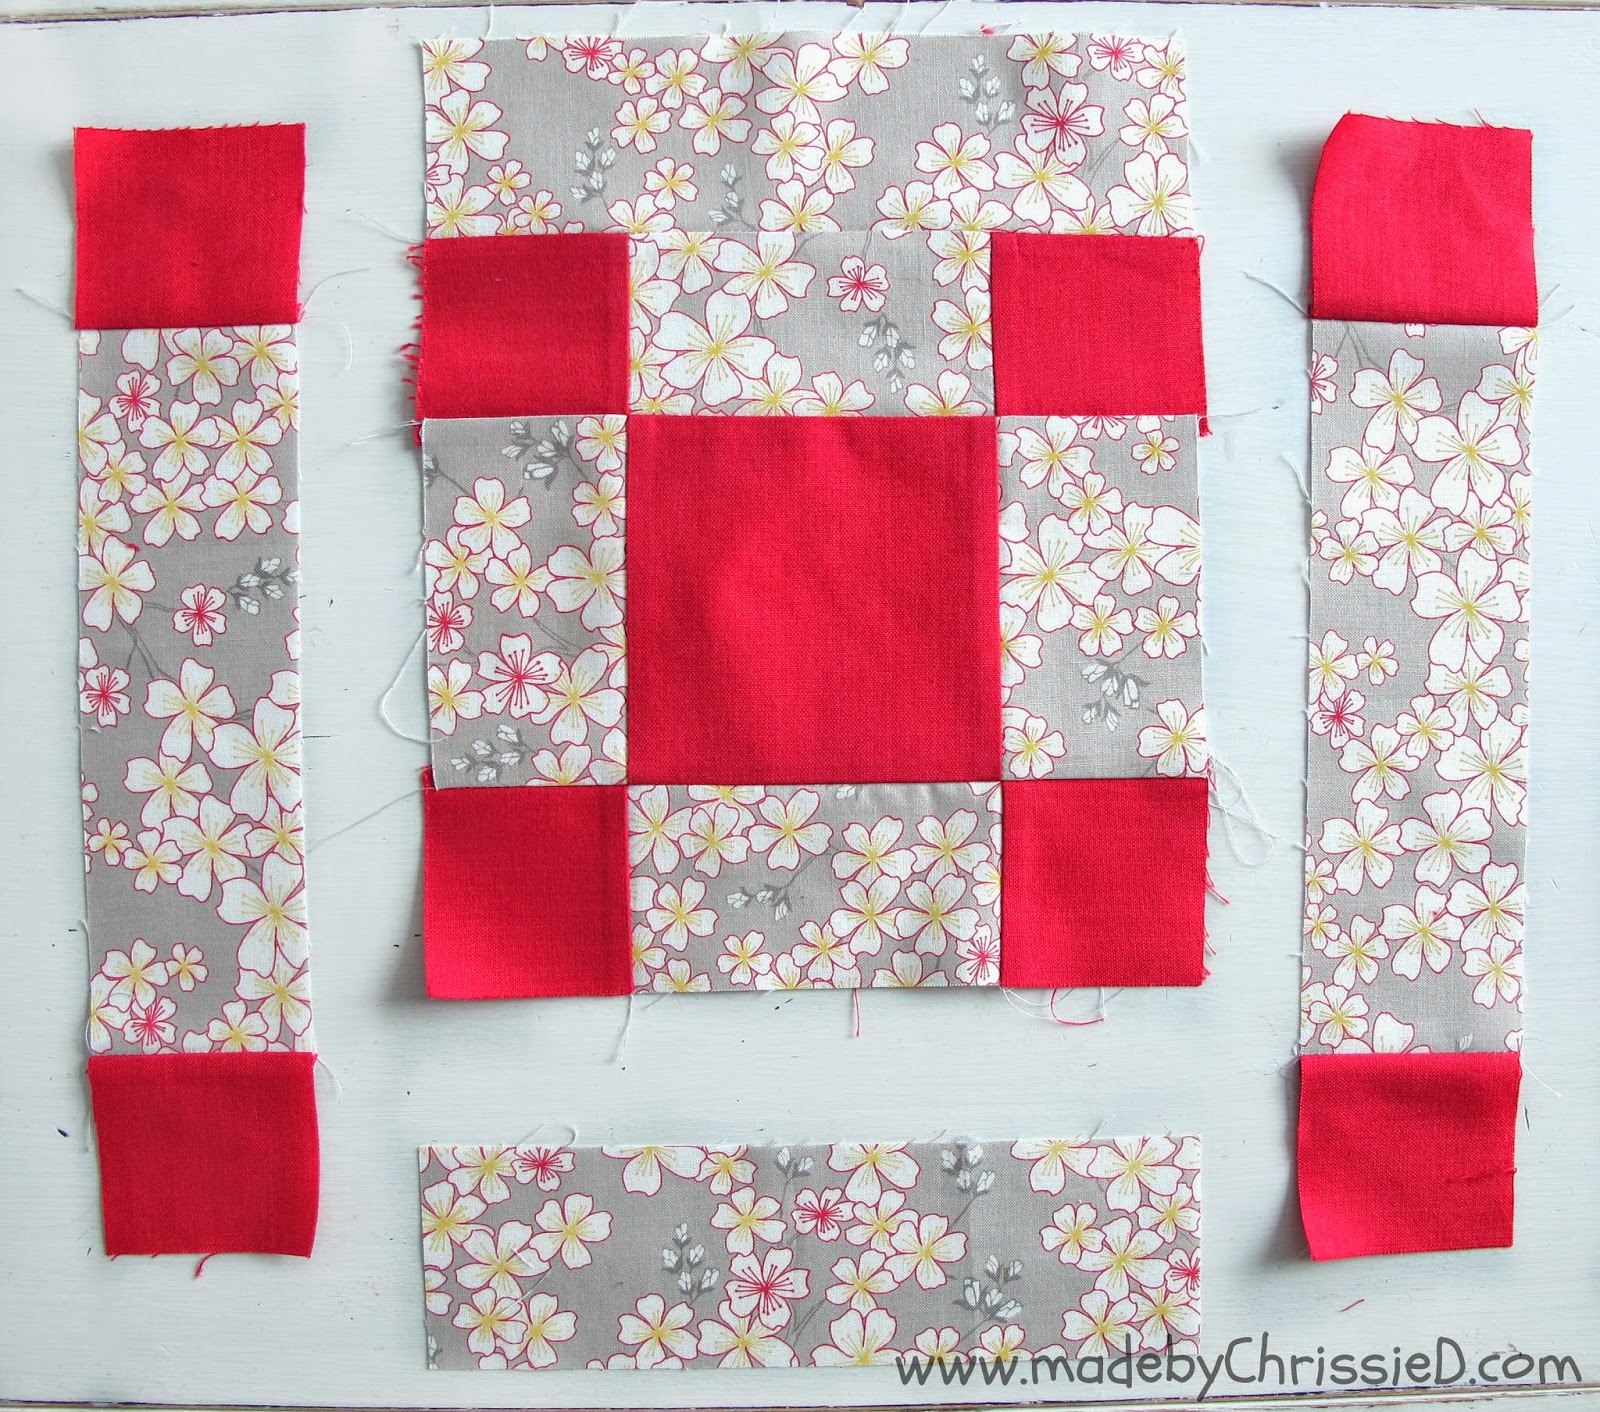
Cut 4 of 2.5" x 4.5" rectangles (shown floral)
4 of 2.5" x 8.5" rectangles (shown floral)
1 of 4.5" square (shown solid)
8 of 2.5" squares (shown solid)

Single Irish Chain Block Tute by www.madebyChrissieD.com

Layout design as shown below

Single Irish Chain Block Tute by www.madebyChrissieD.com

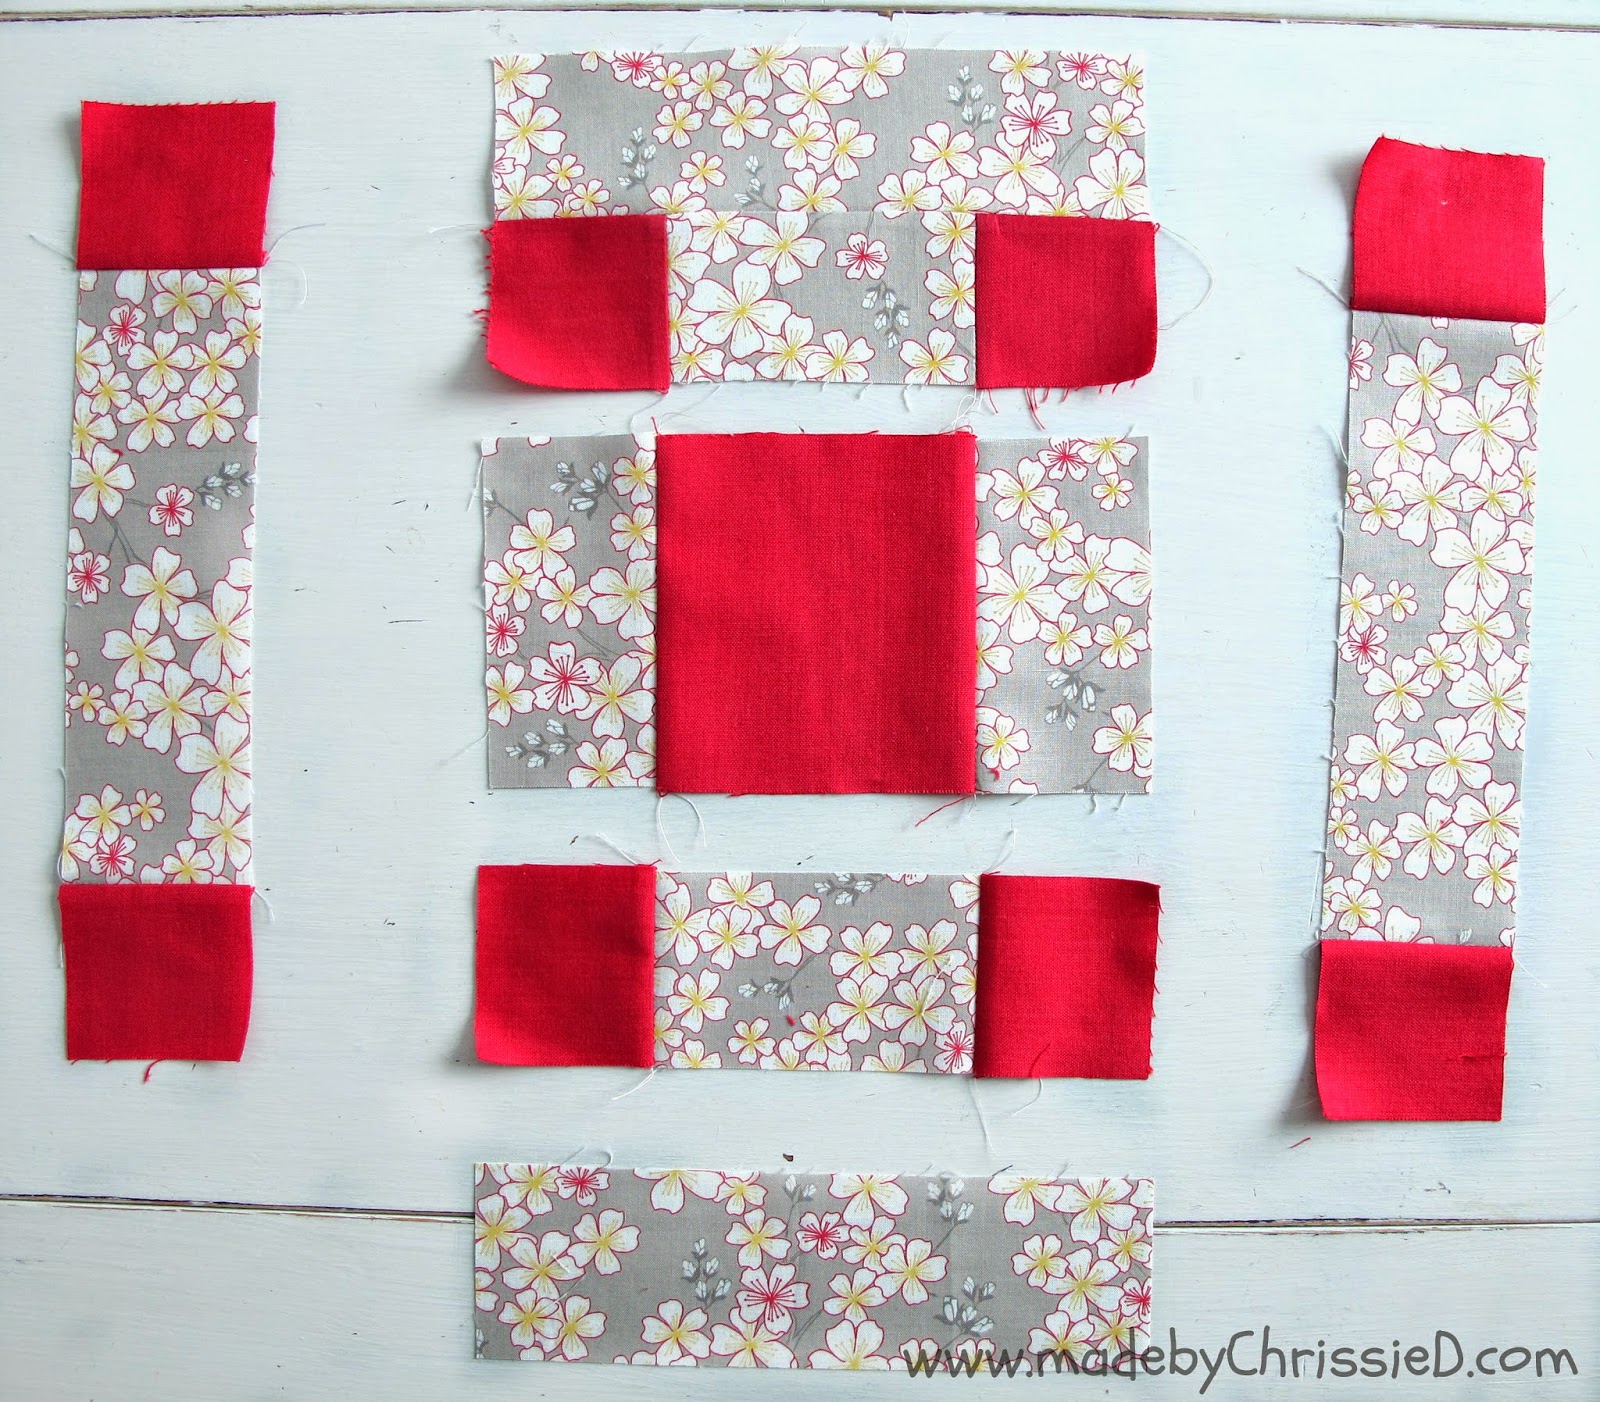
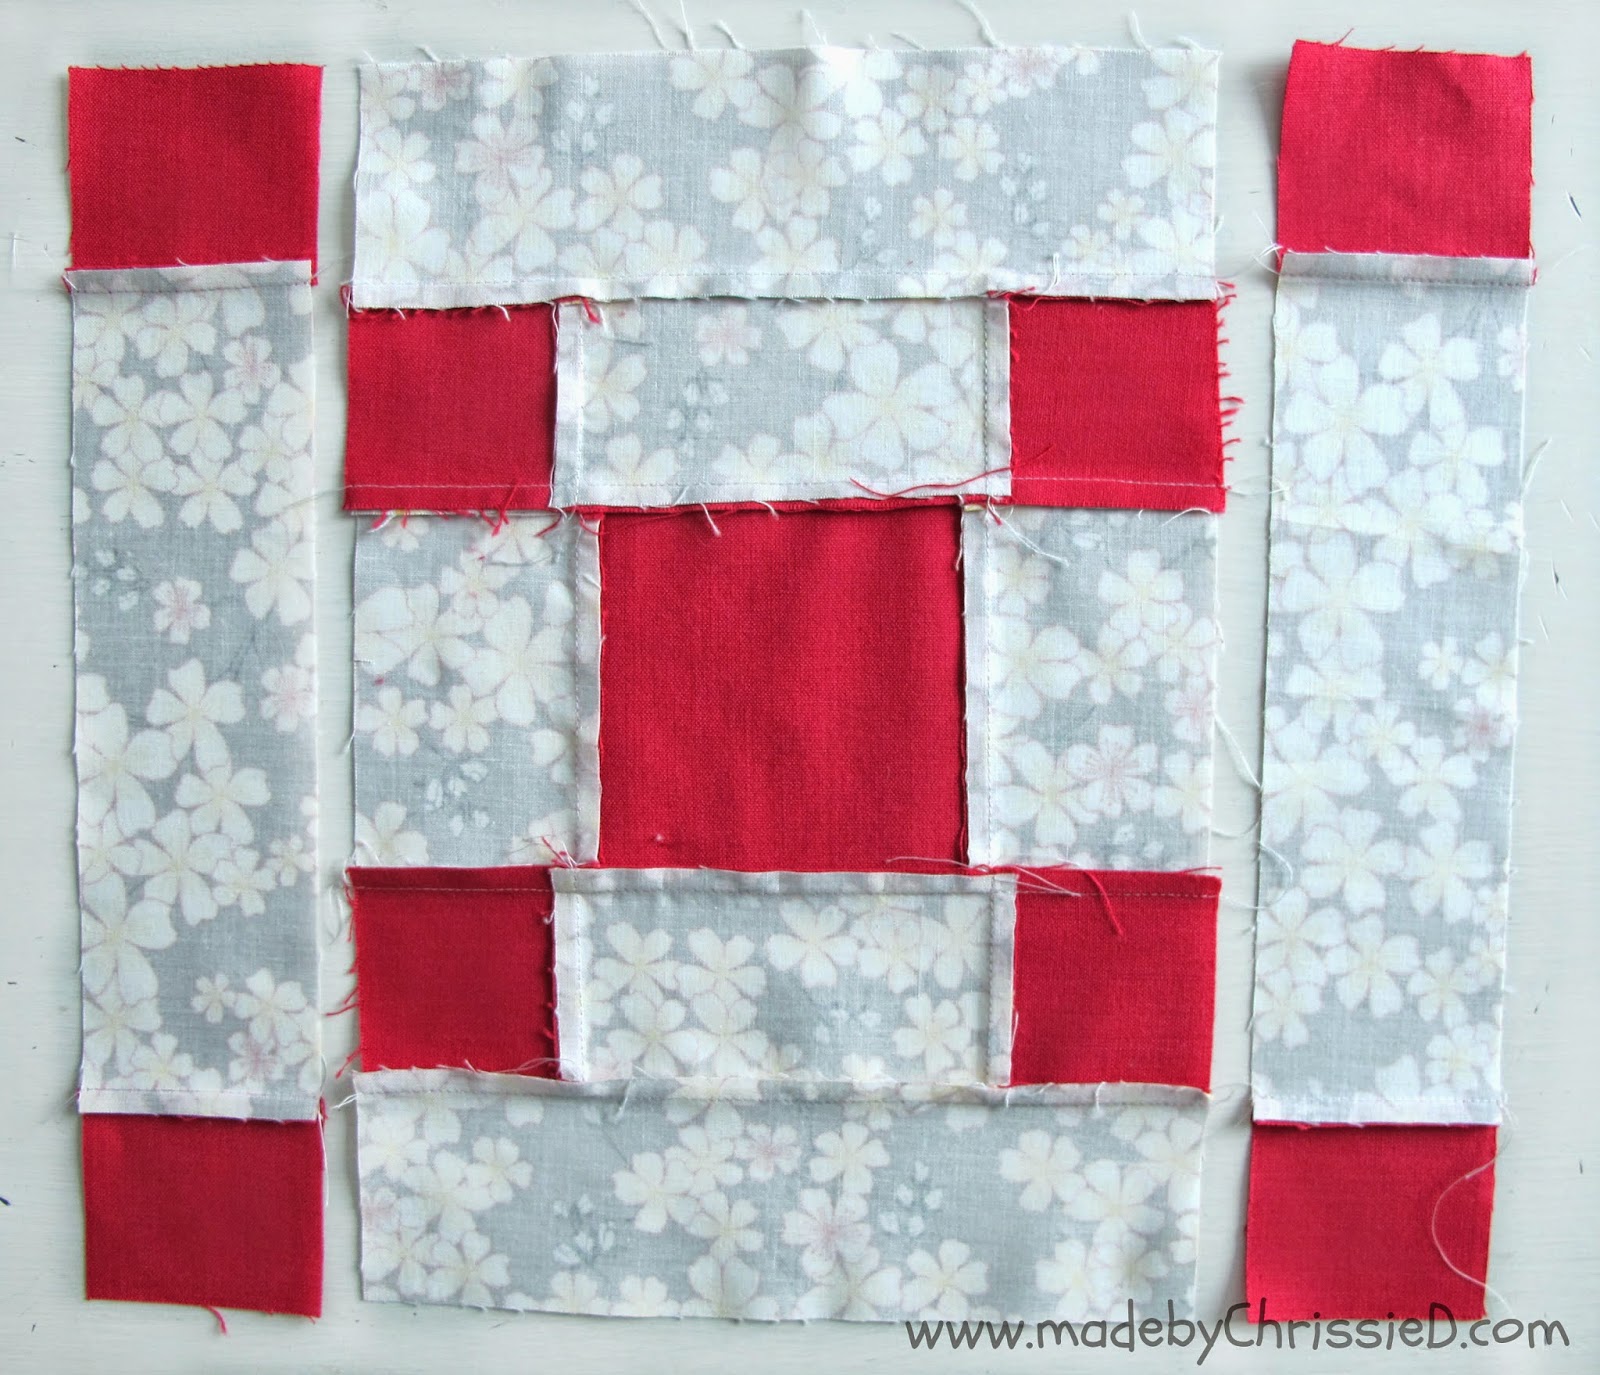
Sew each of the centre rows and the two outer columns of squares together using a scant 1/4" seam. Follow me in the photos below, noting how I've separated the pieces and moving on with me through each image, joining the seams as shown. Wait to press your seams - we'll talk about that when we're further ahead with the sewing.

Let's start with the centre section.
Single Irish Chain Block Tute by www.madebyChrissieD.com

Now, those side columns.

Single Irish Chain Block Tute by www.madebyChrissieD.com

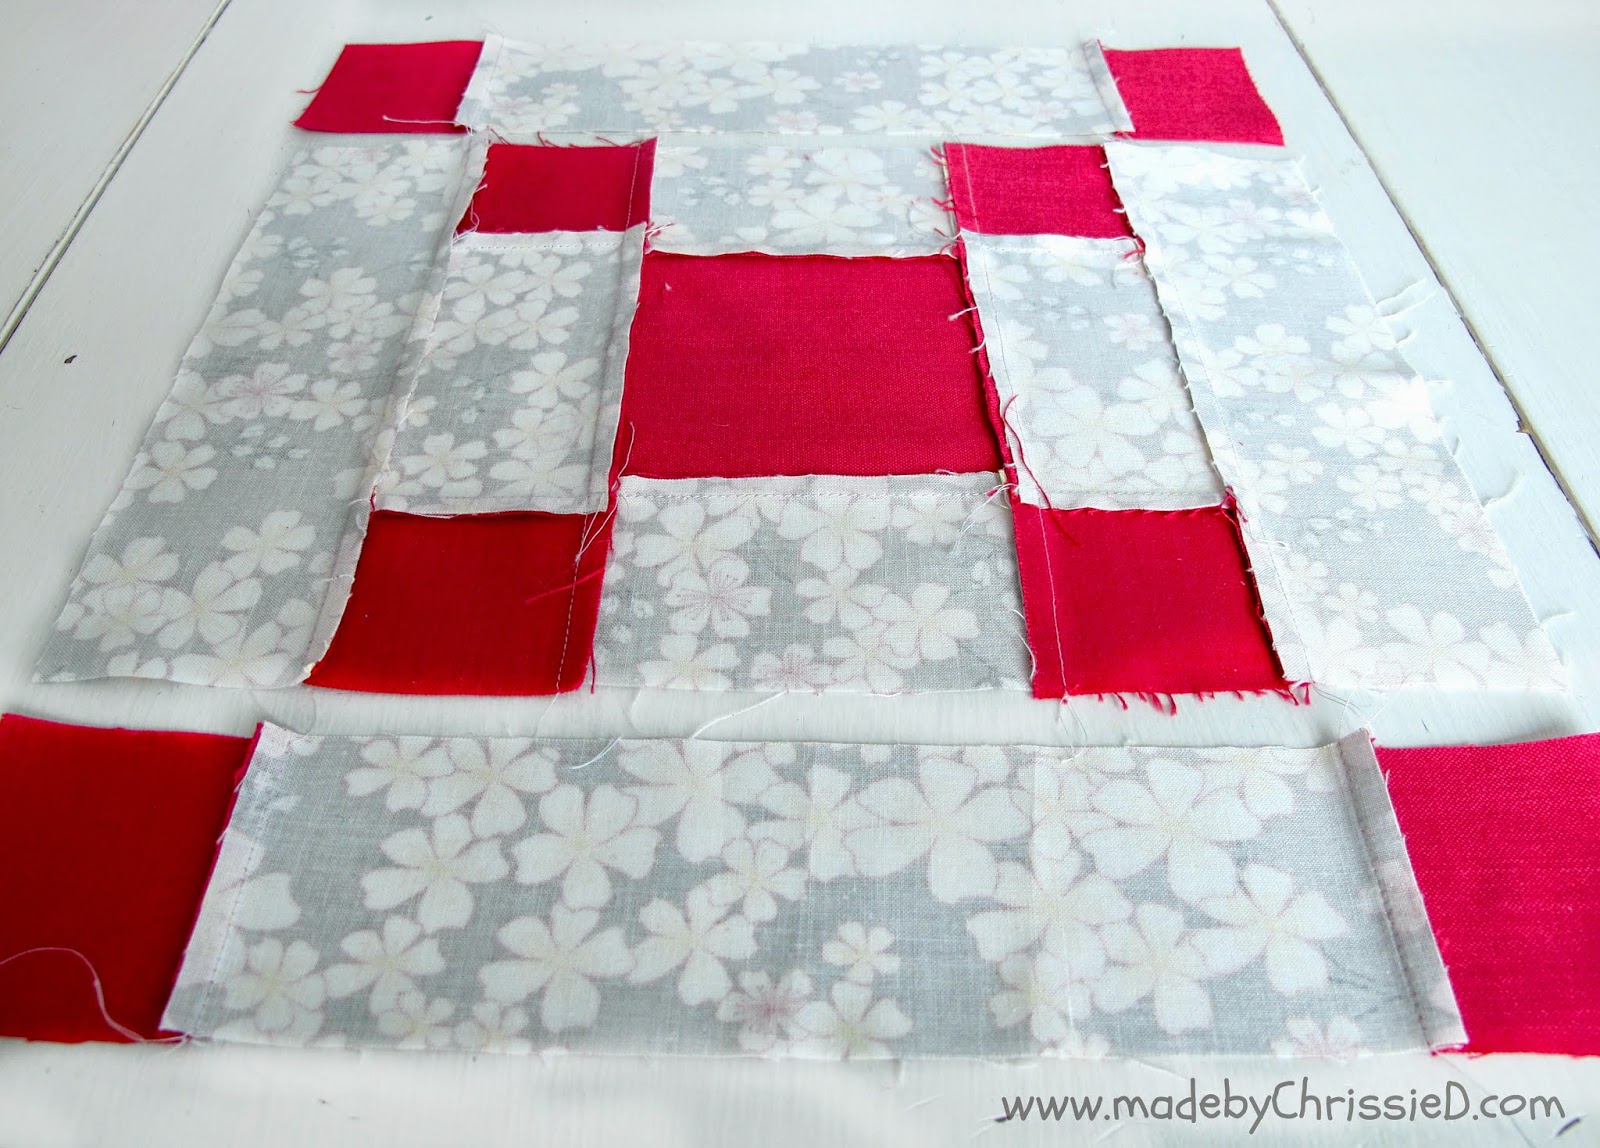
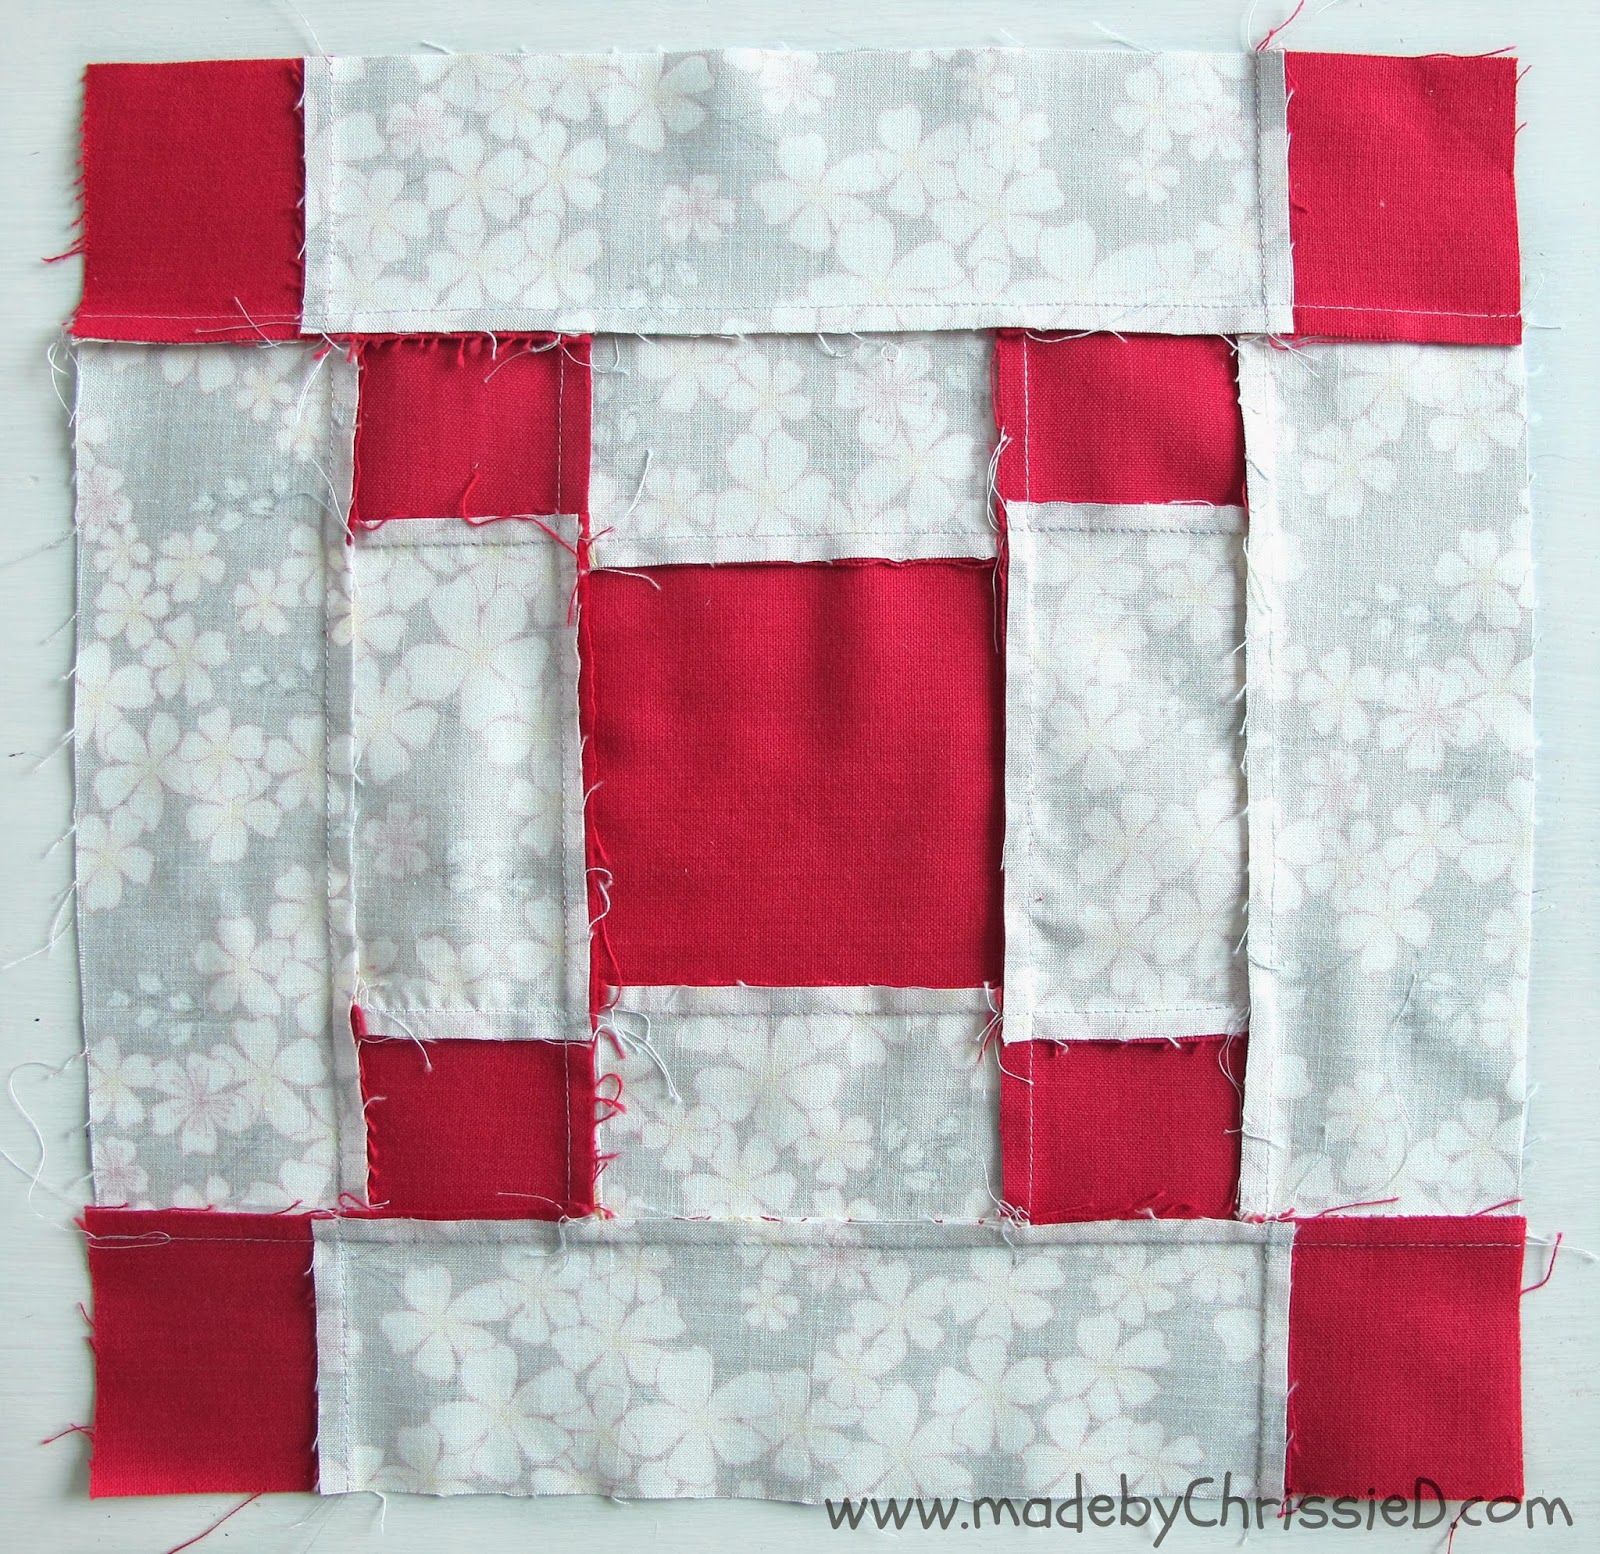
As you can see above, the 3 sections are coming together, so let's look at the back to see how I've pressed each seam. I've alternated the direction of each row so I can nest my seams together in the next stage and create perfect seam joints - you can read more about pressing seams in my Pros + Cons of Pressing Open Or To The Side post. If you need help to nest your seams, you can learn how to do it here in my How To Nest Seams tute.

Pressing Seams Open Or To The Side by www.madebyChrissieD.com How To Nest Seams by www.madebyChrissieD.com

Single Irish Chain Block Tute by www.madebyChrissieD.com

Now, back to the sewing. Again, use a scant 1/4" seam to join the rows of the centre section, as shown in the photos below.

Single Irish Chain Block Tute by www.madebyChrissieD.com

Time to check the direction of those pressed seams.

Single Irish Chain Block Tute by www.madebyChrissieD.com

Then, join the side columns to the centre section.

Single Irish Chain Block Tute by www.madebyChrissieD.com

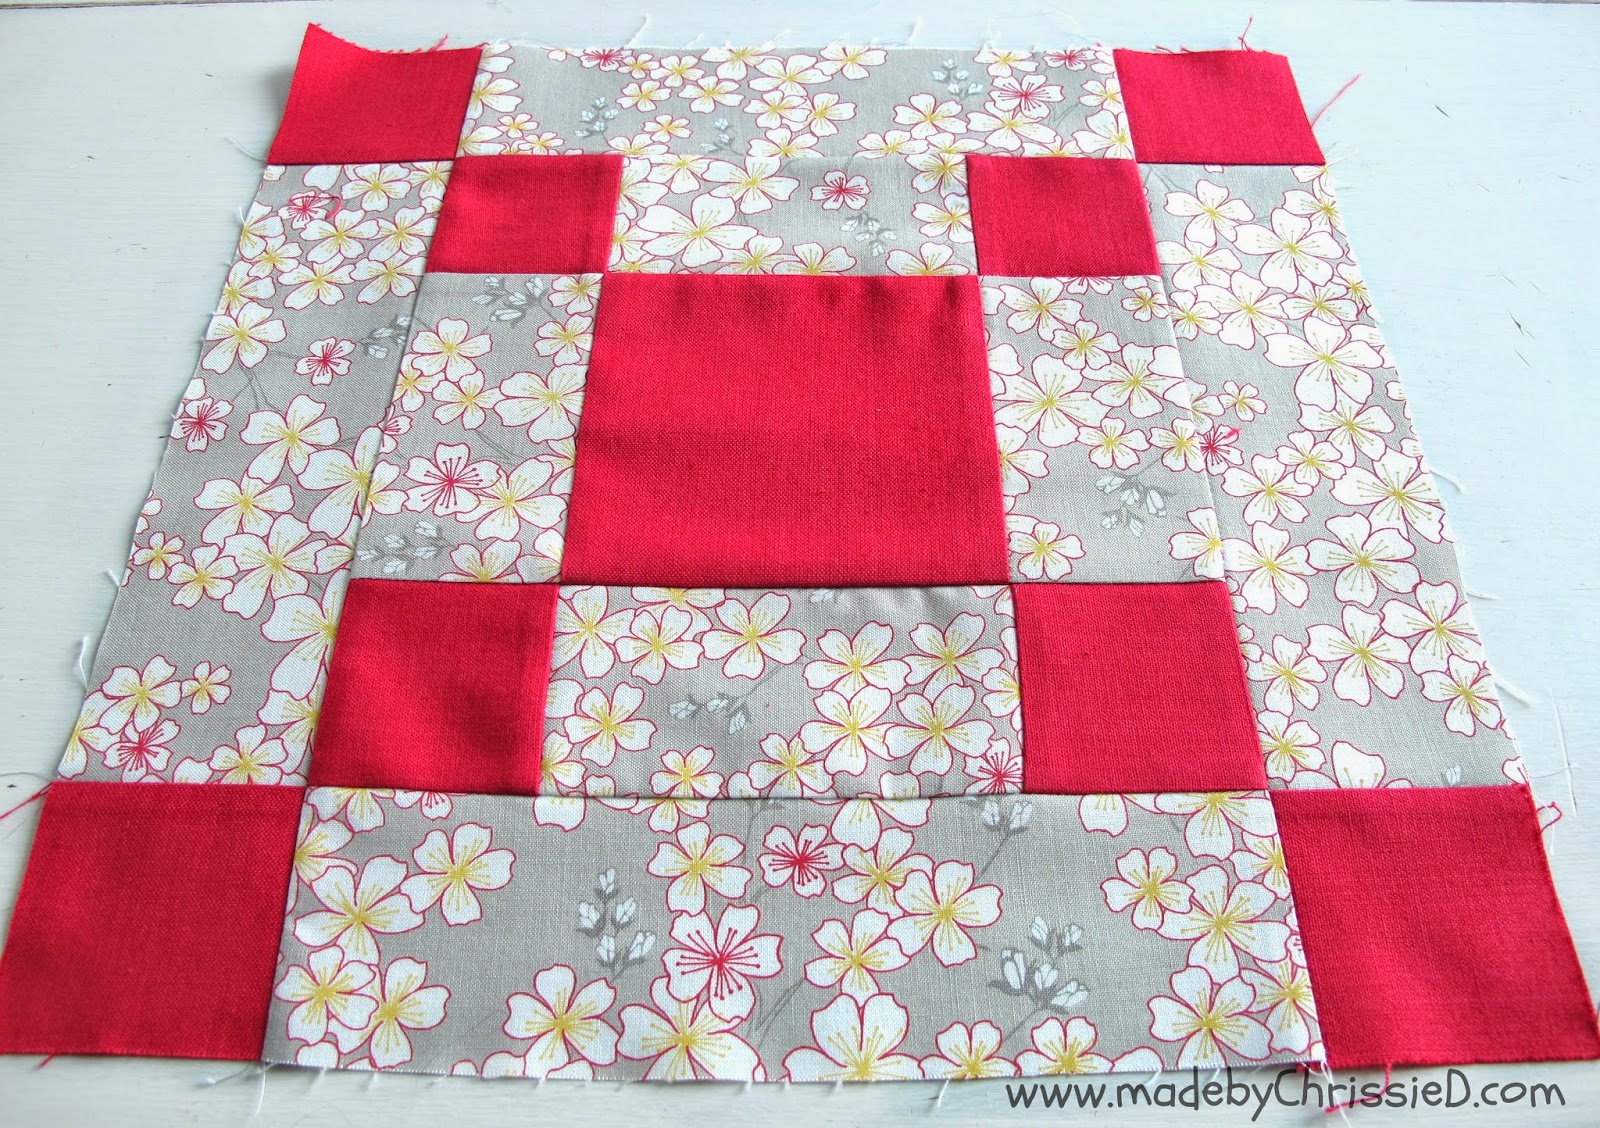
And here's your finished block with perfect seam joints.
Unfinished size 12.5" square/Finished size 12" square.

Single Irish Chain Block Tute by www.madebyChrissieD.com

And a final look at the back seams.

Single Irish Chain Block Tute by www.madebyChrissieD.com

And the last look at that block. In this photo below, you can see the 3D effect that we've given the block just by the direction we pressed the seams - the centre block is the highest, and the outermost perimeter blocks are the lowest. Maren's colour choices have made this more evident with a strong, warm raspberry that comes towards you while the cooler grey floral sits well back.

TIP:  You can use this visual receding and advancing achieved through colour and seam pressing in all blocks to create different effects in your quilt design.

Single Irish Chain Block Tute by www.madebyChrissieD.com

As always, you can check out all the blocks that our Bee makes for Maren on my Quilty - Single Irish Chain Block Pinterest Board - I'll add more pins as each person in the Bee posts photos of their finished blocks, and you can see my NYC Mod Quilt Guild Post here too.

Single Irish Chain Block Tute

Single Irish Chain Block Tute by www.madebyChrissieD.com


Featured on:
Inspired Us Thursdays: Sew Needle Stitch Hook, a link party of fiber arts. | The Inspired Wren

Clicking on an image will take you to a new page of crafty goodness :)

Disclosure: 
This post contains Amazon affiliate links for which I am compensated on click-through purchases (at no additional cost to you). Otherwise, the post is for informational purposes only; all opinions are mine.

Copyright: 
Uncredited reproduction of this site's content, text and images is prohibited.
 All content, text, and images must be credited to Chris Dodsley @made by ChrissieD and include a link to this site.

Protected by Copyscape