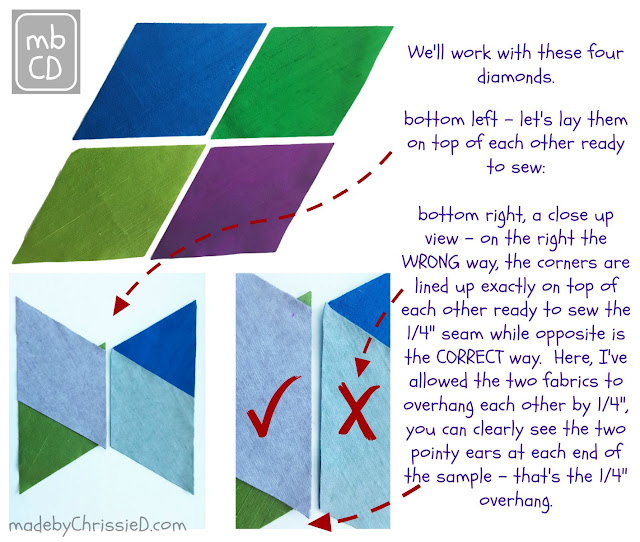
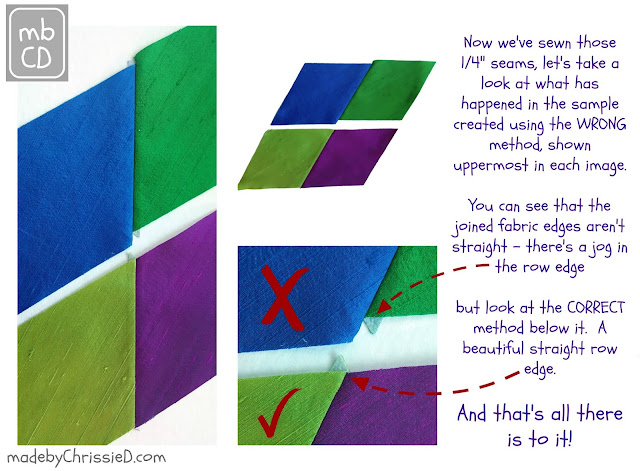
Joining diamonds isn't as straightforward as joining squares. It sure looks like it should be easy, those straight lines and angled corners line up perfectly ready to sew a 1/4" seam, but that's not the case at all. Let me show you what happens when you sew them together this way, and then I'll show you how to line them up, so they DO join perfectly.
Disclosure:
Susan Sato @EasyPiecing purchases patterns directly from me, and no further payments or commission are received by me for click-throughs or purchases from the Easy Piecing website.
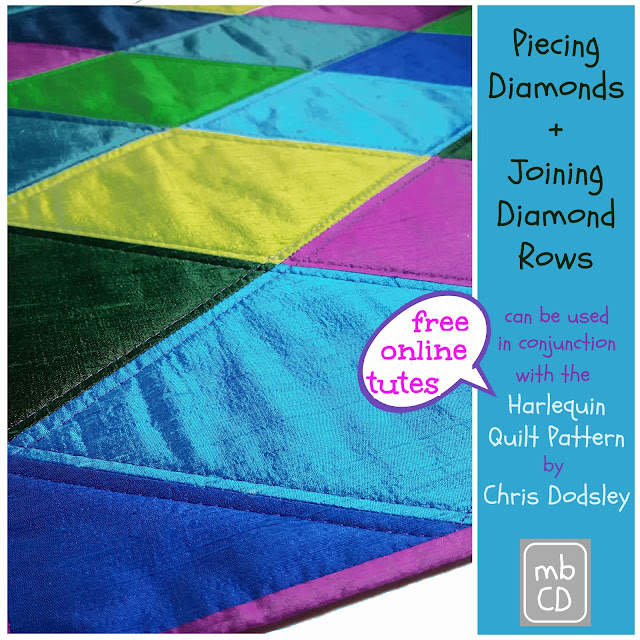
Piecing + Joining Diamond Rows
Personally, I do have a great tool that is really helpful with these pesky overhangs, and I'll show you how I use it with these next set of 4 diamonds, but don't forget you can achieve the same results with no tool at all as I showed you above 😊
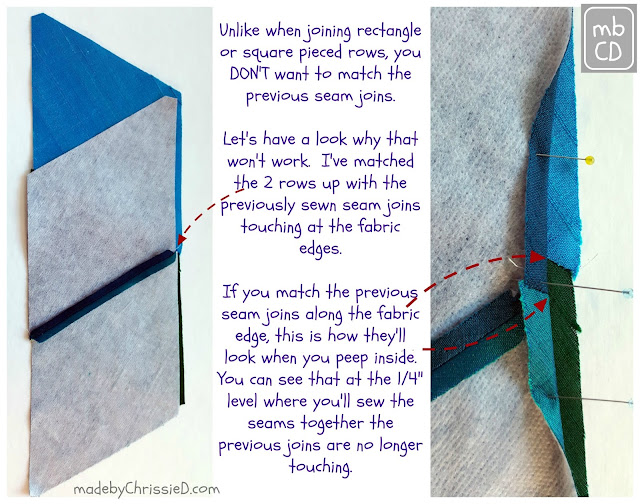
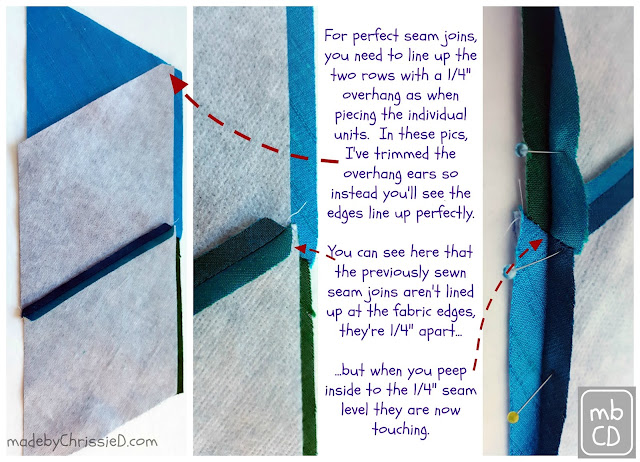
Now let's take a look at how to line up the seams when we're joining 2 rows of diamonds - again, not quite as straightforward as joining 2 rows of squares or rectangles!
This is my super easy tip for ensuring the seams are joined perfectly without having to undo your seams over and over until you get them right!
Isn't that an easy way of getting a perfect 4 diamond seam join?
More info about my Harlequin Quilt Pattern is available here on my blog. You can purchase the pattern by emailing me directly (payment via Paypal). A kit to make an identical Dupioni silk version is available to buy directly from Easy Piecing (includes pattern, interfaced diamonds and interfaced binding).
Piecing + Joining Diamond Rows
Featured
Clicking on an image will take you to a new page of crafty goodness :)
Disclosure:
This post contains Amazon and Bluprint affiliate links for which I am paid compensation on click-through purchases (at no additional cost to you). Otherwise, the post is for informational purposes only, and all opinions are my own.
Copyright:






thank you so much. This is a beautiful easy to follow tutorial.
ReplyDeleteThanks Sam for taking time to comment, it's great to get your feedback :D
DeleteNever tried diamond because of this problem, you have inspired me to have a go
ReplyDeleteLet me know how you go on, I'm looking forward to seeing what you make :D
DeleteThat's fantastic, you make it so clear. Pinning, because one day I'm going to need this. Thanks for sharing at #HandmadeMonday
ReplyDeleteHello Chris, just wanted to let you know this great tutorial is one of the features at #HandmadeMonday this week :-)
DeleteI've never figured out how to do this neatly, but you make it look easy :)
ReplyDeleteThe photos and descriptions are very helpful. Thanks for linking up with the Tips and Tutorials Festival!
ReplyDelete