teaching sewing confidence, tip by tip
Showing posts with label Noodlehead. Show all posts

Wednesday, 15 April 2015

For Mother's Day - Another Divided Basket


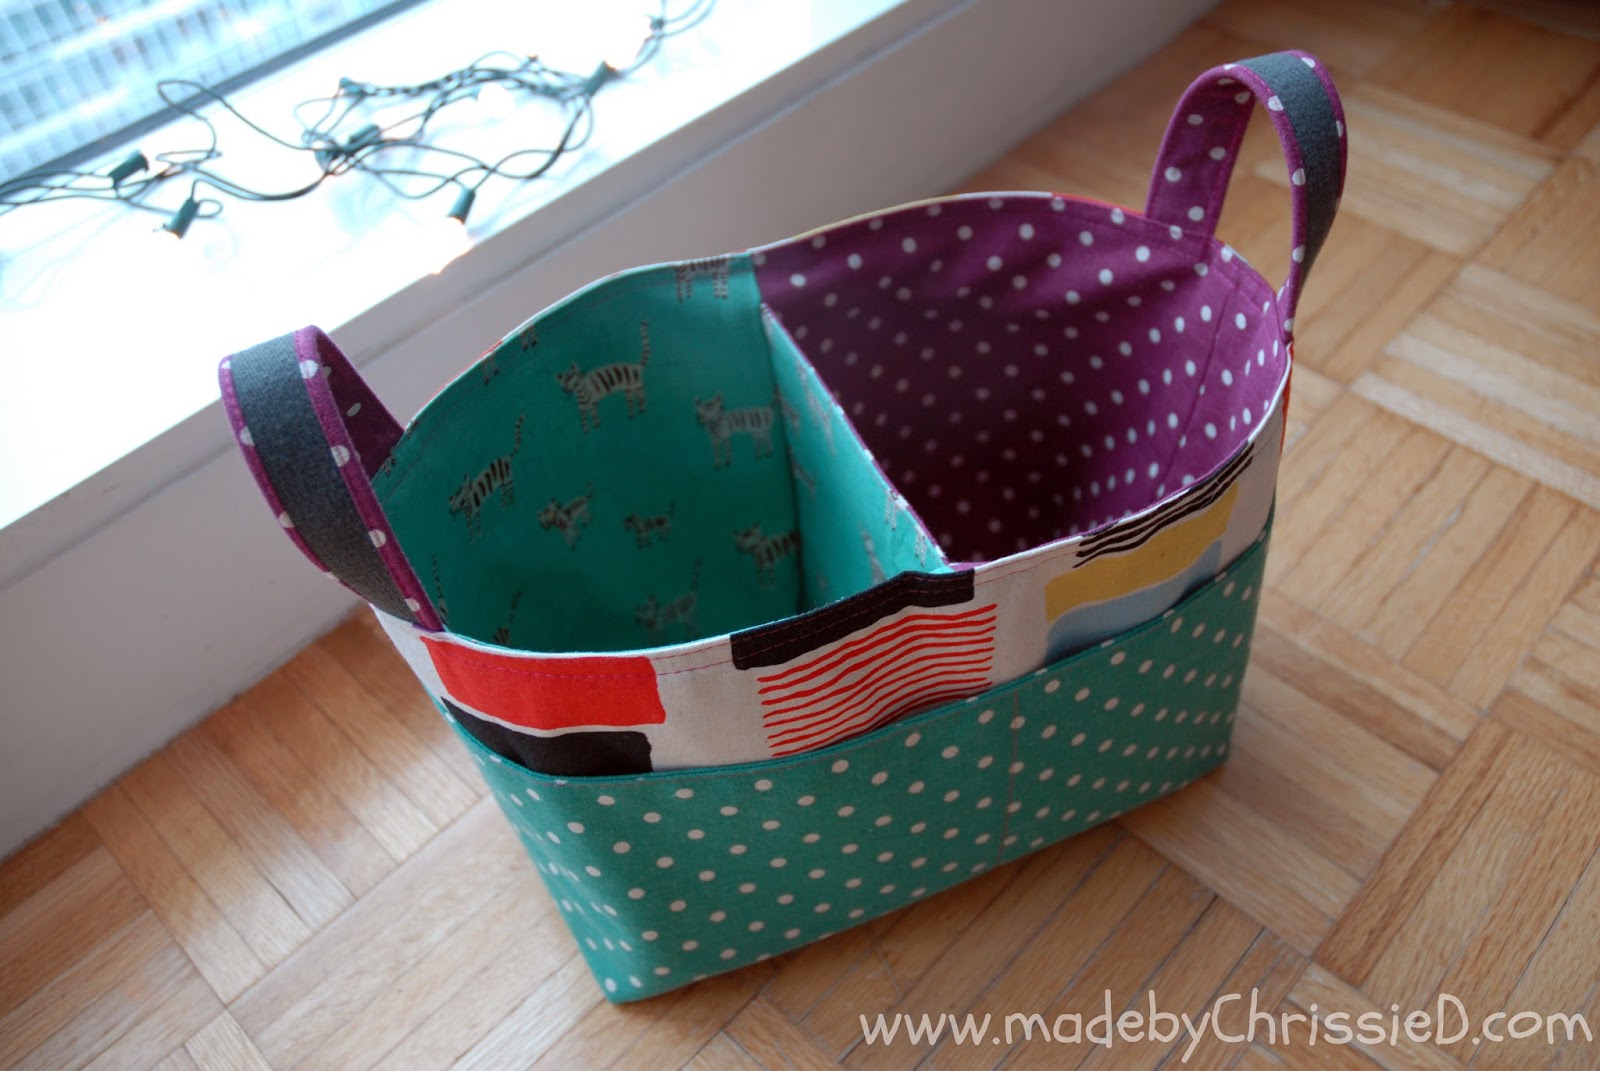
While I was in England we celebrated English Mother's Day.  I wanted to make a Noodlehead Divided Basket for Mum and I thought she'd find one most useful in her bathroom.

Raiding my stash I pulled three fabrics by Lonni Rossi for Andover fabrics that are the perfect match for Mum's decor.
Bare Branches - Patterns 7530-MK & 7535-MKN (2014)
Facets - Pattern 7180-MK (2013)

This is the finished but very empty basket.  I fussy cut the lining so the pattern's continuous on both sides of the basket divide.


It just wouldn't be right to give someone an empty basket so I trimmed some cream hand towels with the same fabrics I used for the basket.


And then I added some bath time goodies.


Now that's looking much better, though having to put the towels upside down (with the open folds visible) so you can see the trim is really upsetting me!!!
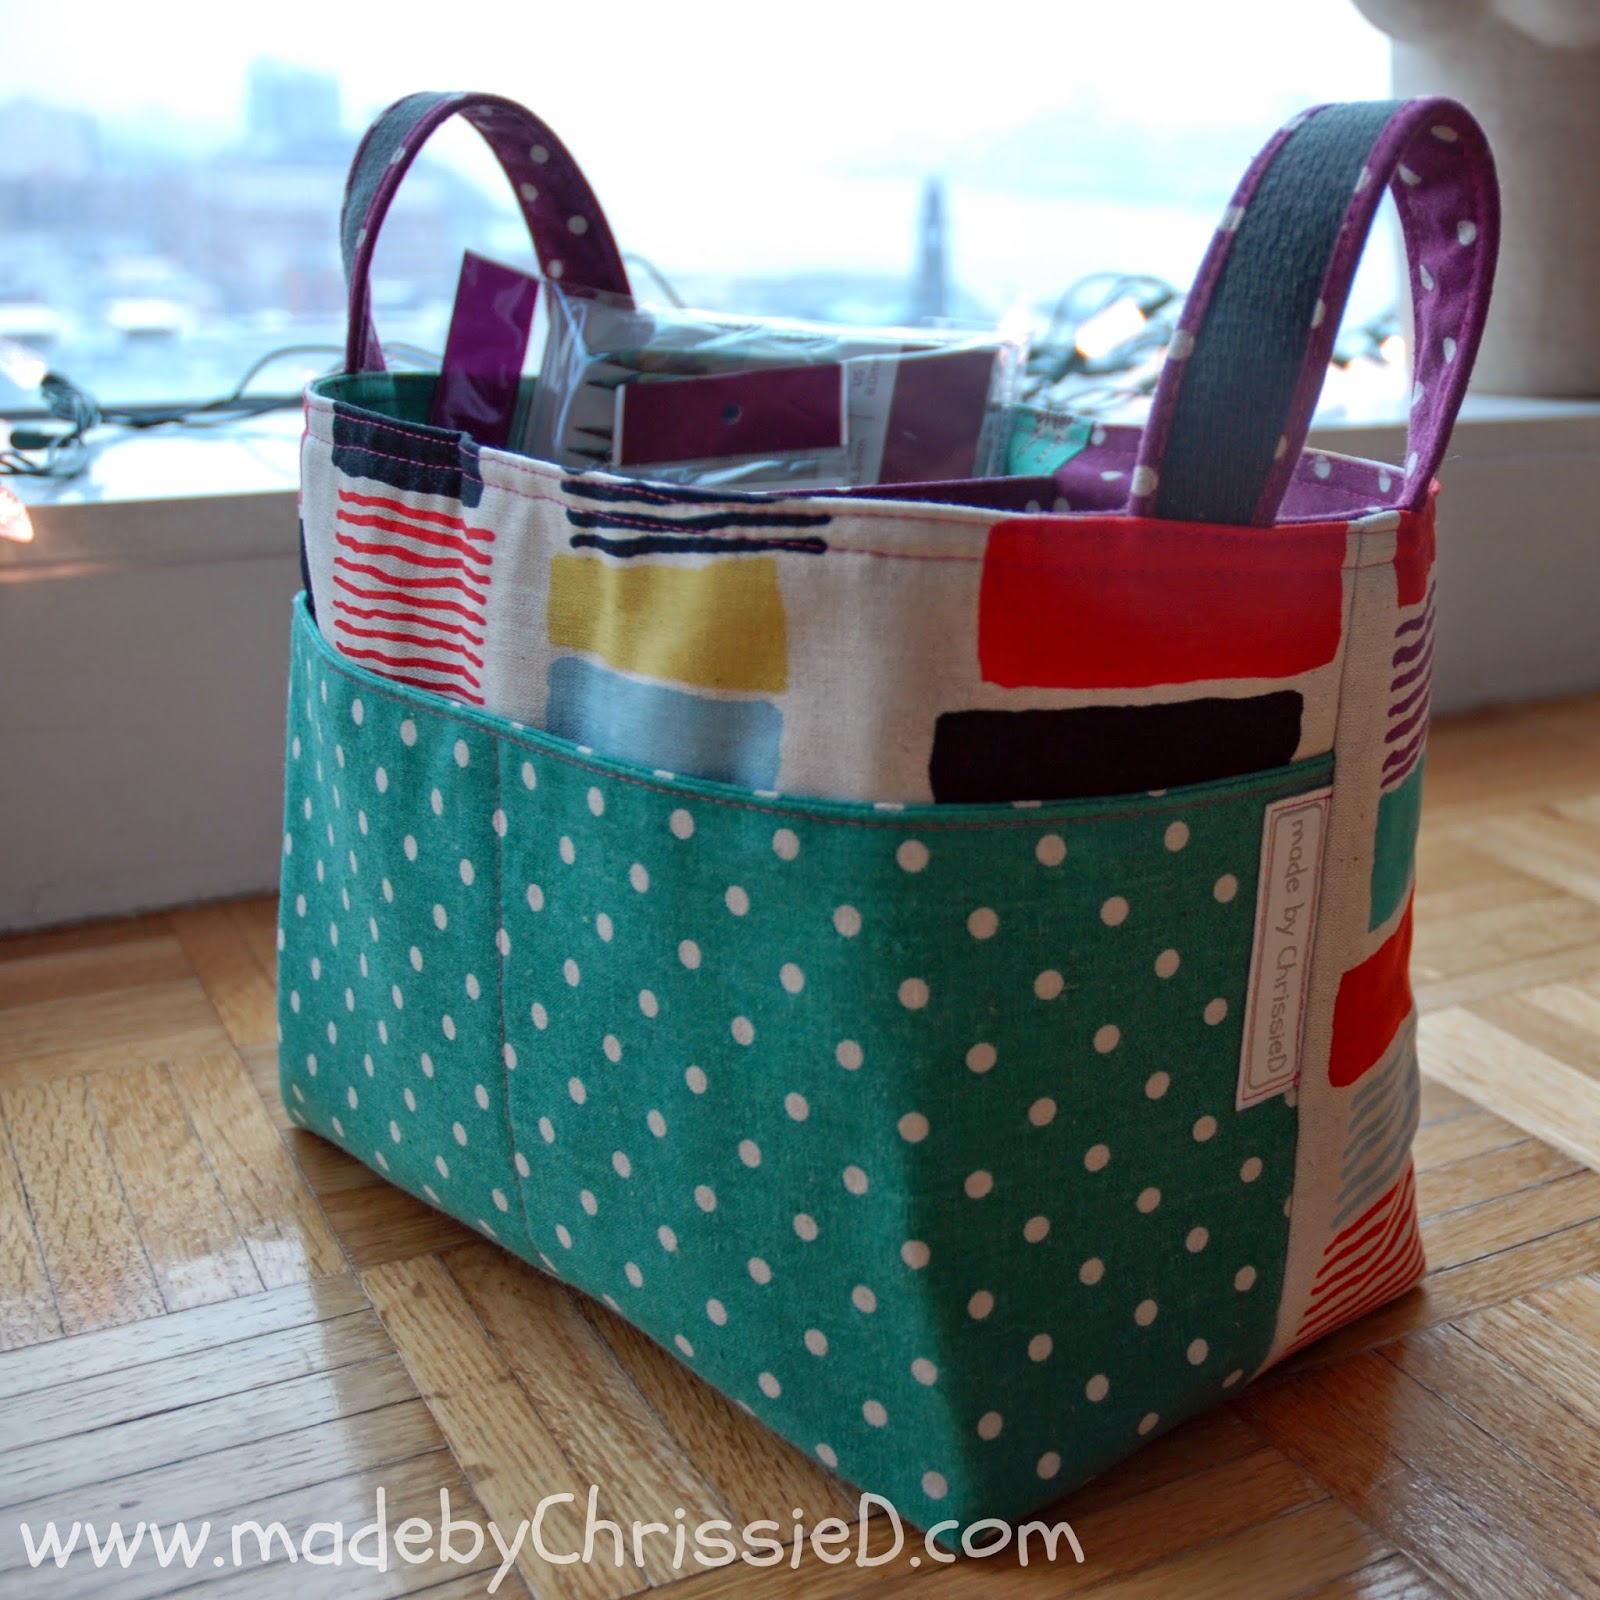

The front...


The back...


And here's a few more close up pics just because I love the details on these baskets.


For the handles I've used softer, smoother apron tape along with a layer of fusible fleece to add firmness rather than my usual cotton webbing.


Before I sew the body of the basket I always ensure that the side and bottom seams line up perfectly.

 And it almost goes without saying that Mum loved it and just look at it in it's new home,


Are you making any Mother's Day gifts, do share your ideas with us in the comments?


Click the images below to read more about other Divided Baskets I've made.


Clicking on a image will take you to a new page of crafty goodness :)


Wednesday, 21 January 2015

Spin Me A Yarn Basket


My dil, Katie, has started knitting again so for Christmas I made her a divided basket full of knitting goodies, just like the Knitter's Dream Basket I made for my daughter, Flicky, last Christmas.


Again, I used the Divided Basket pattern by Anna of Noodlehead and here's a list of the fabrics:
A cotton/linen fabric - the selvedge reads "made in Japan - Project: by Cotton"
Moda Linen Mochi dots - Teal and Boysenberry
Cotton + Steel Hatbox 4001-052 cotton canvas by Alexia Marcelle Abegg.

Outside pieces and handles.
Outside sections joined.
Lining and divide.


And a knitting basket should always be full of knitting notions


Thankfully, Katie's present has the Tatty seal of approval.


Katie made good use of her knitting basket during her stay with us over Christmas and set about making a scarf for my son Joe and by New Year he was wearing it on our trips out.


Aren't they both gorgeous?!!!  I'm missing them so much already now they're back in London.

Click the images below to read more about other Divided Baskets I've made.


Featured:


Clicking on a image will take you to through to the new page of crafty goodness :)

Wednesday, 3 September 2014

Adventures, Explorations and Nursery Baskets

The moon is the first milestone on the road to the stars - Arthur C Clarke


With my Grandson, Oliver, due next week, I need to get some project finishes under my belt ready to take out with me when I go to Seville to meet him.

Oliver's space theme nursery was originally inspired by these fab Rocket Age fabrics by October Afternoon for Riley Blake (Rocket Main Blue/Rocket Captain Blue/Rocket Stars Orange) and Ana asked for storage baskets to finish off the room and after seeing Flicky's Knitter's Dream Basket she specifically requested a larger version of Noodlehead's divided basket pattern for nappies.


I've increased the measurements to 14" (L) x 8" (D) x 9" (H) and moved the central divider offsetting it to allow more room for larger size nappies.  I've divided the front pocket into 5 sections too.

Next, I've made 3 stacking baskets.

Want to make your own?  
  • You need a square base with rounded corners whatever size you wish.
  • Cut a rectangle of fabric for the basket side that's the same width as the four sides of the base added together plus an extra 1/2" for seams (you can just use a circle base if you prefer and then measure your side to equal the circumference of the circle plus an extra 1/2" for seams). The height of the basket is up to you - just add 3/4" for seams to your height measurement.   
  • Add a layer of Pellon 809 Decor Bond or 808 Craft Fuse interface to the basket side and base.
  • Sew the basket side and base together using a 1/4" seam - start sewing with the first 1/4" of the basket side not attached (this is your excess that will become your basket side seam) and when you get to the end the final 1/4" should also be excess and unattached.
  • Now sew the two excess open sides of the basket together again using a 1/4" seam.  
  • Create the same for the lining (you can use Decor Bond again on the base to make it firmer but you don't need it again on the side). 
  • Press the top edge of the outside and lining down by 1/2" to the wrong side of the fabric.  
  • Put the lining inside of the outside with the wrong sides together.  
  • Line up the top edges (adjust turnings if necessary so the heights are the same) and topstitch at 1/8" then repeat at 3/8".


You can turn the top edge of the containers down to whatever height you like.  You can see here where I've previously had the top turned down to - that happens when you use Decor Bond though you can iron it out again to some extent though probably not fully.


I've added tabs to the top of one of the containers before topstitching.


Having 3 fabrics I've alternated each for the outside, inside and base


and, of course, I've added my labels.


And how do those baskets look in use?


There're 54 x 16-28 lb nappies in that basket, perfect!


And the final line-up?


Folded

Stacked

Empty

 Full Of Goodies

I can't wait to hand deliver these and making them reminded me that two years ago I shared my eldest son Jack's graduation quilt with you - I mentioned then that he'd always been my little adventurer and explorer, I wonder if he'll pass those aspirations on to his own son Oliver?  

So back to that Arthur C Clarke quote at the top of the post and I hope my Grandson finds the moon when he travels his own road to the stars.


Click the images below to read more about other Divided Baskets I've made.


Featured:


Clicking on an image will take you through to the new page of crafty goodness :)


Disclaimer: This post is for informational purposes only, no payment or commission is received on click-throughs and opinions are my own.