Have you seen the gorgeous rolls of dish towelling in our fabric stores? So scrummy I just couldn't resist buying some. It's gorgeous to work with and I'm thinking summer beach totes, pillows, and rug quilts but for now, I'm sharing the obvious:
A Dish Towel Tute
Sizing:
This is a personal thing - I bought 1 1/8 yards of each of these two
Moda towellings as this is a perfect amount for me to make a dish towel (finished size 19.5") and I'll be able to make 4 dish towels from my bought fabric. I like small dish towels - don't know about your house but not that many dishes get dried around here we tend to leave that to the dishwasher, so these towels are actually for wiping hands when cooking.
NB: Towelling fabric shrinks quite a bit (I haven't done a scientific % measurement but it's very noticeable). If you're keen for your finished washed towel to be a particular size then I'd recommend prewashing your fabric before making your towel.
Materials:
Basically, the idea is to use a piece of pre-sewn towelling fabric that's 1.5" longer than the finished size you require to allow for turning seams so:
3/4 yard would make one 'standard' length dish towel - finished size approx 25.5"
2/3 yard would make a slightly shorter dish towel finished size approx 22.5"
5/8 yard - finished size approx 21".
The side edges of dish towelling are pre-sewn making this project super easy and fast.
As my fabric length is long enough to make two dish towels I fold it in half
NB: don't do this if you've only enough fabric to make one dish towel.
and run the scissors along that fold.
giving me two dish towels.
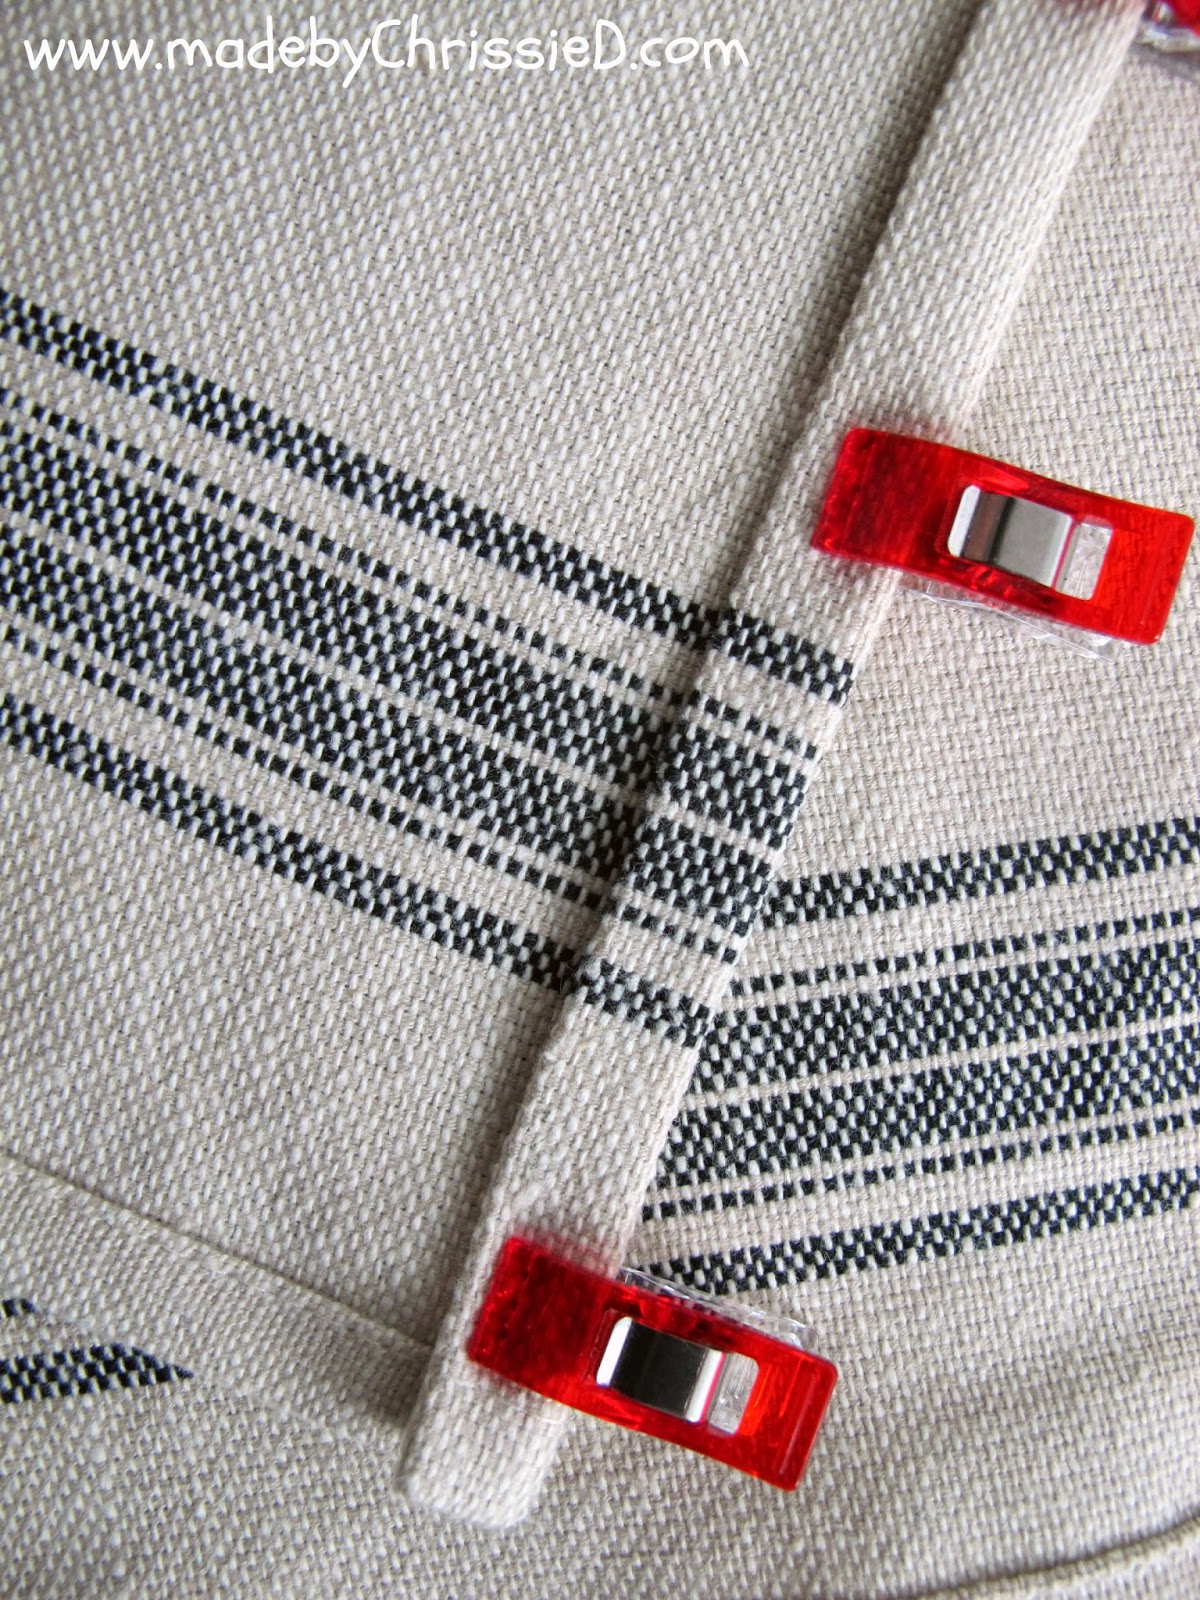
I press back 3/8" making sure to match the pattern as I create the seam folds.
At the edge seam, I make sure the edge is folded down neatly in line with the pre-sewn side edge and doesn't stick outwards.
I press the fold back on itself again - another 3/8" - and ensure the pattern still matches and the side edges are even and neat
(total fabric folded in seam allowance = 3/4").
Everything's held in place with
Clover Wonder Clips - how did we ever manage without them?!!!
If you don't have clips you can pin or even glue stick your seam in place.
I took note of the colour of the stitching on the pre-sewn side seam and matched it up with my own thread -
Aurifil #2000 Light Sand.
I also checked the length of the stitching on the pre-sewn side seam (tricky to see but that's the original stitching in the pic below) and matched my machine stitch length to it - on my
Bernina, I used a stitch length of 3.
Matching the thread and the stitch length is a simple way to achieve a professional finished look.
I sewed the seam in place using a 1/8" seam.
And here's how the finished edge looks.
Then I repeated these steps on the opposite end of the dish towel too.
And, of course, I added my label.
It took less than 30 minutes to make these 4 dish towels.
and I'm really pleased with how they turned out.
The fabric is very easy to work so I'm off to buy more, watch this space!
This tutorial is featured on:


Clicking on an image will take you to a new page of crafty goodness :)
Disclosure:
This post contains Amazon and Craftsy affiliate links for which I am paid compensation on click-through purchases (at no additional cost to you). Otherwise, the post is for informational purposes only and all opinions are my own.
Copyright:
Uncredited reproduction of all content, text and images on this site is prohibited.
All content, text and images must be credited to Chris Dodsley @made by ChrissieD and include a link back to this site.