teaching sewing confidence, tip by tip
Showing posts with label Stacking Baskets. Show all posts

Sunday, 2 November 2014

May You Always Have Quilts - A Wish For Oliver


What's a baby's bedroom without a quilt so I made this tumbler quilt using more of the Rocket Age fabric by October Afternoon for Riley Blake (Rocket Main Blue/Rocket Captain Blue/Rocket Stars Orange), you remember I used it to make these various storage baskets for Oliver's room that I blogged about here and including a tute for the 3 circular baskets.


So this is the quilt I made


It was a very quick make and I got to use my latest quilting tool - a Tumbler Double Strip Ruler by Creative Grids.


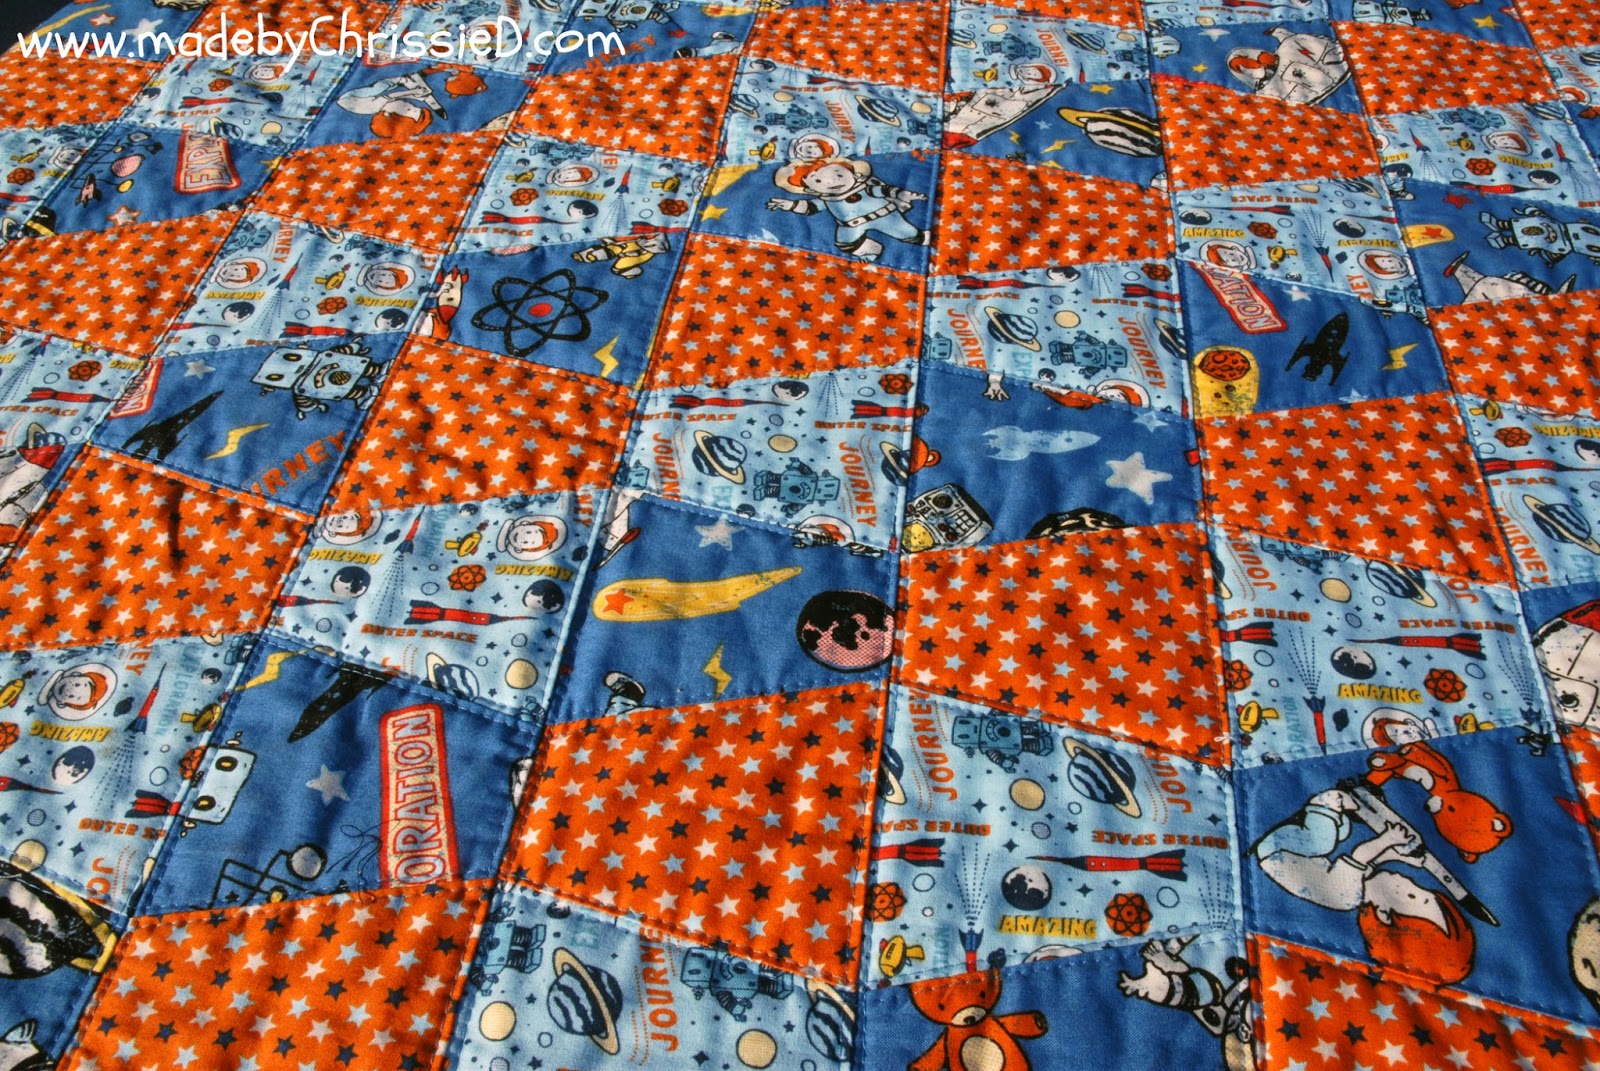
Each block measures 4" finished and my finished quilt size is about 50" x 42" but I forgot to measure it once finished so that's very approximate.

I fussy cut some of the fabric images but in the main I didn't worry about it as it would have wasted so much fabric


The quilting thread is Aurifil #4140 - Wedgewood.

And some more full shots


My wish for Oliver - "may you always have quilts to keep you warm" x


Not too small - it'll be perfect to snuggle under when he's a little older too.


I love those double track quilting lines.


Binding detail


and rolled shot!


Next I trimmed a couple of hand towels and wash cloths to match.


For now the quilt's folded in Oliver's cot (he's not using it yet as he's still in his crib).


And these are hanging stars I had made by Sharon of Spotty Dog Designs - she's based in England but took my order from the States over Facebook, I paid by Paypal and she shipped to Spain and now they're now hanging in Oliver's room. Super lovely to work with, Sharon makes really great customisable ceramic gifts at incredibly reasonable prices so do take a look at more of her work on here on Facebook.


Check out those storage baskets I made keeping everything close to hand for Mum during nappy changes. 


And a last look at Oliver's 'May You Always Have Quilts' quilt.


Featured On:


Follow on Bloglovin


Wednesday, 3 September 2014

Adventures, Explorations and Nursery Baskets

The moon is the first milestone on the road to the stars - Arthur C Clarke


With my Grandson, Oliver, due next week, I need to get some project finishes under my belt ready to take out with me when I go to Seville to meet him.

Oliver's space theme nursery was originally inspired by these fab Rocket Age fabrics by October Afternoon for Riley Blake (Rocket Main Blue/Rocket Captain Blue/Rocket Stars Orange) and Ana asked for storage baskets to finish off the room and after seeing Flicky's Knitter's Dream Basket she specifically requested a larger version of Noodlehead's divided basket pattern for nappies.


I've increased the measurements to 14" (L) x 8" (D) x 9" (H) and moved the central divider offsetting it to allow more room for larger size nappies.  I've divided the front pocket into 5 sections too.

Next, I've made 3 stacking baskets.

Want to make your own?  
  • You need a square base with rounded corners whatever size you wish.
  • Cut a rectangle of fabric for the basket side that's the same width as the four sides of the base added together plus an extra 1/2" for seams (you can just use a circle base if you prefer and then measure your side to equal the circumference of the circle plus an extra 1/2" for seams). The height of the basket is up to you - just add 3/4" for seams to your height measurement.   
  • Add a layer of Pellon 809 Decor Bond or 808 Craft Fuse interface to the basket side and base.
  • Sew the basket side and base together using a 1/4" seam - start sewing with the first 1/4" of the basket side not attached (this is your excess that will become your basket side seam) and when you get to the end the final 1/4" should also be excess and unattached.
  • Now sew the two excess open sides of the basket together again using a 1/4" seam.  
  • Create the same for the lining (you can use Decor Bond again on the base to make it firmer but you don't need it again on the side). 
  • Press the top edge of the outside and lining down by 1/2" to the wrong side of the fabric.  
  • Put the lining inside of the outside with the wrong sides together.  
  • Line up the top edges (adjust turnings if necessary so the heights are the same) and topstitch at 1/8" then repeat at 3/8".


You can turn the top edge of the containers down to whatever height you like.  You can see here where I've previously had the top turned down to - that happens when you use Decor Bond though you can iron it out again to some extent though probably not fully.


I've added tabs to the top of one of the containers before topstitching.


Having 3 fabrics I've alternated each for the outside, inside and base


and, of course, I've added my labels.


And how do those baskets look in use?


There're 54 x 16-28 lb nappies in that basket, perfect!


And the final line-up?


Folded

Stacked

Empty

 Full Of Goodies

I can't wait to hand deliver these and making them reminded me that two years ago I shared my eldest son Jack's graduation quilt with you - I mentioned then that he'd always been my little adventurer and explorer, I wonder if he'll pass those aspirations on to his own son Oliver?  

So back to that Arthur C Clarke quote at the top of the post and I hope my Grandson finds the moon when he travels his own road to the stars.


Click the images below to read more about other Divided Baskets I've made.


Featured:


Clicking on an image will take you through to the new page of crafty goodness :)


Disclaimer: This post is for informational purposes only, no payment or commission is received on click-throughs and opinions are my own.