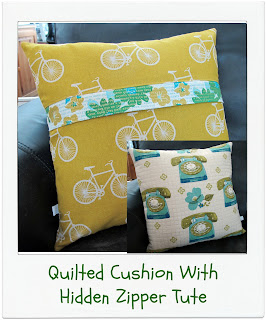
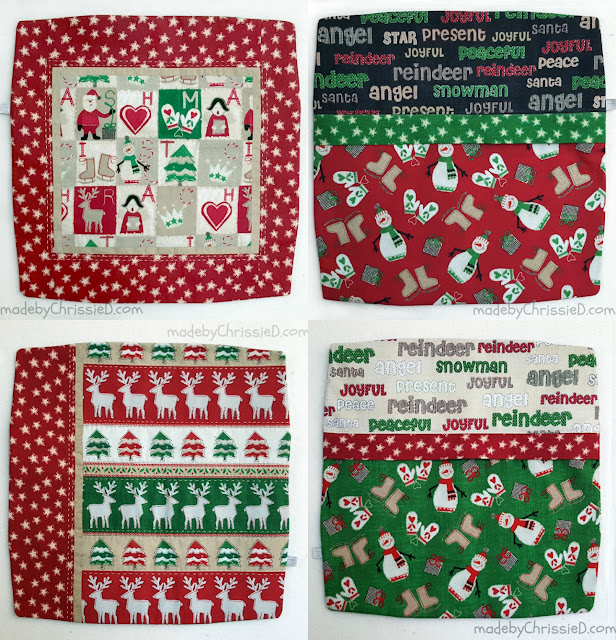
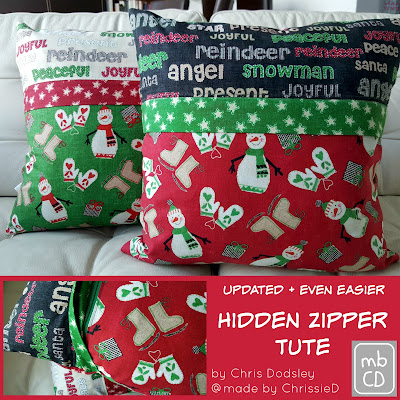
One of my most popular tutorials is my Quilted Pillow With Hidden Zipper tute. A huge number of readers have used my double sided fusible technique successfully and I've shared photos of your projects too in the original blog post. Here are pics of how I've used it and even turned it vertically too.
Hardly surprising then that one of my most popular teaching classes is the same project and I'm incredibly proud of the pillow queens that have emerged from those classes - you know who you are! ;D
When I teach the pillow class I adapt my 3 part method to an even more simplified 2 part technique (shown above) that, along with using my favourite sewing box notion, allows students to finish the project during class. Today we'll still be using my 3 part back method but I'm introducing you to my favourite sewing supply that will make the original method even easier and quicker too.
My favourite sewing box notion is
Water-based Glue Stick
There aren't many projects where I don't utilise the many benefits and advantages a water-based glue stick brings to sewing, especially the coloured glue stick that 'disappears' after a minute or so, that really is my fave.
I'm also hoping my 10 step photo tutorial will make this a breeze for you to work through in your own sewing space.
Of course, you're very welcome to refer back to my original tute (above) too. It's a great source for inspiration and sometimes if things aren't terribly clear, it helps to have them put across in a slightly different way and the old method may suit you better.
This tute doesn't include how to make the pillow front - I do have a tute for that also and you can click to it here.
Updated & Even Easier
Hidden Zipper Tute
Materials:
Measurements are for an 18" square pillow insert finished cover size is 17-1/2" square.
Back fabrics are cut 1/2" larger than insert (18-1/2") to allow wiggle room to line up zipper to unfinished 18" pillow front.
Back fabrics are cut 1/2" larger than insert (18-1/2") to allow wiggle room to line up zipper to unfinished 18" pillow front.
Upper Fabric - 18-1/2"(w) x 6-1/2" (h)
Lower Fabric - 18-1/2" (w) x 12" (h)
Zipper Flap - 18-1/2" (w) x 4" (h)
Zipper - any length longer than 18-1/2" - I'm using a 24" zipper.
My Tools:
Note: I'm an Amazon affiliate and will receive a small commission, at no additional cost to you,
on any purchase made by following a link.
My Tools:
Note: I'm an Amazon affiliate and will receive a small commission, at no additional cost to you,
on any purchase made by following a link.
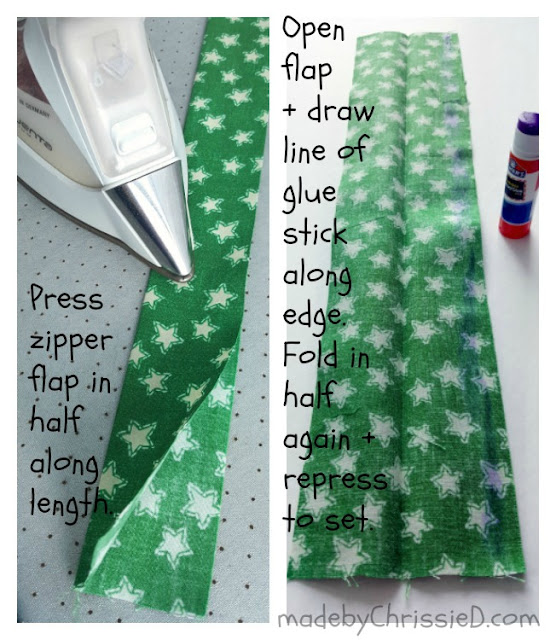
Step 1
Make Zipper Flap
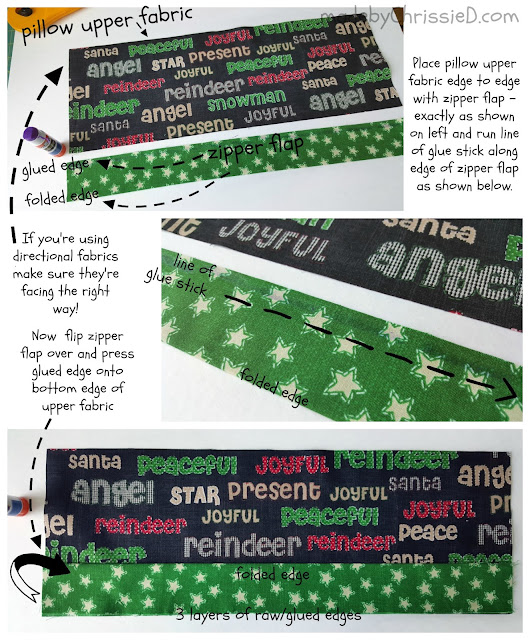
Attach Zipper Flap To Upper Fabric
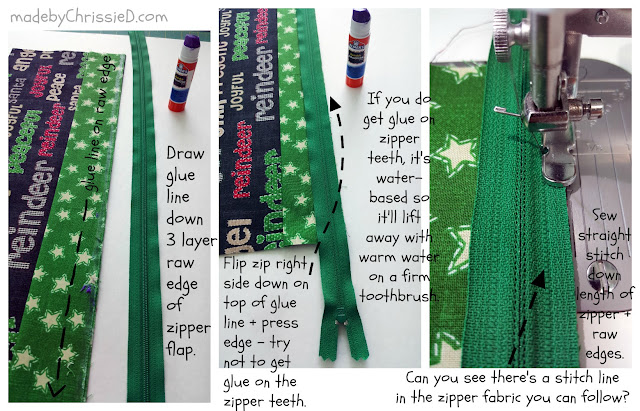
Step 3
Attach Zipper To Flap & Upper Fabric
Step 4
Attach Zipper To Lower Fabric
Step 5
Top Stitch Upper & Lower Fabrics
Step 6
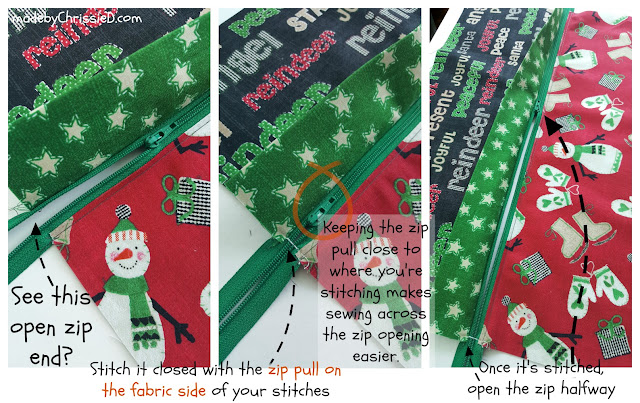
Prep Zipper for Trimming
Step 7
Trim Pillow Back To Match Front
Step 8
Sew Pillow Front & Back Together
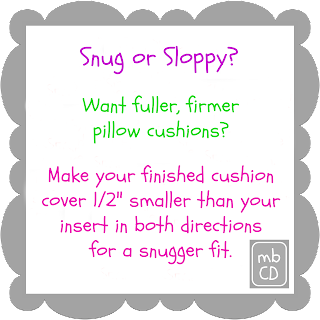
Measure the size of your pillow cover - if it is the same size as your pillow insert then sew a 1/4" seam around all 4 edges of the pillow to reduce finished dimensions by 1/2".
If the cover measures larger than your pillow insert sew a 1/2" seam instead to reduce finished dimensions by 1". Don't forget, you can always sew another wider seam later if you're not happy with the fit of your finished cover.
Step 9
Remove Bunny Ears (optional)
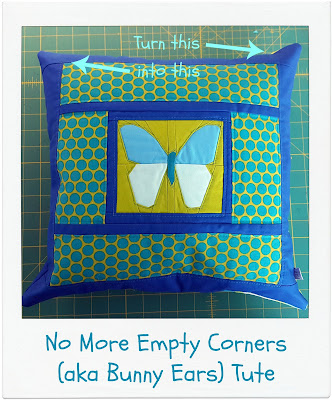
I've created a separate tutorial showing you how to avoid Bunny Ears, empty corners on your pillow. Click through here or on the tute image below and follow the instructions. If you're happy with bunny ear corners then you'll finish your pillow in the same way just don't mark and trim the corners from their current right angles.
Step 10
Finish Seams
When all 4 sides of the pillow are sewn together, sew around them again with an overlock or zigzag stitch to strengthen and to give a professional finish to the inside seams. If you have right angle corners you can clip them for a cleaner turn but if you've used the 'no more bunny ears' technique this won't be necessary.
Turn your pillow cover right side out through the half-open zipper, lightly spray the seams with water (very lightly) and give them a wiggle with your fingers to encourage them to turn fully out, and the corners too.
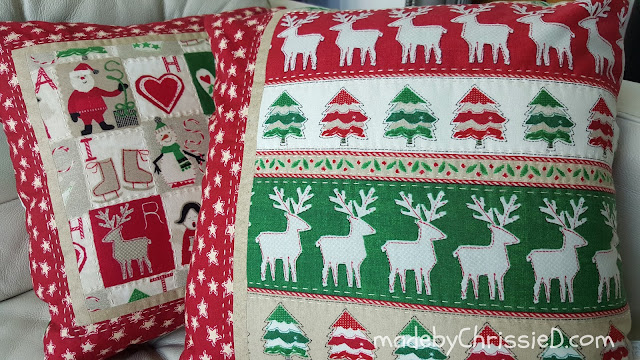
Finished Pillows
Made By Me
Other covers I've made using this tute - click image to read original post.
in this version, I've inserted the zipper without the flap as I want the zipper to add colour and interest.
Here Are The Tutes Again
Sharing Your Makes
If you make a pillow using my pattern I'd love to know. You can share pics with me via the following links and using hashtags #mbCD and #madebyChrissieD.
Clicking on an image will take you to a new page of crafty goodness :)
Disclosure:
Craft Paper Christmas collection fabrics used for the pillows were supplied by Windham Fabrics at no cost to mbCD, all other materials are my own. This post contains Amazon and Craftsy affiliate links for which I am paid commission on click-through purchases (at no additional cost to you). Otherwise, no payment or commission is received for click-throughs to shared links; the post is for informational purposes only and all opinions are my own.
Click to follow Chris Dodsley of made by ChrissieD on Bloglovin'
Linky Parties This post may be linked to some great Linky Parties, always a great source of inspiration too. If you click through to my 'Fave Linky Parties' page you can see where I like to share my work.
















Nice tutorial on putting an easy zipper into a pillow.
ReplyDeleteThanks Bonnie :D
DeleteThank you so much for the tutorial!
ReplyDeletePleasure Janie, hope you find it useful :D
DeleteGreat zipper tutorials, Chris! The fabric is so cheerful and festive. I'm new to your blog as of yesterday. Looking forward to reading more. Thanks for the info and encouragement. (janeherbst at roadrunner dot com).
ReplyDeleteDelighted you've found my blog Jane, hope you find lots more helpful tips as you look around some more :D - Chris
DeleteThank you for the great tutorial.
ReplyDeleteThanks Kathi, let me know if you use it, I'd love to hear how it works for you :D
DeleteThis is an absolutely great step by step tutorial. It is spelled out thoroughly enough I am going to try to do it. Pinned as well
ReplyDeleteThank you for sharing another great tutorial. Added to The Really Crafty Link Party Pinterest board!
ReplyDeleteYou have the best tutorials!
ReplyDeleteThanks for this new updated version - I shall use it next time I make a cushion:)
ReplyDeleteThank you so much for all of your tutorials. You give such clear, easy to follow instructions that even I can follow you! :-)
ReplyDeleteThank you for this very needed and well explained tutorial. Now my future cushions will look much better using this method.
ReplyDeleteSuper glad you came across my tute and found it useful. I'd love to see any that you make, do send me a pic - Chris :D
Delete