Bunny ears - you know those floppy bits when your pillow cushion insert just doesn't reach into the corners.
Do you just live with them or do you grab some polyester fibre fill and stuff them to make them look full and plump?
Whether your pillow cushion covers are homemade or shop bought in the 10 minutes it'll take you to whip those covers off, turn them inside out, draw eight 5" lines, sew along and trim them those irritating empty corners will be forever gone and your home decor will be transformed.
No More Empty Corners (aka Bunny Ears) Tute
No More Empty Corners (aka Bunny Ears) Tute
Step 1:
Turn the pillow cushion cover inside out and lay flat - press if necessary. Notice it's a perfect square.
Step 2:
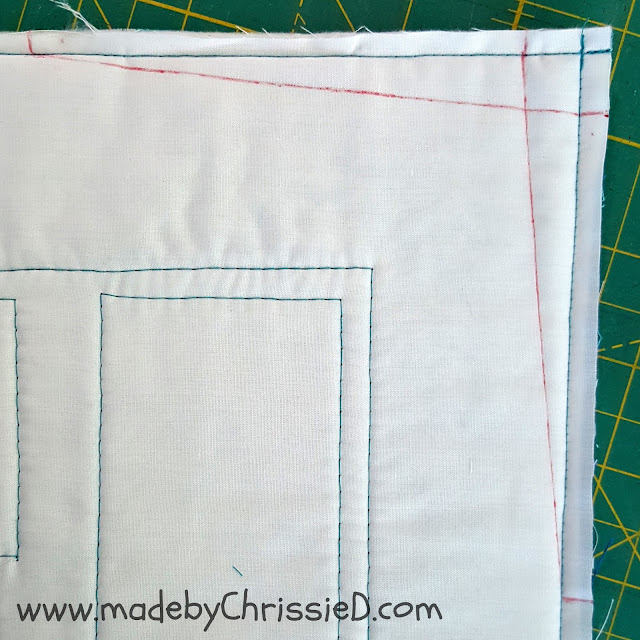
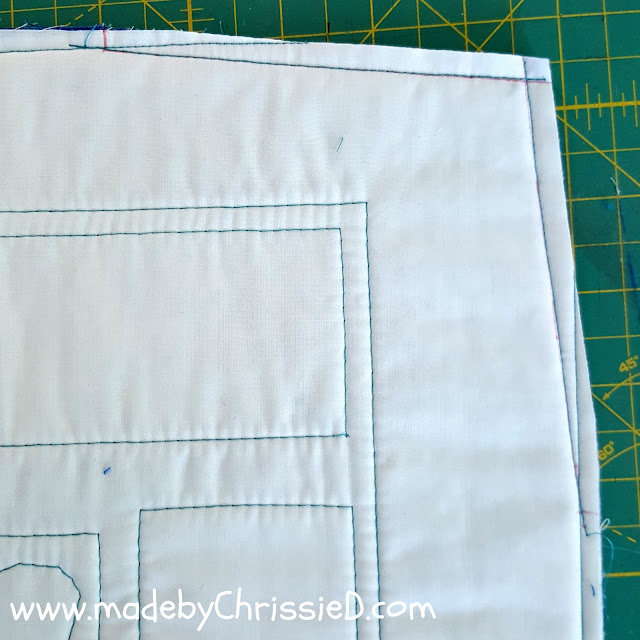
From the sewn seam (not the fabric edge) make two marks at 1/2" and 4" (for a 10" to 14" pillow cushion) or at the 1/2" and 5" mark (for a 16" to 20" pillow cushion) - for smaller/larger covers adapt your markings accordingly noting that the 1/2" mark never changes. Do this along both sides at each of 4 corners (see my red markings).
Step 3:
Draw a line from the 4"/5" mark to the 1/2" mark on the opposite edge of the same corner.
Do this twice at each corner so you now have 8 drawn lines.
Step 4:
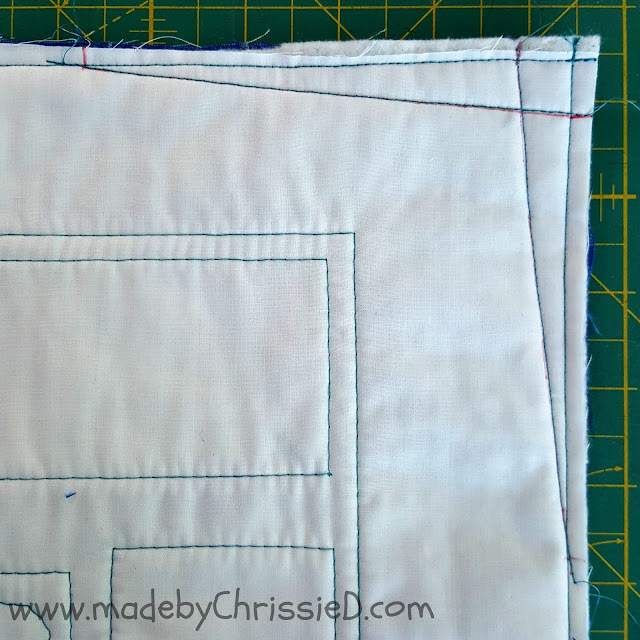
Sew along each line, on the line.
Step 5:
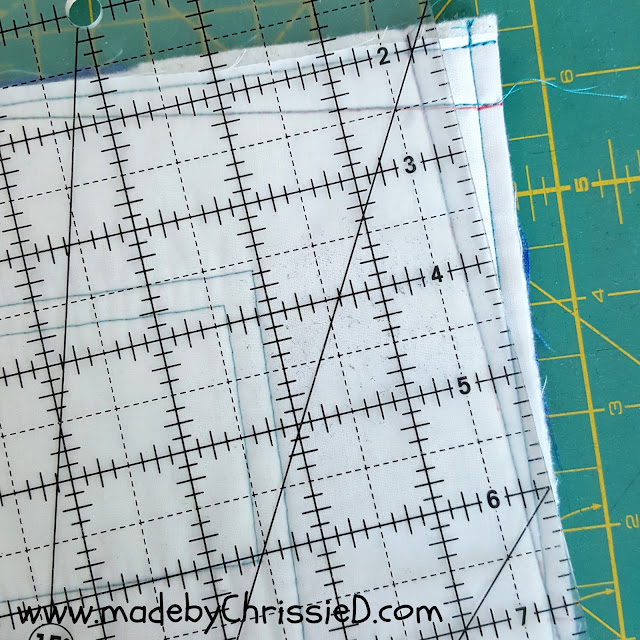
Trim 1/4" outside the newly sewn line to remove excess fabric at each corner.
Repeat at all 4 corners.
You're all done - that's all there is to it!
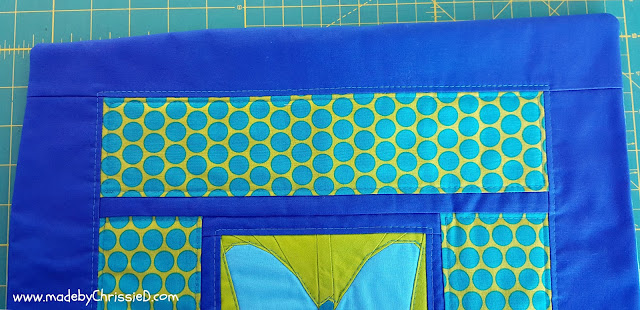
See how the trimmed corner slopes down slightly on the left compared to the original corner on the right
but once you put the pillow cushion insert into the cover you can't tell the cover isn't a square at all.
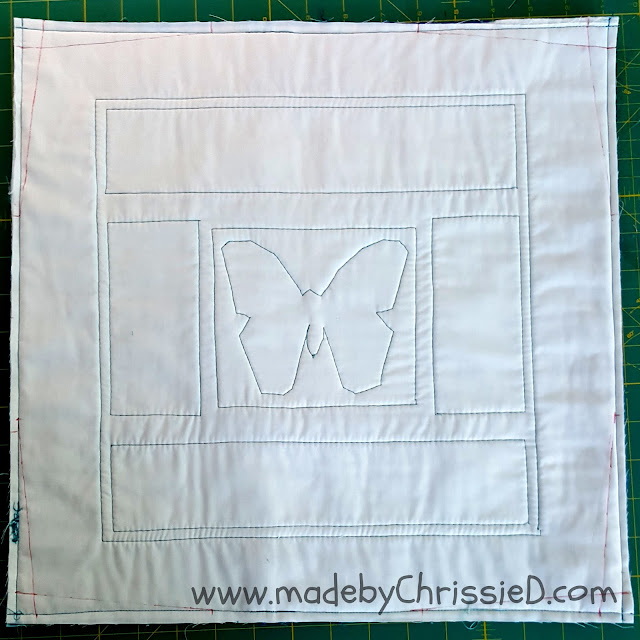
From the back, the trimmed corner is now on the right - which corner do you prefer, the bunny ear original or the trimmed version?
TIP:
I make a lot of pillow cushions so I actually have templates in my favourite sizes that include the sloping corners and it saves me marking/sewing/trimming the corners each time. If you cut your fabric to this shape before you start to sew you can still add piping to the pillow cushion or use outside binding to join the front and back sections.
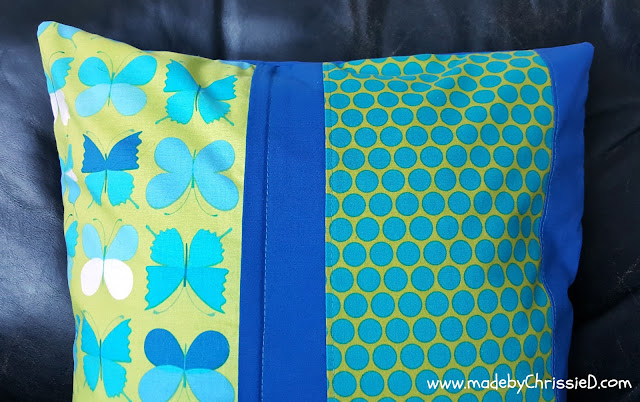
And here's the same pillow cushion with all four corners trimmed.
You can read more about my Mini Butterfly Pillow Cushion here and if you'd like to learn how to make a quilted cushion with a hidden zipper backing you'll find my tute here.
No More Empty Corners (aka Bunny Ears) Tute
Clicking on an image will take you to a new page of crafty goodness :)
Disclaimer: The butterfly pattern was supplied by Juliet @The Tartankiwi at no charge to mbCD otherwise this post is for informational purposes only, no payment or commission is received on click-throughs and opinions are my own.
Copyright:
Uncredited reproduction of all content, text and images on this site is prohibited.

Click to follow me on
Related Posts:


Linky Parties This post may be linked to some great Linky Parties, always a great source of inspiration too. If you click through to my 'Fave Linky Parties' page you can see where I like to share my work.


Linky Parties This post may be linked to some great Linky Parties, always a great source of inspiration too. If you click through to my 'Fave Linky Parties' page you can see where I like to share my work.





Brilliant Chris - thank you. xx
ReplyDeleteWe were forbidden to have "bunny ears" on our City&Guilds cushions, and ever since I learned how to prevent them I intended to write a tute for it, and never did! When you see the unfilled cushion cover you think it wouldn't work, but it works perfectly. No bunny ears for my cushions ever again ;-)
ReplyDeleteIt really is so simple to get a great finish isn't it. Love C&G, how to learn to do everything properly - Chris :D
DeleteI always knew you were supposed to do this, but I have never heard the dimensions, so thank you for that!
ReplyDeleteWow! I'm really impressed with this. Genius. Thank you very, very much.
ReplyDeleteOne more hint: for a 16" pillow form, make the cover between 15.5 - 15.75 square so pillow form fills the cover better. Poufier - instead of a loose cover.
ReplyDeleteAbsolutely Kathy, it's in my 'How To Make A Quilted Cushion' tute and I always tell my students to make a finished cover that's 1/2" smaller in both directions than the insert, it gives a much fuller, firmer finish. Some prefer a soft loose cushion but I like them really snug :D
DeleteSo, say I wanted to make a different size pillow? maybe 20x20" Not sure how you calculate the number that is not 1/2 inch because I'm not sure what you based it on. Thanks.
ReplyDeleteHi Laverne, there's no set calculation, it's what works best for the look you want to achieve. As a general rule any cushion measuring between 10" to 14" square works with a 4" mark and a 16" to 20" cushion works with a 5" mark. You can deduct or add 1" or more to these measurements if using a smaller or larger cushion. So I'd probably use a 6" mark for a 22" to 26" cushion. As long as you mark the same distance from the corner on each side it'll work, you're looking to create a shallow diagonal slope to the corner rather than a steep cut off corner - Chris :D
DeleteI went to sleep thinking about this technique (yes, I am sad I know)and woke up wondering if you can shape the corners before you sew the front and back together. I often use binding on cushions, like binding a quilt, to join the front and back so if I did that here then sloped the corners I'd spoil the binding. Anyone tried it prior to sewing the seams?
ReplyDeleteYes, absolutely you can. This was the best way to show the technique in a tute that works for everyone but I have sloped corner templates for my favourite cushion sizes so I don't have to make the marks/draw the lines each time - so much quicker to cut your fabric to this shape before you start and that way you can still bind from the outside or add piping to the cushion - thanks for mentioning it and I think I should actually add it as a tip at the end of the tute. And if it's sad to think about sewing as you're nodding off then I must be very sad too ;D - Chris
DeleteExcellent! I'm so thrilled about this technique. I've made lots of cushions and never been 100% happy with them but couldn't put my finger on why that was. Now I know. Bunny ears! Thank you from the UK.
DeleteGreat tutorial! I had never heard of this technique before, but it works like a charm.
ReplyDeleteGenius! I have some shop bought covers that desperately need this treatment, now I know how easy it is they may get a reprieve, I was planning to get rid of them as they look so cheap and nasty!
ReplyDeleteA great tutorial. This is one of those little tricks my seamstress mum taught me, but not many people know about. It certainly makes a difference. Thanks for sharing.
ReplyDeleteIt really is one of those old usefuls isn't it Janice?! I find when I'm teaching that there's lots of transferrable skills and knowledge between home dec, dressmaking and quilting that not everyone knows about, my students are constantly wowing which in return gives me a huge buzz - Chris :D
DeleteThis is great. I recently made my first pillow top. Will turn it inside out and make this modification soon. : )
ReplyDeleteLet me know how it works for you June - Chris :D
DeleteThis is great Chrissie. I didn't know about this technique but I'll definitely use it now. Thank you.
ReplyDeleteThanks, Chrissie! What a great tip...and simple too!
ReplyDeleteI always love your work, and I recognize that polkadot fabric from a ways back :)
ReplyDeletethank you for that, and the fabric has indeed been around a long time, I bought it in 2011 or 2012 and it was on the sale shelf even then!!! - Chris :D
DeleteWhaaaaattttttt????? You. Are. Brilliant.
ReplyDeleteXX!
Arggghhhhh, thanks for saying Lori - let me know if you use it and love it!!! - Chris :D
DeleteFantastic tutorial! Thank you very much!!!
ReplyDeleteEsther
esthersipatchandquilt at yahoo dot com
ipatchandquilt dot wordpress dot com
Love the colours you have chosen for the pillow
ReplyDeleteGosh, such a simple answer to a bothersome problem, thank you x
ReplyDeleteGreat advice, thank you! :)
ReplyDeleteThis is excellent, thank you! I hate the bunny ears on the pillows I make.
ReplyDeletewhat a clever trick! I always make my pillow about 1/2-1 full inch smaller than the pillow form I'm planning to use, but this is definitely something to try!
ReplyDelete:) Kelly @ My Quilt Infatuation
I always make my cushion covers 1/2" smaller than my insert too Kelly as I love a snug fit but inserts seldom shape nicely into those corners and you still get bunny ears. If it's a problem this technique elimates them altogether - Chris :D
DeleteWhat a great tip! It's amazing what a difference it makes just with that bit off the corners.
ReplyDeleteWhat a fabulous tutorial - it always bugs me when they don't quite fit.
ReplyDeleteWhat a great tutorial. Thanks for sharing it.
ReplyDeleteArgh! I could have done with this last week. I recently made three cushions with big ol' bunny ears!
ReplyDeleteI just 'hopped' across from Blossom Heart Quilts.
Thanks for this tut - I've read it before (and thought I'd left a comment) and this time I've saved it for future reference :)
ReplyDeleteJust wanted to say thanks for this good instruction. I just used it again today and the pillows look great!
ReplyDeleteThis is fabulous!!! I hate bunny ears but never knew how to "correct" for them. Thank you.
ReplyDeleteYour tutorial is great and the method works perfectly so thank you very much. I'm in a bit of a quandary at the moment because I'm making an oblong cushion for a friend that measures 12x18, have you any advice for that?
ReplyDeleteHi Julie, I'd use the same technique that I've detailed in my post. Measure along 4" on the 12" sides of the cushion and 5" on the 18" side of the cushion - it'll look perfect. Hope this helps, Chris :D
DeleteThank you very much, will try that.
ReplyDelete