Today I'm sharing my Zippy Pouch Tute; if you're following the Selvage Along hosted by Jess @Quilty Habit and Renee @Quilts of a Feather you can make it with selvedge fabric but you can make it with standard fabrics too so if you're not a selvedge fan don't click away just yet!
If you are interested in working with selvedges a great place to start is my What's a Selvedge? post and each week on the Selvage Along there are new project tutes added through to 21st September.so lots of time to start collecting selvedges and join in.
ZIPPY POUCH TUTE
This Zippy Pouch tute is very adaptable, you can make it to any size - today I'm sharing two zippy pouches: a Laptop/File Pouch; and also a Pencil Pouch. When you're making pouches it's hard to say for sure what the finished size will be, it's dependent upon on several factors during the making process. If in doubt make your pouch too large, it's safer and you can always trim/take in your seams later to resize if the finished pouch is too big.
Here are my measurements for these projects:
Laptop Case (fits a 15" laptop)
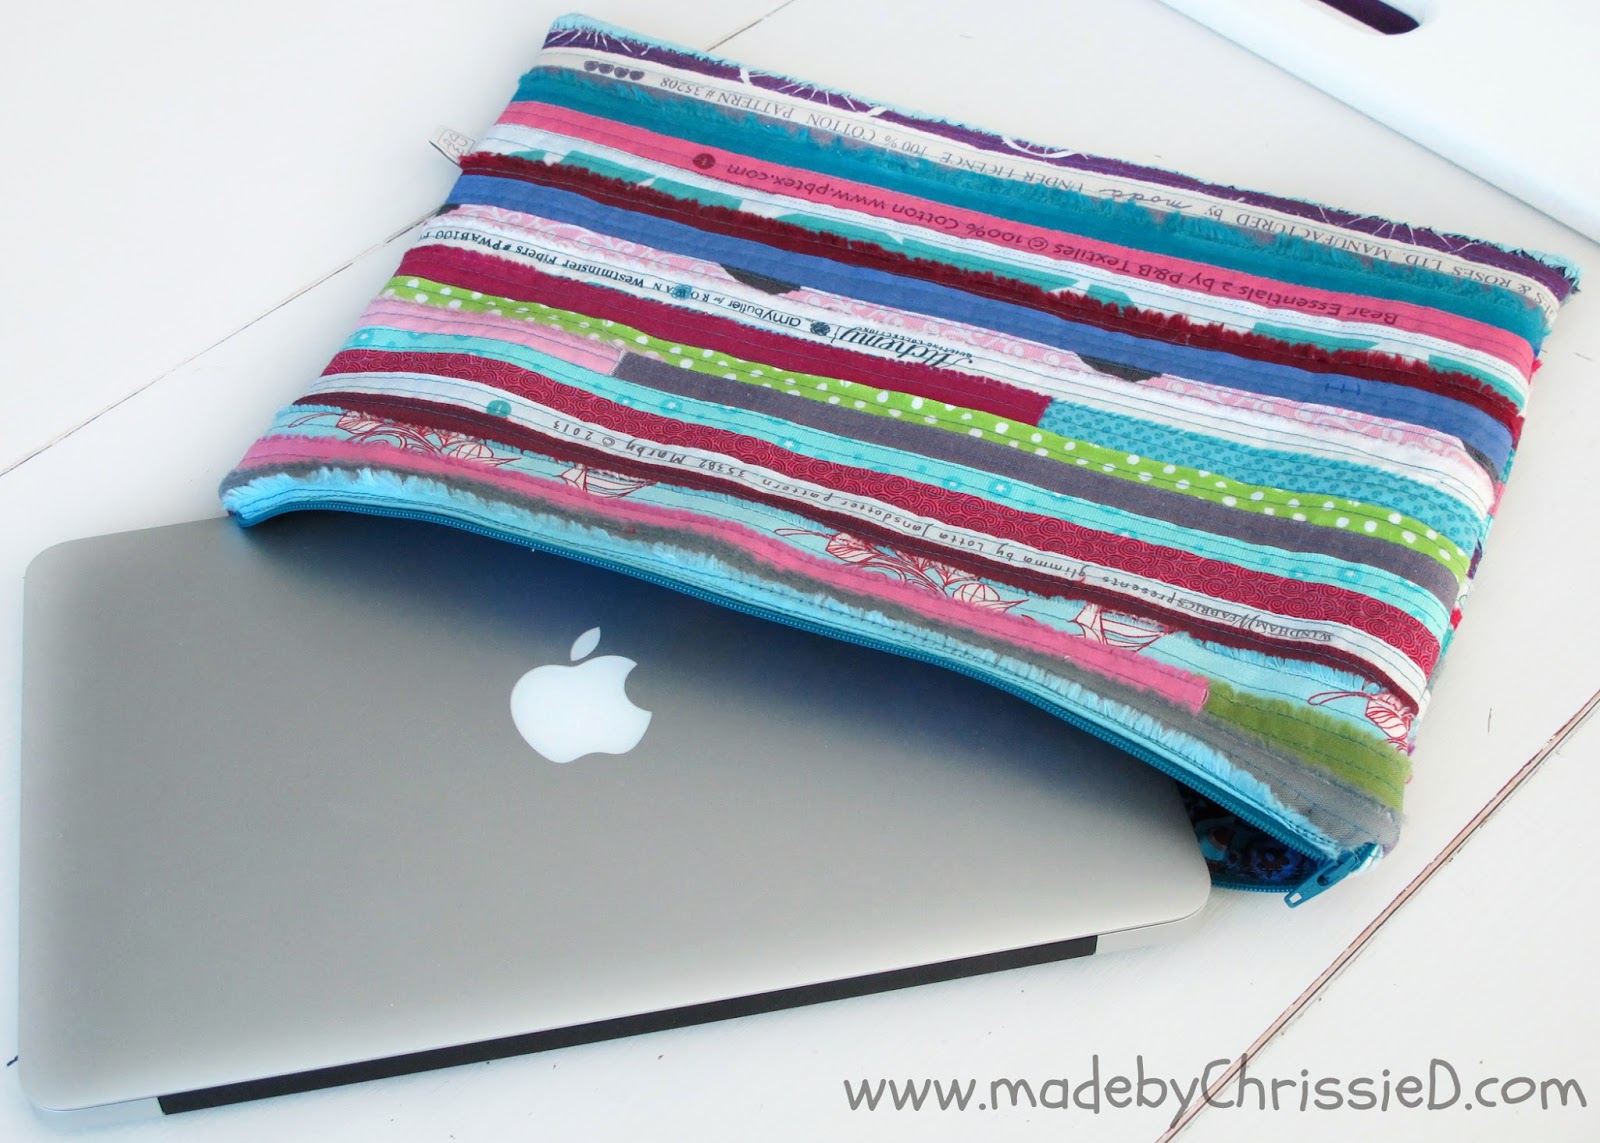
I wanted a longer case than necessary to have room for accessories and books too so I cut my fabric at 18" (zipper edge) x 14", however, fabric cut at 18" x 11-1/2" would fit the laptop alone perfectly.
Finished outside size = 16-1/4" (15-1/2" zipper opening) x 13-3/8"
TIP: zipper opening on finished pouch should be slightly longer than longest measurement on laptop to allow laptop to slide comfortably into pouch.
Pencil case
fabric cut at 10-1/2" x 7"
finished outside size = 9-1/2" (8-1/2" zipper opening) x 6-3/4"
TIP: an average pencil case size is approx 8" wide (across the zipper) x 5" long based on the standard length of a pencil (7.5") but obviously you can make your case to any size you like.

Basically, whatever size you want pouch to be you need fabric (selvedge fabric or any fabric) that measures at least 2" larger than you want for finished pouch.
TIP: quilting fabric will cause it to distort and shrink so make allowances for that in measurements and finished pouch will also shrink when washed.
Materials:
4 pieces of fabric that each measure your calculated size for your zippy pouch (2 x outer/selvedge and 2 x lining)
2 pieces of batting cut same size as your 4 fabrics
1 regular #3 coil plastic zipper (should be at least 2" longer than width you want finished pouch to be).
NB: You can use a metal zipper at your own risk, you'll need to be more careful sewing over and cutting through the metal teeth.
This tute isn't suitable for invisible zippers.
NB: You can use a metal zipper at your own risk, you'll need to be more careful sewing over and cutting through the metal teeth.
This tute isn't suitable for invisible zippers.
Thread - matching or contrasting
Notions:
Basting spray
Straight pins
Glue stick and/or Clover Clips (both optional)
Ruler
Disappearing pen or marking pencil
Standard zipper foot for your sewing machine
1/4" or walking foot
Glue stick and/or Clover Clips (both optional)
Ruler
Disappearing pen or marking pencil
Standard zipper foot for your sewing machine
1/4" or walking foot
Making Zippy Pouch:
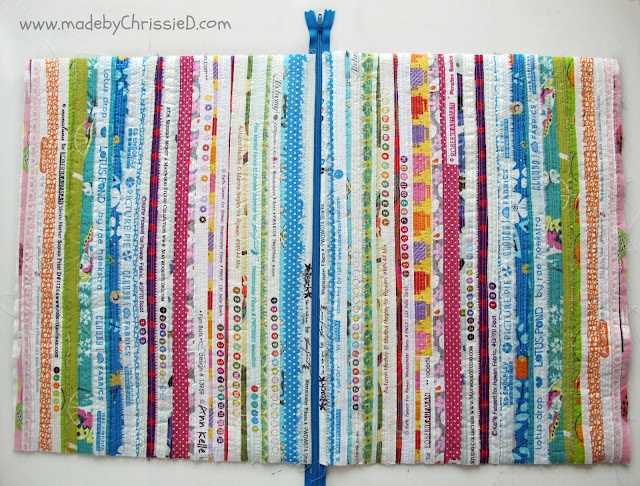
if you're using selvedges make two pieces of selvedge fabric at your calculated size using my How To Make Selvedge Fabric tute. If you're using ordinary fabric cut two pieces to your calculated size line each with batting and quilt as desired.
For both fabric types, once quilted cut two fabrics to required size for the pouch.
For both fabric types, once quilted cut two fabrics to required size for the pouch.
Cut two lining pieces to exact size of outer/selvedge fabric - you can use a whole piece of fabric or a pieced fabric as I have - this is a Kaffe Fassett Spot (Duck Egg) and a Philip Jacobs Iris & Peony (Green-2010).
Add a zipper, matching or contrasting.
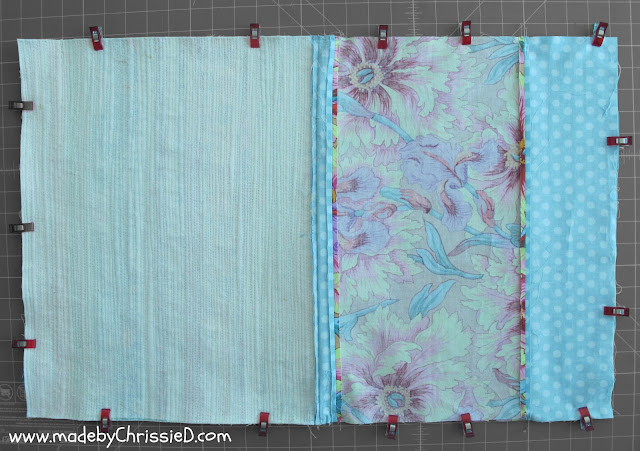
Lay fabrics out exactly as shown in photos:
- outer/selvedge fabric and lining fabric right side up with top edges together and zipper in centre with zipper pull closest to you;
- place closed zipper face down on top of outer/selvedge fabric keeping zipper pull closest to you. It's really important to centre zipper on fabric so you have an overhang of zipper at both ends of fabric;
- lay lining fabric right side down lined up along top edge with zipper and outer/selvedge fabric;
- the zipper is the meat in outer/selvedge and lining fabric sandwich and is centred on the two fabrics hanging out at each end;
and keep all long top edges lined up throughout.
You can pin or Clover Clip these three layers together but my favourite method is to glue them, it's so wonderful to sew pin and Clover Clip free without having to hold fabric edges together at same time!
If you want to try glue method, use a water-based glue stick and run it along top edge of fabric and stick fabric to zipper. Use plenty, don't stinge but try not to get it on zipper teeth as it makes zipper hard to pull, pinch with fingers to hold in place and press with iron to set glue.
TIP: If you get glue on zipper teeth use warm water and a toothbrush to clean it away - the glue is water soluble.
TIP: If you get glue on zipper teeth use warm water and a toothbrush to clean it away - the glue is water soluble.
TIP: If fabric and zipper don't stick (sometimes this happens due to surface finish on some fabrics) just revert back to Clover Clips or pins.
Thought I'd show you all three methods in one pic, hehe.
Thought I'd show you all three methods in one pic, hehe.
This is how fabrics look attached together ready for sewing - they'll be layered with outer/selvedge fabric and lining facing each other and zipper facing down towards outer/selvedge fabric as in the picture with zipper pull at the top.
I'm using Aurifil 50/2 thread #2805 - Light Turquoise. You only see thread along the top edge of the pouch so it can be matching or contrasting.
Sewing Your Zipper:
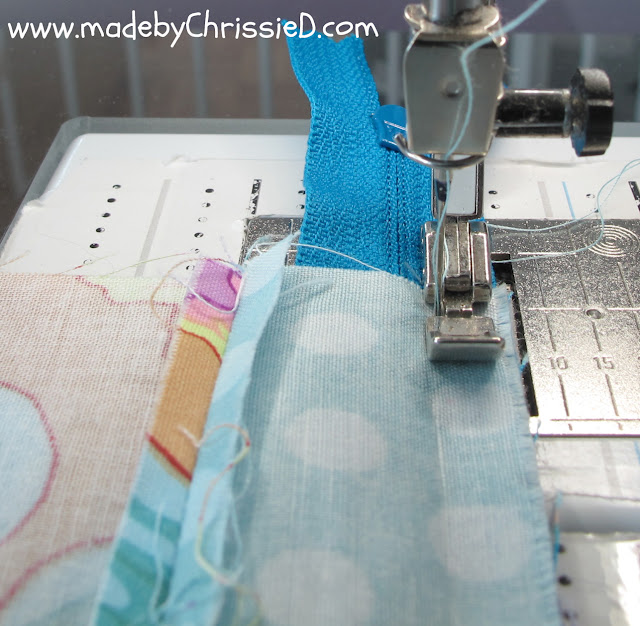
- switch machine to zipper foot;
- needle all way to left (or if using a straight stitch only machine set zipper foot so you can sew on left side of it);
- place main fabric on left of needle with wrong side of lining facing upwards;
- put left edge of zipper foot tight against zipper teeth - you can feel them through lining fabric; and
- sew a regular length stitch straight down length of fabric keeping zipper foot against zipper teeth throughout.
- put left edge of zipper foot tight against zipper teeth - you can feel them through lining fabric; and
- sew a regular length stitch straight down length of fabric keeping zipper foot against zipper teeth throughout.
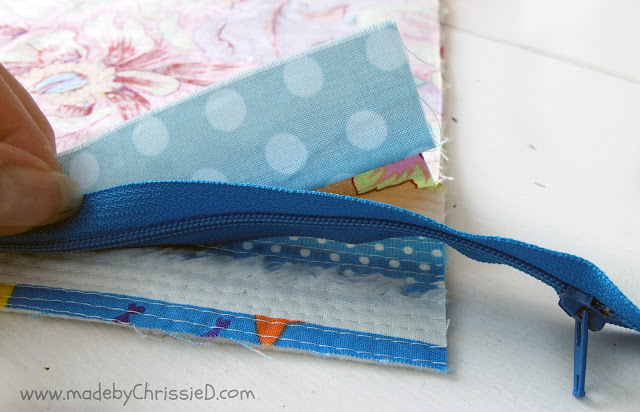
Press outer/selvedge fabric and lining away from zipper teeth, wrong sides together. If you have glue on zipper spray with a little water and use a toothbrush to work it away.
Now to attach fabrics to other side of zipper - again lay fabrics out exactly as shown in photos:
- place second piece of outer/selvedge fabric and second lining fabric together right sides up as shown and with top edges of both central;
- place second piece of outer/selvedge fabric and second lining fabric together right sides up as shown and with top edges of both central;
- place zipper/fabrics already sewn directly on top of second outer/selvedge fabric so two outer/selvedge fabrics are right sides together and zipper is face down and lined up on right with zipper pull closest to you;
- two linings will be facing you with top edges both central;
- now place second lining fabric right side together with first lining fabric as shown in pic - all long edges and zipper should be lined up together;
- bottom edges of linings won't line up exactly - this is due to zipper placement;
- fabrics already sewn to the zipper become the meat in this latest fabric sandwich.
Pin, Clover Clip or glue all top edges together as before.
Sewing Your Zipper:
Sewing Your Zipper:
- use zipper foot;
- needle all way to left (or if using a straight stitch only machine set zipper foot so you can sew on left side of it);
- place main fabric on left of needle with wrong side of lining facing upwards;
- put left edge of zipper foot tight against zipper teeth - you can feel them through lining fabric; and
- sew a regular length stitch straight down length of fabric keeping zipper foot against zipper teeth throughout.
- put left edge of zipper foot tight against zipper teeth - you can feel them through lining fabric; and
- sew a regular length stitch straight down length of fabric keeping zipper foot against zipper teeth throughout.
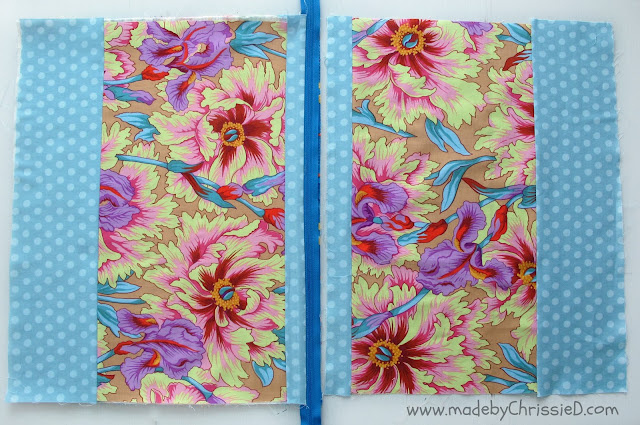
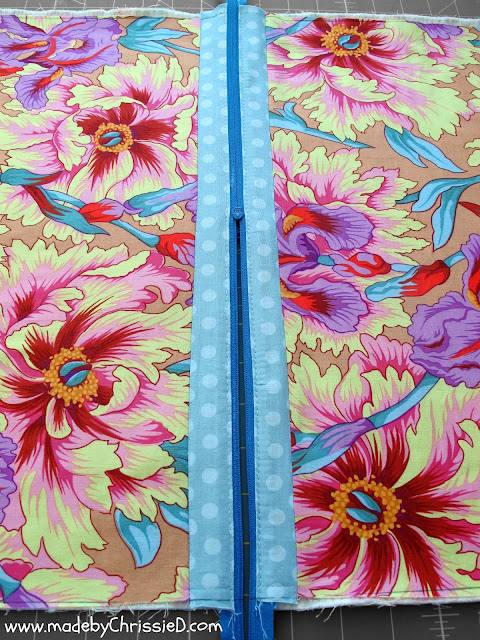
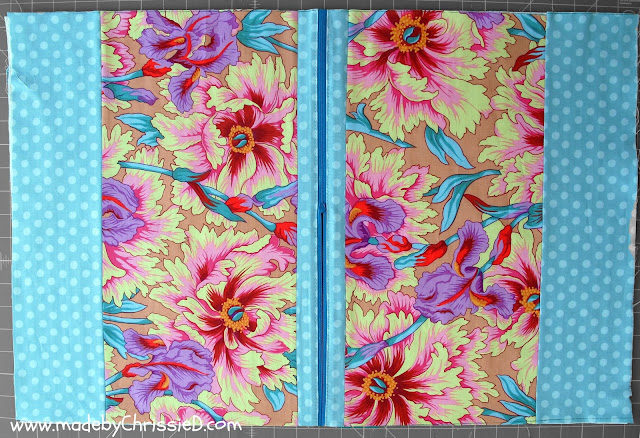
Press all four fabrics away from zipper teeth as before and your piece will now look like this on outside
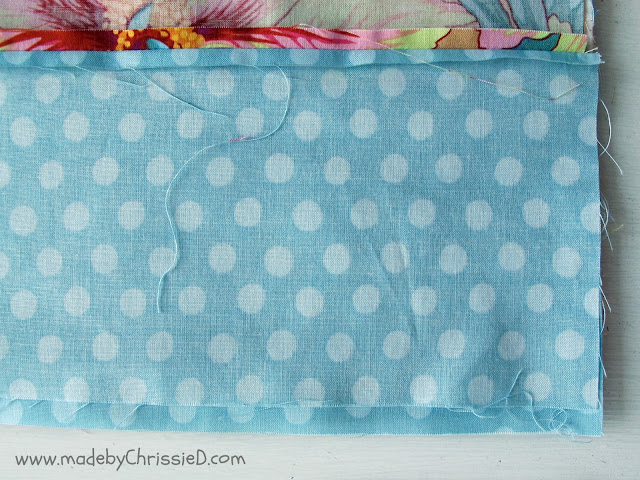
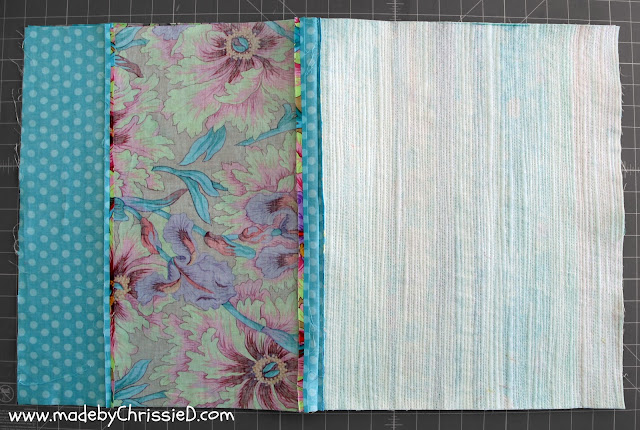
and this on inside. Note direction the zipper's facing. It should be facing upwards between outer/selvedge fabrics (as above) and downwards between lining fabrics (as below), if it isn't, then now's the time to remove zipper and turn it around.
TIP: if you don't want to remove an incorrectly placed zipper you could consider whether lining fabric can be used as outer fabric and vice versa, could save time and effort if it'll work for you!
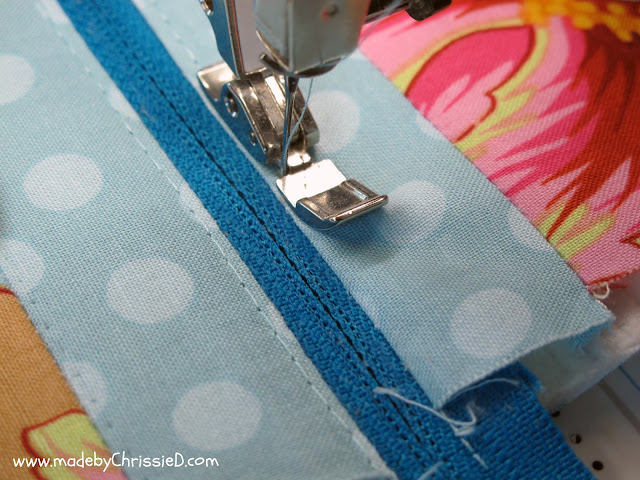
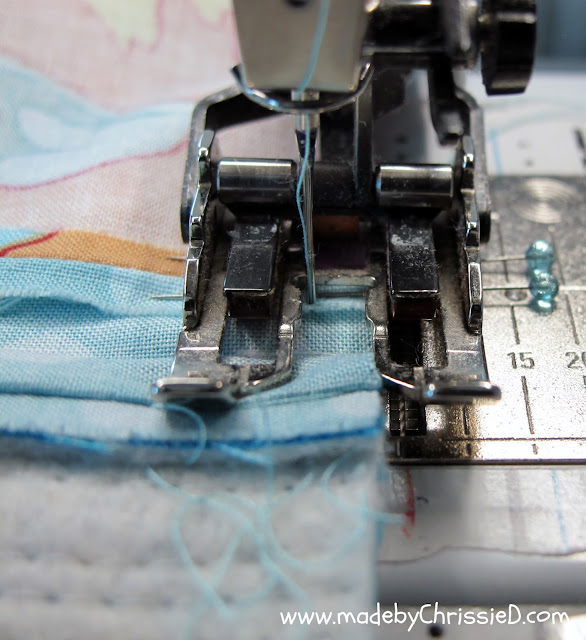
Top stitch along both edges of fabric alongside zipper approx 1/8" onto fabric - I've used a 4.0 mm length stitch as in pic below. You can add top stitch with outer/selvedge or lining fabric uppermost if machine tension is correct then stitches should look as good from the top as they do from bottom.
TIP: tug lightly on outer/selvedge and lining fabrics as you top stitch to pull them away from zipper teeth, you don't want tucks appearing that'll spoil the finish around zipper edge of pouch.
TIP: tug lightly on outer/selvedge and lining fabrics as you top stitch to pull them away from zipper teeth, you don't want tucks appearing that'll spoil the finish around zipper edge of pouch.
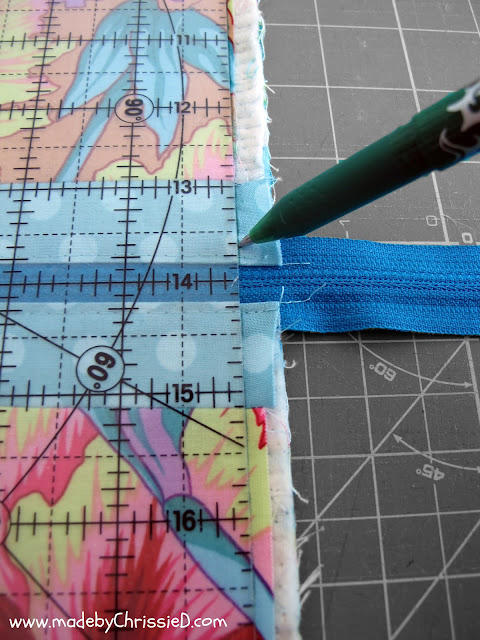
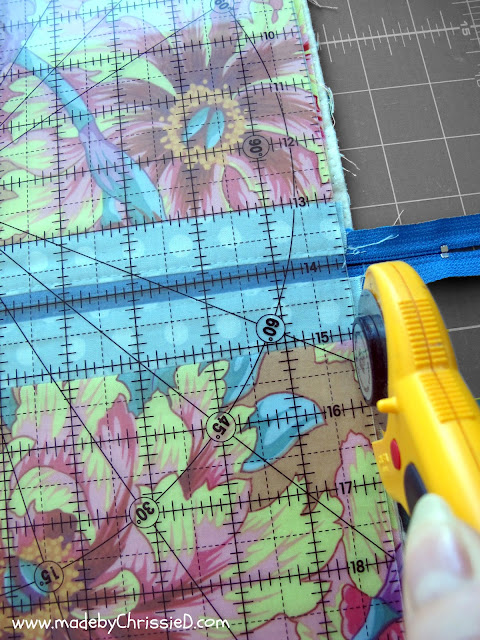
Place a line of your long ruler along the line of the closed zipper - see pic below - the edge of the ruler now creates a perfect right angle for your side seam.
Draw this right angle line side seam with a disappearing pen/marking pencil to ensure you have all layers correctly lined up.
OPEN ZIPPER HALF WAY
this is sooooo important if you forget to do it you'll cut your zipper pull off during next step. Please, please, please half open your zipper!
this is sooooo important if you forget to do it you'll cut your zipper pull off during next step. Please, please, please half open your zipper!
Once zipper is open halfway cut through all layers, including zipper along drawn side seam lines - do this for both side seams.
BEWARE
You now have open unprotected ends at both ends of zipper.
DON'T panic, you'll be absolutely fine just work carefully, DON'T move zipper pull from half way position as there's nothing to stop it falling off either end and DON'T go pulling on fabrics or throwing project around!!!
DON'T panic, you'll be absolutely fine just work carefully, DON'T move zipper pull from half way position as there's nothing to stop it falling off either end and DON'T go pulling on fabrics or throwing project around!!!
Carefully separate fabric layers and lay outer/selvedge fabrics right sides together and lining fabrics right sides together.
Carefully move fabrics to the sewing machine. Outer/selvedge seams are a little bulky - keep outer/selvedge seams and outer/selvedge fabric lined up together and do same for lining fabric and lining seams. Ensure zipper is folded and lying flat too.

Sewing Instructions:
- switch to 1/4" or walking foot;
- sew a 1" line at 1/8" from fabric edge using a regular stitch length;
- do same on both sides;
- zipper ends are now securely closed again and you can work safely with your fabrics.

Sewing Instructions:
- switch to 1/4" or walking foot;
- sew a 1" line at 1/8" from fabric edge using a regular stitch length;
- do same on both sides;
- zipper ends are now securely closed again and you can work safely with your fabrics.
ENSURE ZIPPER REMAINS HALF WAY OPEN
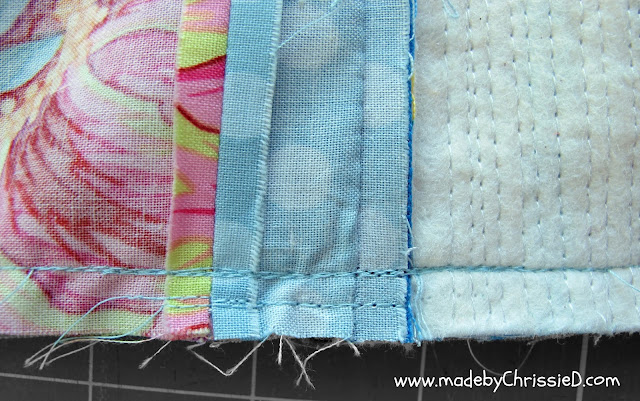
Pin or Clover Clip around fabrics and sew around almost all of 4 sides as shown in diagram below using a 1/4" seam and regular length stitch - leave two-thirds of bottom edge of lining fabric open for turning fabrics later.
TIP: if using my method for sewing on and off fabrics it'll make turning in finished seams later super easy - no fiddling trying to fold in edges for final join and attempting to press in place whilst burning your fingers. Using this method the fabric does all the work for you and automatically turns seams inwards, trust me it works!!!
TIP: if using my method for sewing on and off fabrics it'll make turning in finished seams later super easy - no fiddling trying to fold in edges for final join and attempting to press in place whilst burning your fingers. Using this method the fabric does all the work for you and automatically turns seams inwards, trust me it works!!!
Sewing that 1/4" seam.
Be sure to leave that opening in lining fabric NOT in outer/selvedge fabric. You can just about see my turning stitches in pic below.
TIP: Add another two short rows of stitches directly over existing stitching at both ends of zipper - these zipper ends have a lot of stress put on them when pouch is in use so make sure you've got some really solid stitching there.
Trim four corners on diagonal but don't cut through corner seam stitches.
I've closed the seam opening about 1/8" from the fabric edge.
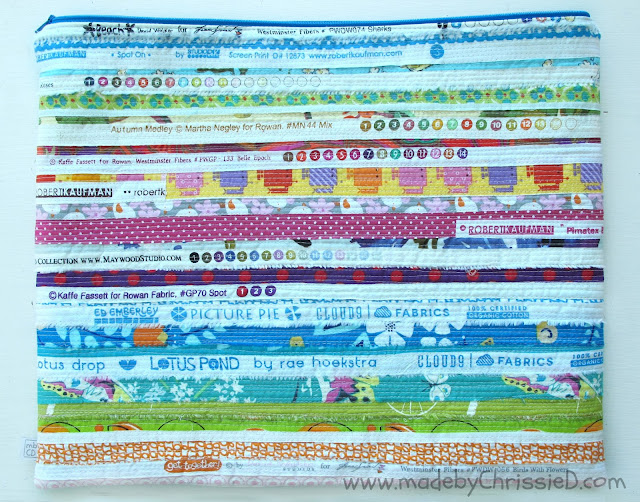
Fill and use your finished zippy pouch!
NB: Pouch is for decorative use only and provides no protection for laptops or other electronic gadgets.
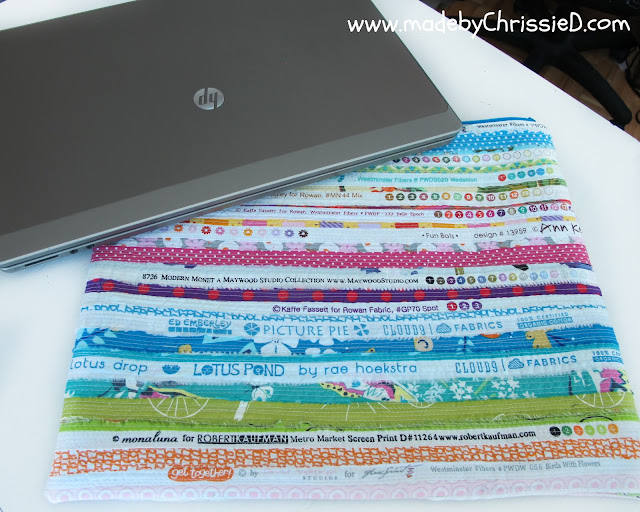
I'm using my pouch to take my notes to class.
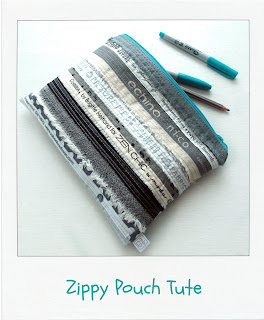
And I couldn't resist making this pencil case to take to class too!
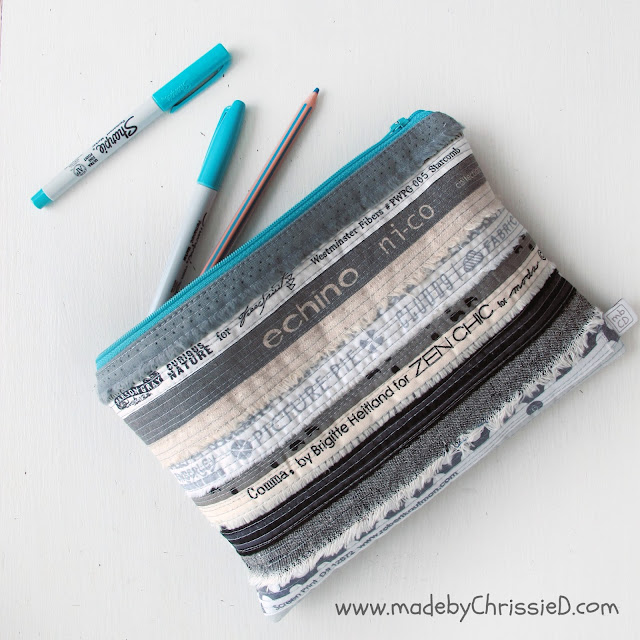
I've used selvedges from my grey/black selvedge bag and topped it with a bright jade zipper to make it pop. It's also a perfect match for the lining - Eucalyptus in Jade from the Pretty Potent collection by Anna Maria Horner for Free Spirit.
If you make any pouches using my tute, selvedge or otherwise, do let me know, I love to see what you make and hear your stories. You can also share your images here in my Flickr group for items made using my tutes.
Click to follow me on


Trim four corners on diagonal but don't cut through corner seam stitches.
Put hand in opening in lining and through half-open zipper - pull zipper fully open then turn fabric through so it's right sides outwards.
Push out all four corners and seams at zipper ends. Wiggle side seams, particularly on outer/selvedge fabric to make seams open cleanly on the outside.
Check pouch closes and zipper works correctly if it doesn't then retrace steps until you've undone your sewing enough to resew the dodgy bit and make things right.
Once you're happy with pouch you can close bottom seam on the lining.
See how fabric turns itself inwards along open seam, isn't that amazing?!!!
See how fabric turns itself inwards along open seam, isn't that amazing?!!!
I've closed the seam opening about 1/8" from the fabric edge.
Tuck lining inside pouch and press everything flat.
Fill and use your finished zippy pouch!
NB: Pouch is for decorative use only and provides no protection for laptops or other electronic gadgets.
I'm using my pouch to take my notes to class.
And I couldn't resist making this pencil case to take to class too!
I've used selvedges from my grey/black selvedge bag and topped it with a bright jade zipper to make it pop. It's also a perfect match for the lining - Eucalyptus in Jade from the Pretty Potent collection by Anna Maria Horner for Free Spirit.
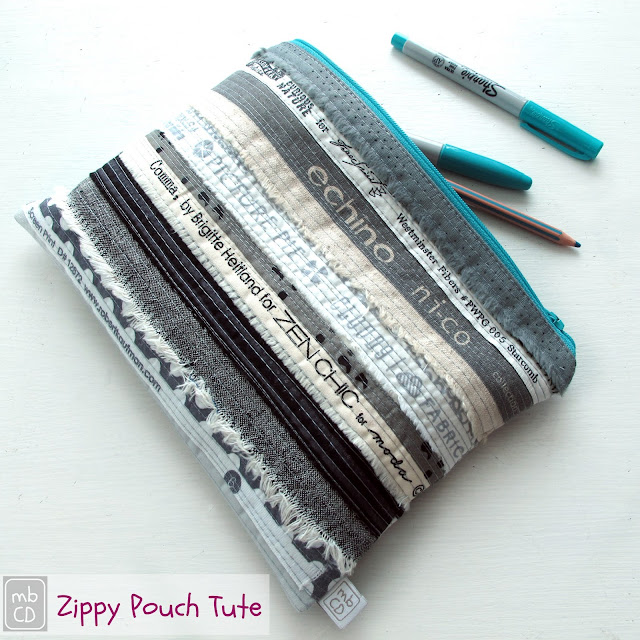
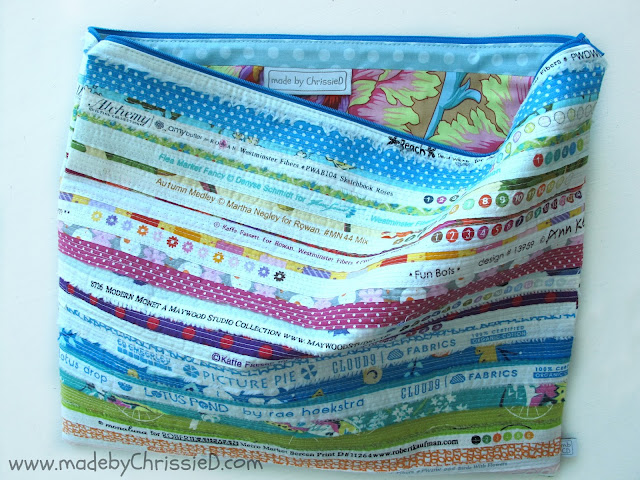
The other side of the pouch.
If you make any pouches using my tute, selvedge or otherwise, do let me know, I love to see what you make and hear your stories. You can also share your images here in my Flickr group for items made using my tutes.
Don't forget there's a Selvage Along midway/check-in linky today @Quilty Habit and @Quilts of a Feather and for lots more selvedge fabric and project tutes check out the full Selvage Along Schedule:
20 July - Intro posts @Quilty Habit and @Quilts of a Feather
24 July - Link up your selvedge pics @Quilty Habit and @Quilts of a Feather
27 July - Selvedge Strip Pillow Tute by Jess @Quilty Habit
3 August - Anna Maria Horner Selvedge Feathers Tute by Renee @Quilts of a Feather
10 August - Selvedge Zippy Pouch Tute by Chris @made by ChrissieD
and a midway/check-in linky @Quilty Habit and @Quilts of a Feather
17 August - Selvedge Binding Tute by Yvonne @Quilting Jetgirl
24 August - Project by Vera @Negligent Style
31 August - Project by Jess @Elven Garden Quilts
14 September - Tute round up on @Quilty Habit and @Quilts of a Feather
21 September - Last linky party - link up all your selvedge projects! @Quilty Habit and @Quilts of a Feather
Clicking on an image will take you to a new page of crafty goodness :)
Disclaimer: This post is for informational purposes only, no payment or commission is received on click-throughs and opinions are my own.























Have never tried using glue instead of pins to place the zipper for stitching so thanks for the comprehensive instructions , I might just give it a go on my next zipper pouch :)
ReplyDeleteI use glue a lot in my work, it's great for holding any seam or two pieces of fabric exactly where you want them. If you give it a go I hope you like it - Chris :D
DeleteYou write such wonderfully clear and detailed tutorials Chrissie. Thank you for taking the time and effort, I've learned some good tips to make life easier. :-) especially the little wrinkle about the final sewing together and sewing onto the lining. Neat!
ReplyDeleteI'm so glad you like the tute Julie. I write my tutes the way I write my class notes and teach my classes, I know my students really appreciate all the little details, thanks for saying the same - Chris:D
DeleteLove your tutorial.....great directions and super great photos, thanks so much!
ReplyDeleteI love a good selvedge project! and thanks for the great tips on installing the zipper :)
ReplyDeleteThank you for the in depth tutorial! :)
ReplyDeleteGreat pouch! Love the tutorial and the selvedge's are so perfect!
ReplyDeleteI love that you left the 'fuzzies' on the selvedges! :D That's one of my favorite parts of selvedge projects. Great descriptive tutorial!
ReplyDeleteI love those fuzzies too and I like to pull them free from my stitches when I'm finished quilting, they add great texture to a project - Chris :D
DeleteI have been saving selvedges for awhile. It might be time I tried this. I have shared your pot on my FB page.
ReplyDeleteMaking selvedge fabric is really easy Maria and then you can use it just like any other fabric in your projects, thanks for the share - Chris :D
DeleteThe black and grey selvedges make a nice little pouch :-)
ReplyDeleteWhat a cute pouch!! I love the fringy look that you kept on the selvedges!! And, Thanks for the excellent tutorial!
ReplyDeleteSusie
Great tutorial and such a cute pouch!
ReplyDeleteI made one of these pouches almost exactly the same way and with selvages. Love how you did your also. Best wishes for a wonderful summer, Linda @Crafts a la mode
ReplyDeleteBeautiful pouches and Wonderful tutorial. Thank you for taking the time to write up such a detailed. pictured tutorial. Awesome!
ReplyDeleteThanks for linking your comprehensive tutorial to #scraptastictuesday
ReplyDeleteGreat tutorial, Chrissy. I've been keeping an eye on the selvage along. I think I may be joining -- looks like fun!
ReplyDeleteAll three pouches are really cute! Love your fabric choices, especially the surprise prints inside!
ReplyDeleteThese look great! I love the idea. It's such a great way to use scrap fabric and I'm a sewer so I end up having A LOT of these selvedge ends! Thankyou for sharing on #HomeMattersParty!
ReplyDeleteAs always Chrissie a great tutorial. I love selvedges and always save them. Particularly like your greys:)
ReplyDeleteI like the look of your selvedge pouches and didn't know about the selvedge sew a long currently on so will be checking out all the other posts too. Time to start keeping selvedge A!
ReplyDeleteGorgeous makes! I love the idea of using selvedges and the pouches are so fun and full of character :) x
ReplyDeleteLove your pouch. I want to make one. I am going up to look at my material store to see if I have enough edges.
ReplyDeleteLoving your tutorials , so detailed x
ReplyDeleteVisiting from Handmade Monday - what I lovely tutorial, thank you! It never even crossed my mind to use the selvedges but that's so effective.
ReplyDeleteI love the selvages to make a zippered pouch, very scrappy and lovely.
ReplyDeleteGreat tutorial on making your 'pouch'. So many ideas for using this, love it. Thank you for sharing with the Clever Chicks Blog Hop! I hope you’ll join us again next week!
ReplyDeleteCheers,
Kathy Shea Mormino
The Chicken Chick
http://www.The-Chicken-Chick.com
LOOOVE your selvage projects and what a fab tutorial! :) Gorgeous work! --Jodie
ReplyDeleteI just made a black and white selvedge pouch before finding this post from the linkup. I love your addition of the bright zipper. Mine stayed monochrome, but the pop of colour really lifts everything.
ReplyDeleteWhat a beautifully detailed tutorial. Almost makes me want to go out and buy a sewing machine so I can try it - LOL! Thank you for sharing.
ReplyDeleteThanks for providing this tutorial - so much great stuff in here for making these projects and also for building skills. I loved that photo with pins, clips and glue all in one. Don't you just adore those selvages with sort of shaggy edges? They are so cool!
ReplyDeleteHi there
ReplyDeleteJust stopped by to let you know that I featured this on my Round Tuit post this week!
A Round Tuit 272
Thanks again for linking up! Hope you have a great week!
Jill @ Creating my way to Success
Wow - I had no idea it was fabric selvage when I first looked at the picture. That is so cool!! You really are talented! Thanks for sharing with us at Dream. Create. Inspire. Link.
ReplyDeleteGreat tutorial Chrissy, thanks for sharing
ReplyDeleteComing back after Christmas to make one of these. Love the selvages! Thank you for the tutorial!
ReplyDelete