If you're thinking about making a Yuma Quilt and joining in the
#YumaQAL with Gotham Quilts you could be forgiven for being nervous about piecing all those triangles together and then joining your rows - well it's the points, isn't it? If there's one thing sure to strike fear into any quilter it's points - well maybe they're up there with Y seams?!!!
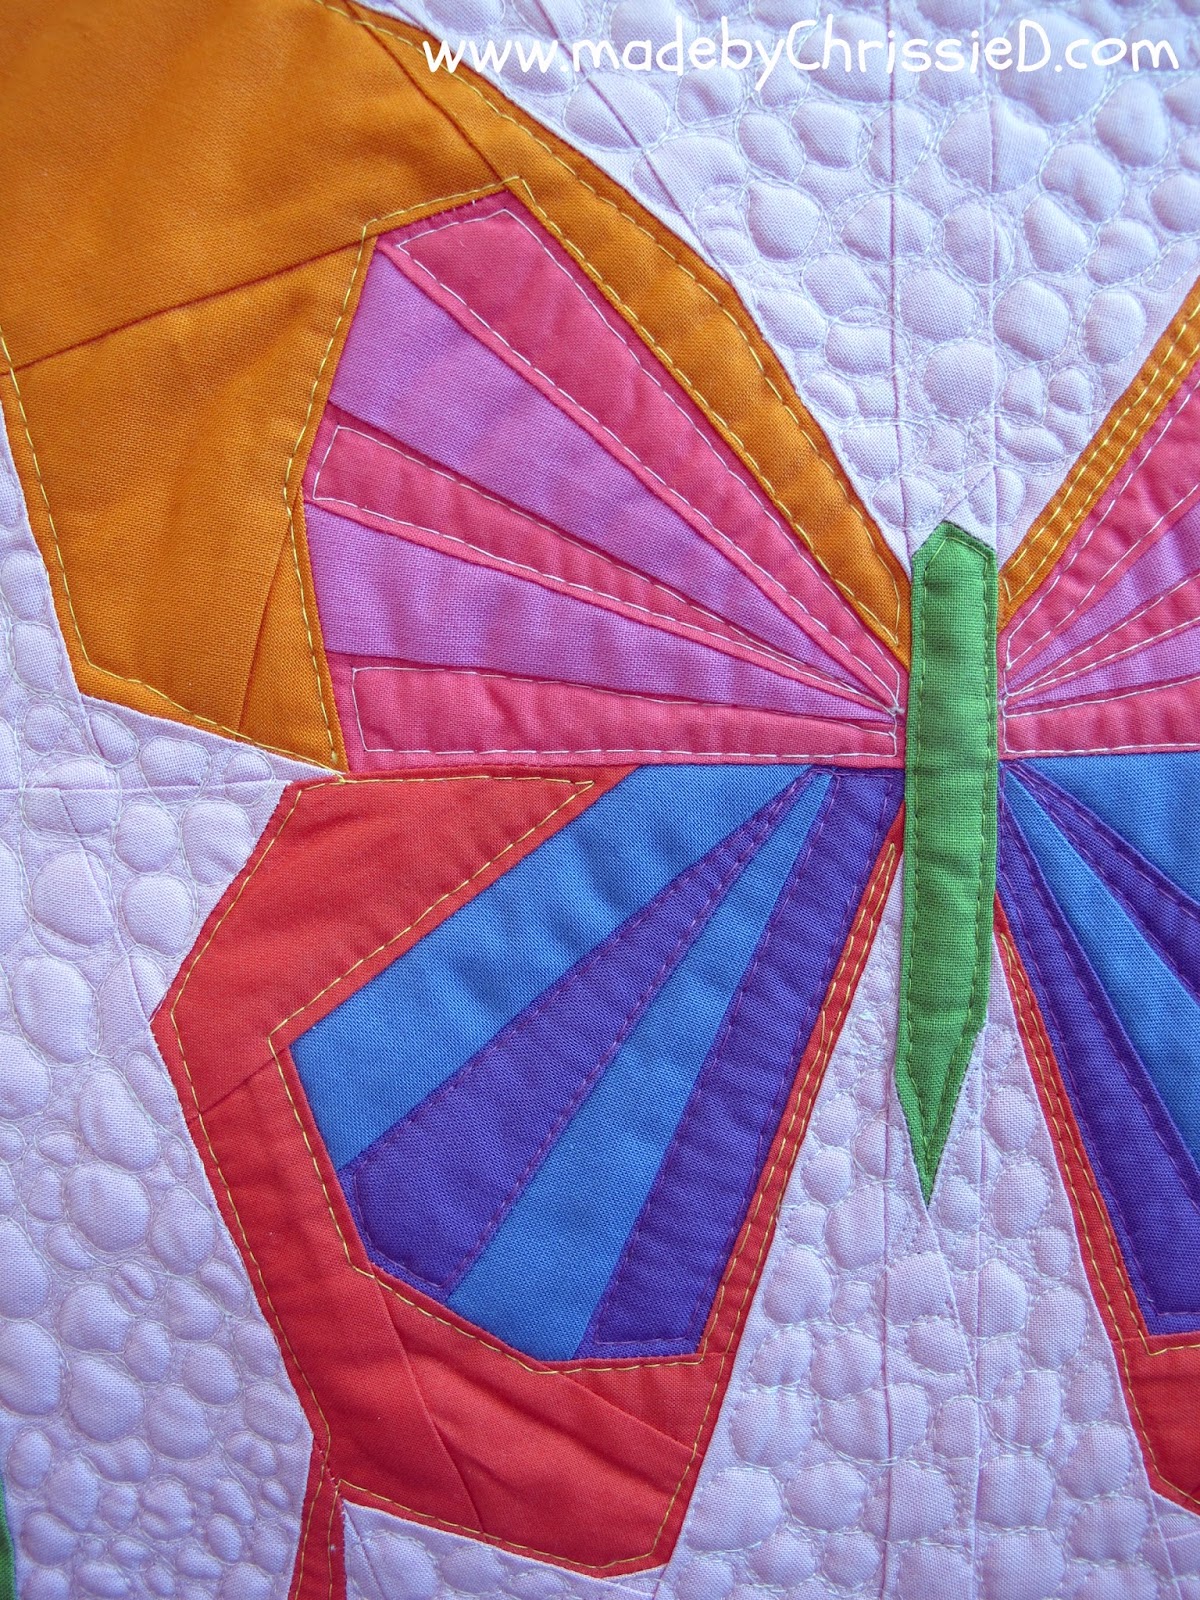
The Yuma Quilt doesn't have a single Y seam in it, but there are plenty of points to worry about. I'd be lying if I said the points in this quilt didn't give me problems - well they were all my own fault actually, totally self-inflicted and caused by the arrival of this beauty.
More about my new machine in another blog post but this is how I committed the fatal error and didn't follow my own advice I give to all my students... never trust your 1/4" piecing foot or your machine's footplate markings, ALWAYS check the accuracy of your 1/4" seam measurement. The thing is even if each seam is just a hair's breadth off a 1/4" then those hair's breadths are going to add up to, well depending on how many seams you've got in your quilt, a whole bloody wig. So eager was I to play with my new toy and to get started on my Yuma Quilt that I forgot my own advice and got stuck straight in, setting myself up for a disaster of oversized Pieced Triangles.
It was only when I started piecing my rows I discovered my mistake and rather than unpicking and remaking 32 Pieced Triangles and 6 Log Cabin Triangles I decided to find a way of making the rows work with the wrong size pieces even if it meant sacrificing a few points along the way. So over the whole quilt I've ensured that the points on every Pieced Triangle remain intact, they're absolutely perfect and the missing points? Well, they belong to some of the Large Triangles but, as my daughter, Flicky pointed out, the design is so strong and graphic that you don't see the missing points, it's like your brain fills them in, it knows they should be there, so it imagines they are. Yes, I won't be entering my finished quilt for any quilt shows as a quilt show judge would spot those missing points a mile away but that blind man on a galloping horse? Well, he won't see them, and that's good enough for me.
So today I want to share with you my tips for piecing and joining those rows the best you can to try to get those points all perfect. The general idea with the piecing is that you place the pieces together with a 1/4"ish overhang at each end and, in theory, they'll match up perfectly, but that's not always the way so here are some things you might want to try if that method's not working for you.
NB: these methods won't necessarily work for everyone, but they're worth knowing about in case they work for you.
A Log Cabin Triangle Side Note:
I found the Log Cabin Triangles were slightly large - but I trimmed down the straight triangle edges (NOT the diagonal) to 12" and found the two centre rows pieced more easily. Please attempt to use the triangles at full size before trimming just in case the original untrimmed size works well for you, but I'm including my trimming note here to document for others the possible need for trimming.
Method 1
The first alternate method I'm sharing is folding. - I took each Large Triangle and folded the sides in half to mark the halfway points with a crease.
I matched this crease to the seam on the Pieced Triangle.
.
Placed them right sides together.
Pinned and sewed my 1/4" seam.
How Should My Points Look And Why?
And here's how EVERY point should look on the right side after attaching the two adjoining triangles. The fabric surrounding every point must measure a minimum 1/4" - this is because this will become your 1/4" seam when you are joining your rows and if you don't have a 1/4" available then you're going to lose some of your beautiful points into that row seam.
My Points Still Don't Look Right
So what can you do if your point doesn't look like this - what if the fabric surrounding your point doesn't measure the minimum 1/4".
First, unpick your seam on the fabric piece that's causing this measurement to be less than 1/4". Don't cry, I know it's really hard ;D but that unpicked seam is going to turn out to be your best friend making getting perfect points even easier.
If you've already pressed the seam open that's even better, don't press it back flat, just remove the offending stitches. Now place the pieces back together where you think might be a good match to get that elusive 1/4" above the point. Place your pin along the seam, as shown below. Place it exactly along the seam where your stitches would go.
Now fold the fabric back as if you'd sewn the seam, it's easy to do because it's still got the previously sewn seam memory in the fabric. If your fabrics are lined up correctly, then the two fabrics above the point should be lined up pretty much in a straight line and at least 1/4" above the point, just like in the pic below.
If the point looks and measures up correctly now, you're on a roll and can place more pins along that seam as shown in the pic below and sew in that new 1/4" seam. If your point still doesn't look right, all you do is remove the pin and slide one fabric along the previously sewn seam line a little, replace the pin and recheck the status of the points. That already sewn and pressed seam can just slide from side to side until you find the sweet spot for your point.
Method 2
If this doesn't work for you, then here's another way you can try. See those overhanging points in the pic below?
You can try lining them up to about the same overhang level - it doesn't work precisely every time but if your frustration's rising it's def worth giving a go.
Patience Is A Virtue
Take time to check each point, it'll be so worth it in the end.
When you're happy with your points, you're ready to join your rows.
Joining Your Rows
Once all your rows are pieced, double check those minimum 1/4" fabric spaces above each point and trim your rows straight if there's any excess over a 1/4" along the full length and on both sides of each row.
Take a pin and put it through a point on your row from back to front.
Then place that pin through the front to back through the corresponding point on the next row.
Pull the pin vertically through all the layers - don't allow any movement in the fabric that hair's breadth is critical again here.
Take a second pin and insert through all layers of the 2 rows pinning as normal, pin as close as you can to the vertical holding pin and don't allow any movement in the fabrics.
Remove the vertical holding pin and repeat on each corresponding pair of points along the 2 rows that you're joining.
Sew the two rows together along the full length with a 1/4" seam.
OR
here's my tip for reducing the amount of unpicking you might have to do
Don't sew the full length of the row - chances are one or more of those points isn't going to match exactly, and you'll spend a lot of time unpicking and resewing the whole seam. Instead, just sew from an inch before to an inch after each point. In the pic below I've added a dotted line under each of the short sections I've sewn.
If all your measurements and trimming are correct, your 1/4" sewn line should be right alongside the point as you see the sewn line against the grey point in the pic below.
When you've sewn two inches at all point sections along the row, you can open up the two rows and take a look at how accurate your points are.
Some will be slightly offset, and you may want to unpick and resew them - but it's no big deal as you're only unpicking that 2" section.
Some points will be first time perfect, and then you have my full permission to happy dance!!!
Just look at those points :D
When you're happy with all your points, you can sew a 1/4" seam along the full length of the 2 rows.
If your full row of stitches is right on top of the short sections there's no need to remove the original stitches, you can leave both in the quilt.
Last Chance Saloon
If you're still struggling with those points, I have one final method you can try.
Line those points up using the vertical holding pin method above and carefully remove the holding pin. Peel the top layer of fabric back without disturbing the placement of the layers and see if the tips of the points match in a tiny square as in the pic below.
If the points create a perfect square then very carefully place the two rows back together and pop a pin directly through the points doing everything possible not to disturb the placement,
Don't worry you're nearly there now and look how wonderful your Yuma Quilt top's starting to look :D
Two Rows 
Three Rows
Four Rows - half way there!!!
Just When You Think It's All Over
Had enough yet?
There's still joining the middle two rows to consider. Those Log Cabin Triangles form a centre square when joined. In addition to checking your points, you need to make sure your seams meet correctly on each square.
I can't wait to share my finished Yuma Quilt top with you tomorrow, I'm excited to find out what you all think of it. Don't forget to look back through all my post from the #YumaQAL week - you can click the links for previous days to catch up on those too:
If you want to join in all you need to do is download the free Yuma Quilt pattern here and be sure to share your work on Facebook, Instagram, Twitter, etc using the hashtag #yumaQAL. Even if you're not making your own Yuma click through to the Instagram #YumaQAL and take a look at what everyone else is up to.
YUMA QAL SCHEDULE
Each week another blogger will be sharing their YumaQAL experiences with you:
Clicking on an image will take you to a new page of crafty goodness :)


 Disclaimer: Gotham Quilts supplied the fabrics used at a discount price to mbCD otherwise this post is for informational purposes only, no payment or commission is received on click-throughs and opinions are my own.