My
NYC Mod Quilt Guild Bee has entered a new year and E gets to be Queen Bee again - you might remember that last year she had us create blocks for her
Bible Quilt.
This year E has come up with another wonderful challenge - a modern take on the traditional
Sunbonnet Sue/Sam.
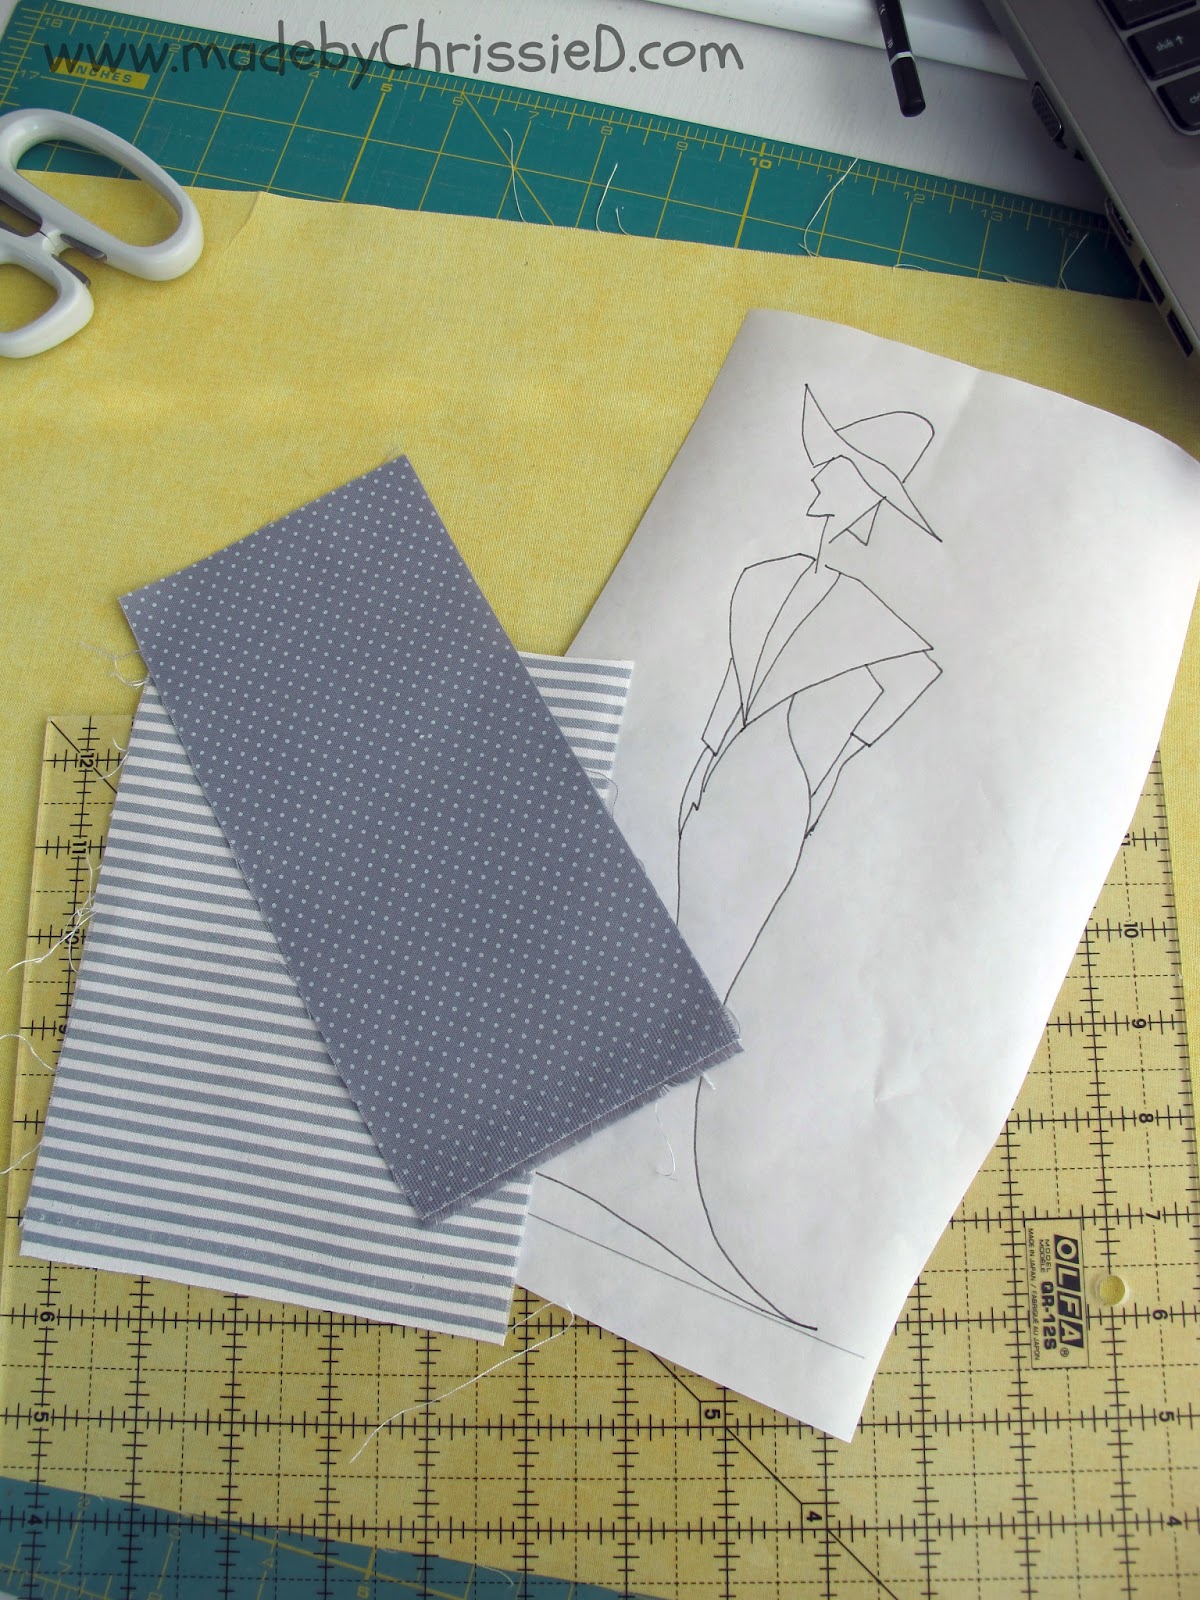
Here're the fabric and instructions that she sent out to us
This was a great chance for me to do something a bit more artsy so here's photos I took along the way so you can see a bit of my planning and design and how I created the block
 |
| Outline sketch of Sunbonnet Sue on freezer paper. |
 |
| Fabric detail added to sketch. |
 |
| 12.5" square drawn onto yellow fabric with a blue water erasable marker, if you squint you can just about see the blue lines drawn on the fabric. Don't cut the block to size yet as the fabric may 'shrink' when you satin stitch the applique onto it. |
 |
| Sections of sketch cut out and ironed onto fabric (freezer paper adheres to fabric but not permanently). The fabric is ironed onto the top side of light weight double sided fusible. |
 |
| Hang on to all the small cut out bits of the sketch that don't need to be ironed onto fabric, you'll need them later to create an outline on the fabric. |
 |
| Iron the freezer paper sketch outline onto the background fabric in the exact position that you want Sunbonnet Sue to be and draw around the outline as a template - I again used water erasable marker at this stage. |
 |
| Remove outline template and place cut out fabric sections of the sketch on background fabric to check placement. |
 |
| Now I used a fabric pencil to draw over the sections of the outline that I wanted to create with a stitched line on the finished block and then I used water to erase all the blue lines from the fabric |
 |
| I removed the backing paper from the double-sided fusible and ironed the fabric pieces into their final position on the background fabric and then I removed the sketched freezer paper from the top of each piece. |
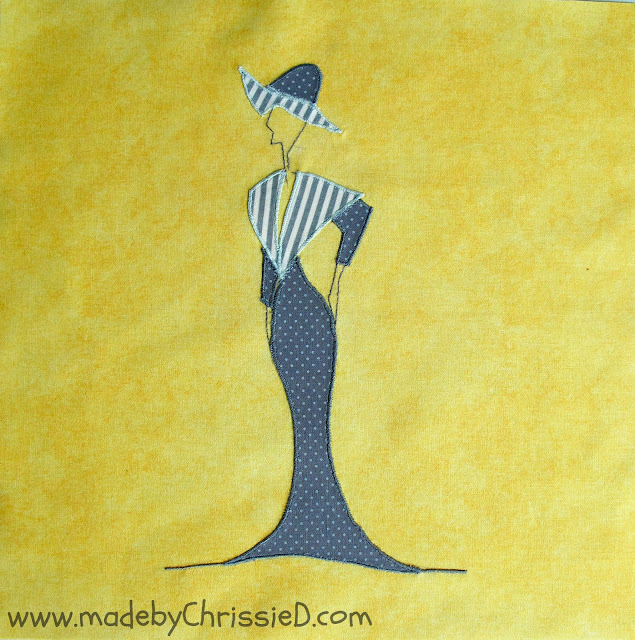 |
| I used a straight stitch to sew over all the pencil lines on the background fabric and once this was done the pencil lines were no longer visible beneath the stitches. Next, I used a satin stitch to outline the edge of each fabric piece and to hold it securely in place. I changed the colour of the thread in different areas to add detail. |
 |
| I knotted and sewed all the threads through the stitches on the back of the block and then cut the block to size (12.5") |
I'm in love with my finished block - is that okay to say out loud? I love her so much I'd like to keep her for myself. I'm very reluctantly going to pop her in the post to E over the weekend and can only hope that she loves her as much as I do.
I really can't wait to see other blocks for this quilt being posted, it'll be fun to see what everyone else's take is on a modern Sunbonnet Sue/Sam.
You can see my NYC Metro Mod Guild post about the Bee Block
here.
Related Posts:
Related Pinterest Boards:
Click these buttons to see more of my NYC Mod Guild blocks and my tutorials
Disclaimer: This post is for informational purposes only, no payment or commission is received on click-throughs and opinions are my own.


Just awesome! I used the same technique making the center block for my dad's golf quilt. I really like her flare and ..uhm curves :-)
ReplyDeleteShe's just as cute as the original "Sunbonnet Sue"! I wish my waist looked like that!
ReplyDeleteThis is the very first Sunbonnet Sue I truly like!!!!
ReplyDeleteWonmderful.
Nana
That is so cool! I loved seeing your design process - awesome!
ReplyDeleteOooh! I like modern Sunbonnet Sue. I've never really liked the old fashioned Sue. (Sorry Sue, nothing personal). Thanks for the inspiration.
ReplyDeleteShe's wonderful - very elegant :)
ReplyDeleteLove it! A bit of Edwardian flair, I think? Love, love, love!
ReplyDeleteSo creative and just lovely!
ReplyDeleteShe looks fabulous. I love your fabric choices. Very creative.
ReplyDeleteCurvey girl! Very smart.
ReplyDeleteVery smart. Love the new sunbonnet sue
ReplyDeleteSunbonnet Sue is STUNNING!!!
ReplyDeleteGorgeous Chrissie!
ReplyDeleteI've never tried this technique before...how wonderful. I love it!
ReplyDeleteHo ho ho! You are amazing!!! This design is wonderful!
ReplyDeleteSilvana
I like this Sunbonnet Sue much better than the old one! So sleek and elegant!
ReplyDeleteWhat a fabulous design!! Love your modern version.
ReplyDeleteSo creative!!!
ReplyDeleteSo pretty Chrissie!!
ReplyDeleteJust stopped by to let you know that I featured your quilted pillow cushion cover tutorial on my round tuit post this week!
Round Tuit 154
Thanks again for linking up! Hope you have a great week!
Jill @ Creating my way to Success
Thanks Jill, it's such fun to be featured, I've also done a thank you to you on my blog, my facebook page and on twitter! Have a great week :)
DeleteI'm so impressed. You did such a great job. I can't wait to see the others.
ReplyDeleteShe is lovely! A very glamorous Sunbonnet Susanne (she's too chic to be a Sue!)
ReplyDeleteShe is so chic! Great job describing your design process. I don't think I would know where to start with that! :)
ReplyDelete-Kelly @ My Quilt Infatuation
Oh you'd be able to do it fine Kelly - just grab some of that double sided fusible, it makes anything possible!!! :)
Deletepretty, jumping over from Anything Goes !! WOW
ReplyDeleteLove all the pics in your post, such a chic SBS! ooh la la ...
ReplyDeleteMuch nicer than the traditional block. :)
ReplyDeleteOh this really caught my eye!! Thinking "Oh I wonder if i can do this?" And then seeing your process? I think I will just appreciate your work from this side of my computer screen. A wonderful talent you have.
ReplyDeleteDon't be put off Kathy - anyone can do it - it's the double sided fusible that makes it so easy, it's just glue for fabric. Go on give it a go! :)
DeleteThank you for this interesting tutorial!
ReplyDeleteEsther
ipatchandquilt dot wordpress dot com
A Thoroughly Modern (and very stylish) Sue! I wandered in from Tuesday Building Blocks. Thanks for sharing ... :) Pat
ReplyDeleteWow. That was a lot of work. It sure turned out lovely - just really great. I can't wait to see what everyone one else creates.
ReplyDeleteSunbonnet Sue grew up to be quite the looker! :) {not to mention a snazzy dresser}
ReplyDeleteWow Chrissie!! She is awesome, you have created something so neat! Thanks for sharing.
ReplyDeleteFreemotion by the River Linky Party Tuesday
Very modern and very glamourous. Loved looking at it.
ReplyDeleteChristie, you got my small waist and wider hips perfectly....lol...I am so glad I decided on this....I love seeing the interpretations and design. Also glad I chose the yellows and grey's...it allows for fun...awesome... So excited. The updated sue will grace the Internet...because there are currently none, prior to my choice. Trust me I searched...so my bee folk are making Internet history with a 2013 version of sue/Sam.....
ReplyDeleteHow fab that you spotted I'd modelled her on you! There's been such a fab response to the block, the fabrics, colours and design, I think the quilting community was ready for a SBS revolution - what a fab challenge you came up with E :)
DeleteWhat a fun design inspired by an old classic. I enjoyed seeing your block and marvel at the patience that you had to put it all together.
ReplyDeleteShe looks amazing. I hope you come up with more of her.
ReplyDeleteI just discovered your beautiful blog through Freemotion by the River, I'm so glad that I found you! I love your blog and I also love your creations. New follower here via GFC and bloglovin. I invite you to visit my blog and if you like my creations I hope that you will consider to follow me back.
ReplyDeleteNice to meet you.
Marisa from
http://passionetcouture.blogspot.ca/
This is so chic! My readers at FaveQuilts would love it!
ReplyDeleteKathryn
Thanks for the wonderful tutorial. I want to make a quilted picture for our wall and this will be really helpful. I had to Google freezer paper and was relieved to find out its greaseproof paper here in the UK. So I've no excuse now not to get started.
ReplyDeleteAli xx
Hi Ali, wanted to get back to you asap, I'm English living in America and I can confirm that freezer paper is nothing like our UK greaseproof paper. I know on the internet some people say it's the same thing but this is only in terms of being able to freeze food in it, when it comes to crafting/applique the differences between the two products means they're not interchangeable. Freezer paper used to be available at craft stores in England rather than supermarkets - it's thick, white paper with a very thick waxed layer on one side that becomes sticky when warm but will peel away again when cool without leaving a residue. I found this link on Amazon.co.uk so you know what the box looks like (this is the same brand we have here in the States) and there's other places you can get it too - and possibly some Tesco/Waitrose have it these days, not sure. Hope this helps, didn't want you to buy the greaseproof paper and be disappointed. Hope this helps a bit and look forward to seeing what you make with it :D
Delete