How To Make Selvedge Fabric - A Fast & Easy Tute
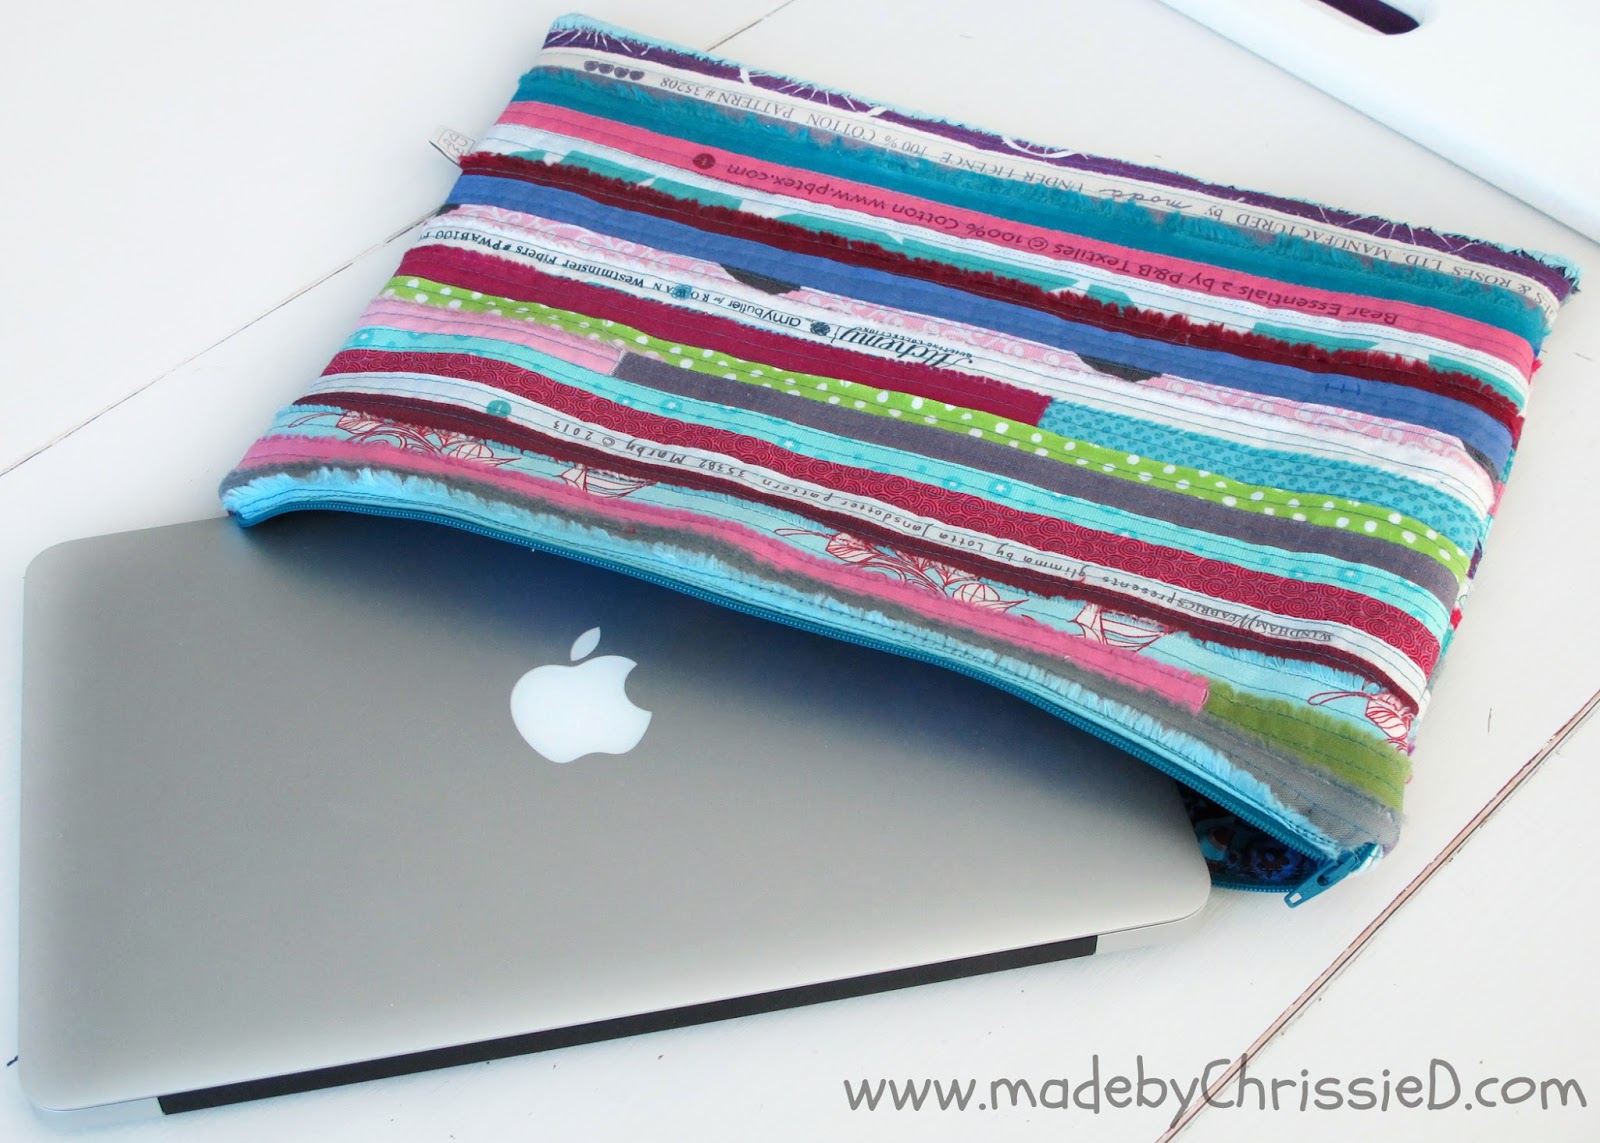
This week I've made a laptop case using selvedges and I thought I'd share with you how I create selvedge fabric.
When I buy a piece of fabric I remove the selvedges along both edges by folding the fabric in the correct direction to cut them off as full-length strips. It's up to you how wide you cut them, you may want to cut them wider and see more of the original fabric design.
Update on 11 September 2018
Making fabric from my selvedges has become an important part of my design so these days I have increased the width of the selvedge I cut off a piece of fabric. I'm now cutting at 1-1/8". This gives me more wiggle room for overlapping the fabrics and leaves more of the print section visible on the text selvedge edge. The rest of the process in creating the fabric remains exactly the same😊.
To make selvedge fabric first I take a piece of batting or backing fabric - whatever suits the outcome of your project best - and cut it at least an inch wider and longer than the finished size of selvedge fabric that I need.
Next, I spray it all over with basting spray such as 505 (temporary/repositionable) fabric spray adhesive - using a repositionable adhesive means you can change the strips around until you're happy with the look.
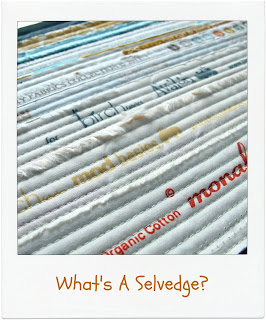
Now comes the fun part - lay your selvedges row by row onto the now sticky backing fabric. Start at the bottom edge of the 'fabric' placing the frayed/finished edge bottom-most. Overlay the next selvedge over the cut raw edge - slightly overlapping it. You may want to vary the amount you overlap the selvedges by so you can see more/less of the colour/design/text. You can use more than one selvedge along a particular row - using up shorter lengths of selvedge - just lay them side by side and leave the side edges raw, any fraying will be minimal and adds to the look of the finished fabric (as in the top row being placed in the photo above)
Once the backing batting/fabric is completely covered with selvedges you are ready to sew the selvedges in place. (If you are creating a Quilt As You Go (QAYG) block then at this stage you can spray baste your backing fabric to the made fabric.) The spray basting should hold the selvedge strips firmly in place while you complete this stage.
I sew/quilt over the length of the selvedges using my 1/4" foot as a width guide. I choose one very straight edged selvedge as a marker for my first row of stitches and then use this as a loose guide for my next rows 1/8" to 1/4" apart - I'm not looking for a perfectly straight line finish here. Placing the stitch lines so close together firmly fastens down all the selvedge edges and creates the fabric.
There're other methods of attaching selvedges that leave the finished edge of each selvedge strip loose from the background fabric but this I like that my method ensures each strip is well attached and often I use a contrasting thread so the stitching becomes part of the finished design also.
Here's a finished QAYG selvedge block that I made last year as part of my Something NEW Sampler Quilt.
This block contains selvedges from all the fabrics used in making the quilt.
This is how the back of the fabric will look - in this case, you're seeing the backing fabric of the QAYG block but if you've just used a backing fabric or batting then you'll see that instead.
Once you've finished your 'made' selvedge fabric then you can trim the edges/cut the fabric to size and use in your chosen project. And that's all there is to making selvedge fabric!!!
Check out my other Selvedge posts:
This time, I used it to make a laptop case
Crazy about that Kaffe Fassett blue Millefiore lining
I love selvedge fabric - it's so individual and scrappy looking, there's always something to look at and read!
I've wondered about crocheting/knitting with my selvedges too - have you tried it? I've crocheted/knitted with lots of materials in the past - one of my favourites is plastic carrier bags - great for making waterproof garden table place/drink mats and chair covers but that's a whole other post!
Do you save your selvedges? If you do then share what you've made and if you've used a different method to make selvedge fabric tell us about that too.
Updated On 21 April 2014:
The laptop case was a present for my daughter's friend Hayley and here's a photo Flicky sent me of Hayley with her case which she tells me she uses every day. The photo is also proof that the sun does shine sometimes in St Andrews, Scotland!
Featured On:


Clicking on an image will take you through to the new page of crafty goodness :)
The laptop case was a present for my daughter's friend Hayley and here's a photo Flicky sent me of Hayley with her case which she tells me she uses every day. The photo is also proof that the sun does shine sometimes in St Andrews, Scotland!
Updated at 11 September 2018
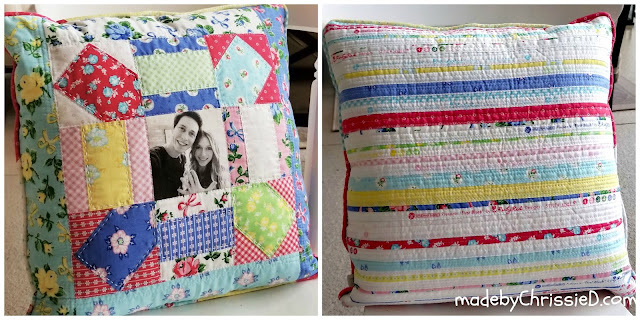
I've used a piece of selvedge fabric for a cushion back - I looove how this looks, don't you?
See more about this cushion here in this blog post.
and another I made last year - read more about it here.
How To Make Selvedge Fabric - A Fast & Easy Tute
Featured On:


Clicking on an image will take you through to the new page of crafty goodness :)


Thank you for the tutorial! I love your bag and I love the colours of those selvedges. I've been saving mine for about a year now, and I'm musing over what to make with them. I must put them to good use soon :-))
ReplyDeleteFlicky picked out the selvedges Sarah - the laptop cover is a birthday gift for one of her uni friends, she tells me it's been very well received :D
DeleteNewt tutorial Chrissie... I just started collecting my salvages - one day I'll have enough to use them. Take care now...
ReplyDeleteJust given away my selvedges so will have to start saving them again to have a go at this. Love the Kaffe Fassett lining too!
ReplyDeleteI do save my selvedges! And now I'm inspired to make something with them. Love your lap top cover! Visiting from Crazy Mom Quilts.
ReplyDeleteSo cool! I saw it on IG and glad I got to your blog!
ReplyDeleteWhat a great tutorial Chrissie! And your laptop case is gorgeous, so are your photos! I might just save the selvages of my next quilt!
ReplyDeleteI save every.single.selvedge - and have never done anything with them. The result is overflowing selvedge bins! Thanks for the tutorial, makes for a wonderful fabric. I just may have to try this!!!
ReplyDeleteLove the laptop case.
ReplyDeleteReally nice, Chrissie!!
ReplyDeleteThat's it... I'm saving all selvedges from now on. I have used selvedges to make book titles on a Library Bag and to make scrappy bows, but usually I toss them... not any more. Your laptop case looks awesome, Chrissie... only the best for a Mac :-)
ReplyDeleteI've featured your fabric selvedge today...
DeleteThanks Pam for your comment and the feature, as you already know I've given you a shout out on my Facebook page :D
DeleteI made mug rugs out of the Downton Abby fabrics and appliquéd the selvage on the back to indicate whose fabric it was. They turned out great.
ReplyDeleteLove your blog. Lee
I'd love to see those mug rugs Lee - and they must look great with the selvedge appliqued, I love that it has the appropriate collection character's name on it. Did you see my Downton Abbey Trunk Show post? I still haven't bought any of the fabric, I look at it every day I'm in work and I just haven't been able to make up my mind though the Dowager's collection was my immediate favourite but I keep being drawn by Lady Mary's collection too! :D
DeleteThis is a great idea and I love how it turned out!! Pinned! Thanks so much for linking up this week at Sewlicious Home Decor! :)
ReplyDeleteMarti
I love this. I need to start saving mine..
ReplyDeleteSo cute!!!!!! And great tutorial, easy to follow. Pinning.
ReplyDeleteI love recycling and this is a perfect idea. I already have a gift in mind! Thanks! {:-Deb
ReplyDeleteThis is a very great tutorial! I love the several rows of stitching you do.... Very pretty!
ReplyDelete:)
Have a happy week!!
hugs x, Crystelle
Crystelle Boutique
What a fun idea! Thanks for the tutorial!
ReplyDeleteA super idea. Nice to use every piece of the fabric and not throw anything away :)
ReplyDeleteI like the raw edges on this laptop case! Very creative!!
ReplyDeleteYou've got the best method yet. Sounds good to me and will try it next time. I made a pouch and when I whip it out of my purse at the quilt shop, the other customers go wild. You'd think it was the hope diamond when it's just selvedges.
ReplyDeleteThanks and you made me giggle, I love how complimentary and supportive crafters are of each other and working at The City Quilter each day customers bring in a constant source of inspiration and items to WOW at :D
DeleteOMGosh, wow. I never would have thought to do this. I am in love. I need to do this tomorrow. I have a large rubbermaid box full of selvedge.
ReplyDeleteWelll I'm loving your mini Sawtooth Scrap Quilt too! Let me know if you do use this technique, looking forward to seeing what you make with it. Hope you're feeling much better today too :D
DeleteBeautiful work Chrissie and selvedges are so fun to use! Thanks for sharing.
ReplyDeleteFreemotion by the River Linky Party Tuesday
this is so cute Chrissie! selvages are so much fun. I just never do anything with them! maybe I should start...
ReplyDeleteThanks for linking up to Needle and Thread Thursday!
:) Kelly @ My Quilt Infatuation
Waste not, want not! What a great idea.
ReplyDeleteBoth of these are beautiful! I haven't kept selvages...but I keep thinking I should, especially after seeing such cool project like this!
ReplyDeleteThis looks like so much fun! I have recently started keeping my selvages so will pin this for future use. I also started making crumb blocks this year too - might as well save every little bit right?
ReplyDeleteGreat looking case, thanks for tutorial.........came to have a look from Amanda Jean's blog :0)
ReplyDeleteHappy Sewing
great tutorial :)
ReplyDeleteGreat tutorial - I often use selvedges but I've never done it this way :).
ReplyDeleteHi Chrissie, just found your blog via Sewlicious' link party. What a terrific idea; it looks like a piece of art! One of these would look good in a frame on my sewing room wall. Good tutorial, thanks for sharing!
ReplyDeleteVal @ artsybuildinglady.blogspot.ca
This comment has been removed by the author.
ReplyDeleteSuper cute! Thanks for sharing tutorial! Would love to have you visit me sometime.
ReplyDeleteHope you have a wonderful week!
Hugs from Portugal,
Ana Love Craft
www.lovecraft2012.blogspot.com
I love the way you did this. I've seen many other ways to make selvage fabric... but I like the look of this one. Thanks so much for sharing!!!
ReplyDeleteThis is so wonderful! I was into selvedges a few years ago. That was so fun. I made a little pouch and I never used it. I was afraid it would get to looking ratty and I love it as it is. Thanks for sharing. Now I want a computer case made with selvedges, too. I love yours! Linda
ReplyDeleteFeaturing. Pinning.
What a great idea for a laptop cover! I also love that you left some of the selvages raw edged!
ReplyDeleteThis is awesome! I just found your blog and you are one talented lady! I would love for you to link up a project or two at the Stitch It, Blog It, Share It Link Party going on now at BehindtheSeamsSewing.com.
ReplyDeleteI adore the look of this fabric! Very eco chic. What a beautiful result, and I had no idea how you were going to do it.
ReplyDelete