Making your own cards can be economical and fun, and it's a great way to use up fabric scraps and selvedges. Today, I'm making Christmas cards, but you can easily adapt the technique to make cards for any occasion.
How To Make Selvedge and Fabric Christmas Cards
Disclaimer:
This post is for informational purposes only; no payment or commission is received on click-throughs to links shared.All materials are mbCD's own.
Materials:
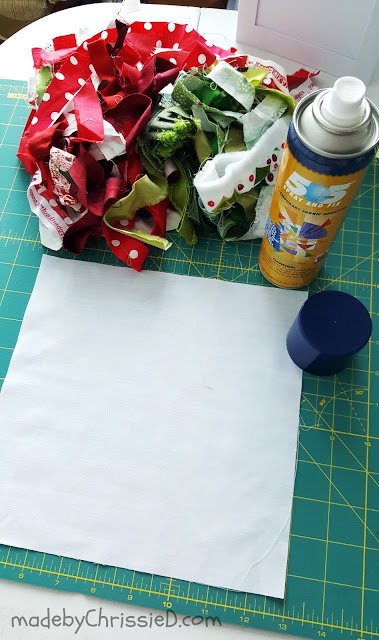
Scrap fabric—I'm using 5" squares, so Christmas charm packs are ideal. If your scraps are smaller than this, you can sew them together to make them up to this size. I'll also give you details of how to work with other sizes.
Cardboard - I'm using bought blank card/envelope sets in 3 different styles/sizes, but you can just as easily fold your own card stock and use standard envelopes.
water based glue stick
Optional Materials:
thread and embellishments
printer paper for printing inserts
PVA glue (see later diagram for more info)
Cards:
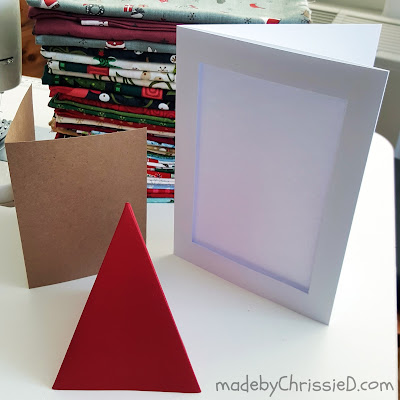
These are the 3 card styles I'm working with. You can buy these in packs from craft stores such as Michaels (US), The Range (UK), and many similar outlets.
Brown and Red cards - 5-1/2" x 4" (140 mm x 100 mm)
White card - 8-1/4" x 5-3/4" (210 mm x 147 mm)
Prepping Fabric:
Let's talk a little about prepping the fabric before cutting. I'm a huge fan of raw-edge applique, so I've not prepped the fabric at all. If you're not in love with a fraying edge, then I have the answer for you.
Many years ago, when studying textiles, I was taught to coat fabric with a 50/50 mix of PVA glue and water to prevent fraying. Here's how to do it.
I cut (10) 5" squares so I'd have a range of prints to choose from. As you get 8 triangles from each square, this gave me 80 triangles. This was too many triangles for my needs, though you may be making more cards than me, and I have lots left over for next year!
How To Cut Fabric Isosceles Triangles:
This is how to quickly make fabric isosceles triangles that represent Christmas Trees. I first saw this technique in a video by Katie @The Crafty Blog Stalker when she cut cardstock for bunting - How To Cut 8 Pennant Pieces Out Of 1 Sheet Of Cardstock. I knew this would be really useful for cutting fabric triangles, too - and it is. If you'd like to see a video of how Katie uses this technique to cut cardstock, here is the link; I will show you how to cut fabric using the same method in photos.
Smaller print designs work well, and I'm using a 5" square, which will give me (8) 2-1/2" high triangles. You can use any size square to suit the height of your card, and here's the maths to calculate your triangle sizes:
The height of the triangle will be half the size of the square:
10" square = (8) 5" high triangles
6" square = (8) 3" high triangles
4" square = (8) 2" high triangles.
NB: This cutting technique doesn't work well for directional fabrics. If you want to use a directional fabric or a particular part of a fabric design, I suggest making a template from clear plastic and fussy-cutting each triangle individually.
A 'No-Sew' Fabric Christmas Card:
Play around with layout designs on your card, then glue in place with a water-based glue stick - I love Elmer's Disappearing purple as I can see exactly where I've applied the glue, and then it 'disappears' :D
So the fabric's in place - what next?
Well, you can keep things really simple and leave your cards just as they are, or you can start to embellish your work.
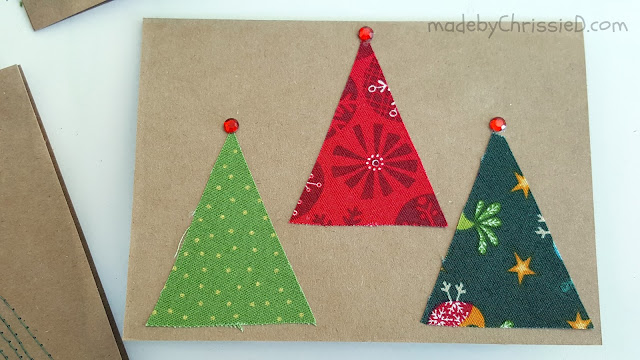
No sewing is involved, so I've glued a 'jewel' to the top of each triangle.
And here I've glued sequins.
How To Sew A Fabric Card:
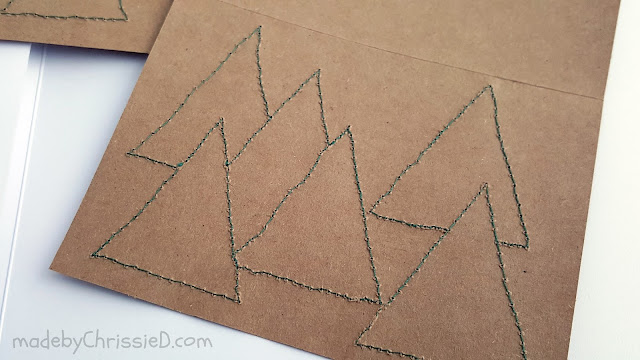
On the card below, I've scribble stitched around the triangles using my free-motion foot, but you can just as easily use a straight stitch and pivot at the triangle corners.
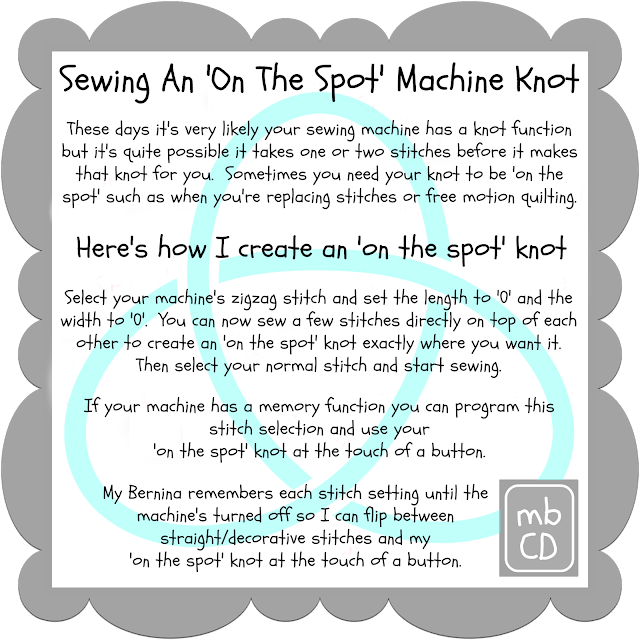
As I start and end sewing, I create a machine knot and then snip my threads away against the card surface. Your machine may have a machine knot function—mine does—but it likes to take a stitch forward before creating the knot. Here's how to create an 'On The Spot' machine knot without using this function.
If you have a straight stitch-only machine, you can turn the straight stitch length to 0 to create this knot.
If you've used a large card and have a small sewing machine harp/throat, take care not to damage your card against the machine when stitching your fabric in place—free-motion stitching eliminates this potential problem totally.
Never sewn paper or card before? It's super easy - just like sewing fabric but here are my tips to keep life simple:
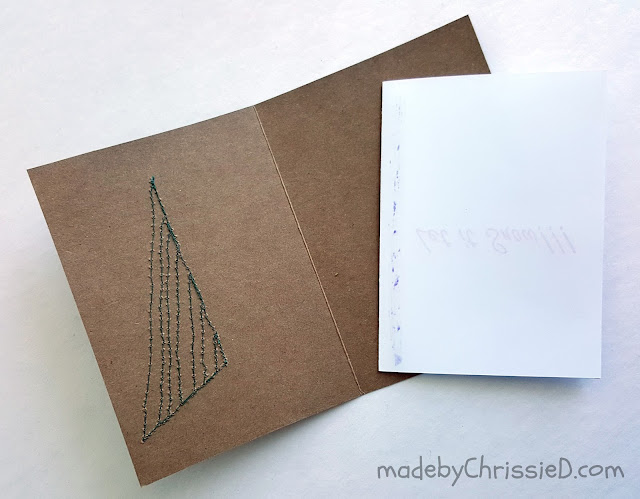
This is how the inside of the card will look after sewing.
I'm happy to leave my cards looking like this, but you may want to glue a piece of paper over the card inside page to cover the stitches.
Making A Selvedge Fabric Card:
I've shared how I make selvedge fabric with you before - you'll find my tute here:
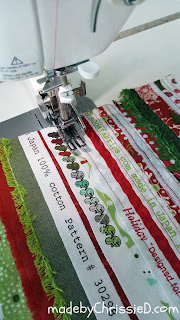
This time, I'm using all Christmas fabric selvedges and some red and green selvedges, too. Rather than batting, I've used a piece of muslin as my foundation to reduce the thickness.

I've trimmed my finished selvedge fabric square down to 8" so I can make (*) 4" high isosceles triangles using the technique I shared above.
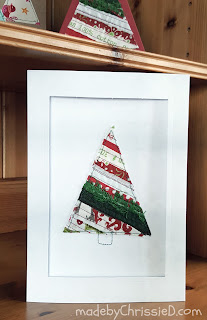
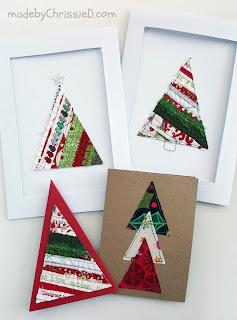
I glued a triangle to the centre of one of my white cards with a framed outer section.
I free-motion scribble-stitched the triangle to the card and added a sewn trunk to the tree.
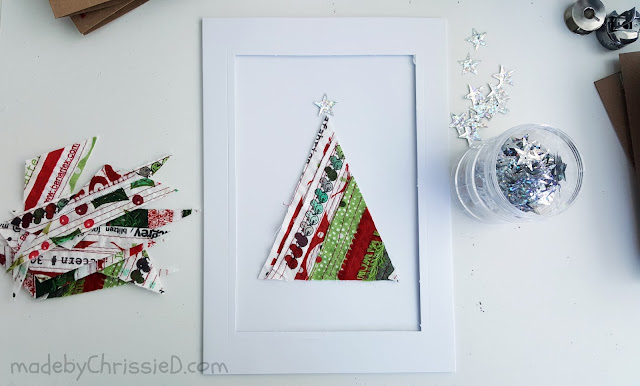
This is a 'no-sew' version of the same card with a glued silver star.
Be careful not to make the same mistake I did on this card. I think this one will have to go to a left-handed friend, as the opening is on the wrong side!
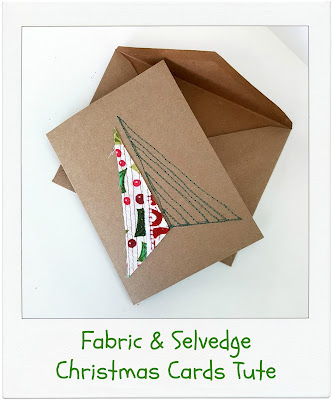
The final version is half fabric and half stitching, using a scrap section left over from cutting the 8 triangles from the selvedge fabric square.
Adding A Paper Insert:
I've created paper inserts for my cards by printing holiday phrases onto white standard printer paper and using Free Style font to create text. For the 5-1/2" x 4" (140 mm x 100 mm), my paper insert is 5" x 7-1/4" (127 mm x 184 mm) folded in half.
I ran a line of glue stick down the fold line on the reverse of the text side - you can just about see the purple line of glue down the left side of the white paper below -
The paper insert and card fold lines were pressed together.
Today, I shared the simplest fabric card technique so you can see how quick and easy it is. Obviously, there are many ways you can develop this technique further to create stunning individual cards that no one will want to throw away when Christmas is over!
Tips For Developing Your Ideas:
So now you know
How To Make Selvedge & Fabric Christmas Cards
Isn't it easy?! Will you be making your own Christmas and Holiday cards this year?
Featured On:

Clicking on an image will take you to a new page of crafty goodness :)
Disclaimer:
This post is for informational purposes only; no payment or commission is received on click-throughs to links shared.
Click to follow Chris Dodsley of made by ChrissieD on Bloglovin.'


















Hi, I hopped to you from Sarah, and these cards are a super way to give a handmade gift as a card. Lots of time to get the technique perfected before the Christmas season arrives.Love your additions , they make the cards so special.
ReplyDeleteComment #2, I forgot to write... that your header photo, with a quilt in front, superb, one set of colours echoing the others , the way you draped your quilt, and the background for your photo shoot.
ReplyDeleteThank you for the Christmas card ideas & tips-I especially liked the selvages one-very nice!
ReplyDeleteI love making handmade cards for the holidays or for everyday notes and greetings. You've shared so many great tips, thank you!
ReplyDeleteThese cards are too adorable!! Thank you for putting this all together for us! And thanks for the inspiration, I will be making cards this Christmas.
ReplyDeleteThanks for the great tutorial! I didn't know that Michael's has the blank cards.
ReplyDeleteI love this idea! Thanks for sharing with us!
ReplyDeleteThanks for the wonderful tutorial! I have been making cards with my scrap fabrics for a while, and this has given me some great new ideas!!!
ReplyDeleteHI,neat tutorial>love these cards! Thanks for sharing!
ReplyDeletemsstitcher1214@gmail.com
Sewn cards look so effective, don't they, and I find the recipients always love them. I especially like the selvedge Christmas cards - great way to use up my selvedge stash. You've just solved a puzzle for me - Elmers glue is just plain old PVA glue.
ReplyDeleteThese cards are a great idea Chris and I'm sure people receiving them enjoy them immensely. Nice to join you on the Hop!
ReplyDeleteMarsha @QuilterinMotion
What an absolutely well thought out, complete and detailed tutorial. Although I don't see myself ever having enough fabric selvages to attempt this, I love your results.
ReplyDeleteTerrific ideas, so pretty and so simple. Thank you for sharing!
ReplyDeleteI love the simplicity of the design. Great.
ReplyDeleteLove stitched cards and those trees look so good
ReplyDeleteLove your card ideas! Going to try them out!mumbird3(at)gmail(dot)com
ReplyDeleteIt's far too early to think about Christmas, but they look very stylish
ReplyDeleteHi Chrissie, Indeed I'll be making my Christmas cards thanks to ALL of your tried and true methodologies. Love the selvage edge in particular. Thanks for sharing in the 12 Days of Christmas in July.
ReplyDeleteschimmel(dot)db(at)gmail(dot)com
I like all of your tips and ideas. I am going to try this. One question: Where did you get your window cards?
ReplyDeleteThanks Susan, I got them at The Range in England but they're available in many stores and online worldwide - they're called Aperture Cards :D
DeleteThese are great Chris, I love how many uses you find for those fabric selvedges :)
ReplyDeleteFantastic tutorial! I have got to get some cards and try these!
ReplyDeleteThis is such a great detailed tutorial. Thanks for sharing all this great information.
ReplyDeleteThis is one heck of a tutorial, Chrissie! So many handy problem-solving tips. Thanks for linking up with TGIFF @ A Quarter Inch from the Edge!
ReplyDeleteTHis is a super handy tutorial - I have the perfect Christmas fabric scraps to use, too. Thanks for linking at TGIFF.
ReplyDeleteI love these! And impressed at how prepared you're going to be come Christmastime, lol!
ReplyDeleteThese are so effective. We have loads of left behind items here, I might use use them to make fabric cards like this with the children here for our Christmas crafts. #TheRealCraftyLinkParty.
ReplyDeleteThose area really cute, and a great way to use fabric leftovers! Thank you for sharing at The Really Crafty Link Party this week!
ReplyDeleteThis is the perfect time to get started on Christmas cards (and tags!) - these are adorable :) This would be a great project to work on with some sewy friends ... of course with a side order of dessert and wine ;)
ReplyDeleteWow, Chris! Lots of useful information here! Great to know how to stop my fabric fraying ..... and useful idea about changing the needle when stitching through card .... I rarely change my needle .... will now change my ways!
ReplyDeleteFantastic tutorial on making cards ... and I like Sandra's idea .... of adding the side order of dessert and wine, and stitching with friends!!! How enjoyable!
I've enjoyed my visit and will be back again. Thank you for all the great ideas!
Barbara x