teaching sewing confidence, tip by tip
Showing posts with label Challenge Block. Show all posts

Thursday, 23 October 2014

Cloud9 Fabrics Cirrus Solids HST Block Challenge


Remember the Cloud9 Fabrics Baby Quilt Challenge I took part in with my NYC Mod Quilt Guild back in June when I made this Foxy Circle Quilt?  


Well, Michelle Engel Bencsko, Co-Founder, Design & Marketing Director at Cloud9 Fabrics set our Guild another challenge to introduce Cloud9's new range of Cirrus Solids.


There're 21 colours in the Cirrus Solids range - chambray weight cross weaves and 100% certified organic cotton.

Our current challenge to create an 8.5" x 8.5" block comprising of only HSTs in a layout similar to the examples in the given black and white diagram below.


There's three given colour groups with different rules for each group - I chose two packs, Combo 2 - Invigorating and Combo 3 - Soothing 


Although I've not put this post together as a tute I've included my design notes for both blocks so you make them too.   Both blocks are quite simple - 16 half square triangles (HSTs) joined together to form rows that are then sewn with nested seams to make the final block.  I've written tutes for both of these processes before and here's links to those if you need them.


The blocks are made up of 16 x 3.5" squares which are joined as HSTs and trimmed down to 2.5" blocks, joined in rows of 4 to produce an 8.5" block including seam allowance.


 HST Block Challenge: Combo 2 - Invigorating


Above are the Cirrus Solids fabrics supplied by Cloud9, aren't they gorgeous?  

Rules from left to right: first two fabrics must be used in any amount as a positive, the third fabric must be used in every HST as a negative and then use one colour only in any amount as a positive from the remaining five fabrics supplied.


My design and chosen fabrics.

Here're the cut 3.5" squares:
2 x Coral, 4 x Lava, 8 x Ash, 2 x Iris


HSTs sewn, trimmed and laid out in rows as shown in the design.


My finished Combo 2 - Invigorating Block


Here's a close up of the fabrics - I want to try to share the texture with you, it's a really great cross weave.


HST Block Challenge: Combo 3 - Soothing


The next group of Cirrus Solids fabrics supplied by Cloud9, I love these even more than the first group if that's possible!  

Rules from left to right: first two fabrics must be used in any amount as a positive, the third fabric must be used in any amount as a negative and then, from the remaining five fabrics supplied, use one colour only as a positive for a maximum of 2 HSTs which must touch within the finished block.


My second block design and chosen fabrics.

Here're the cut 3.5" squares:
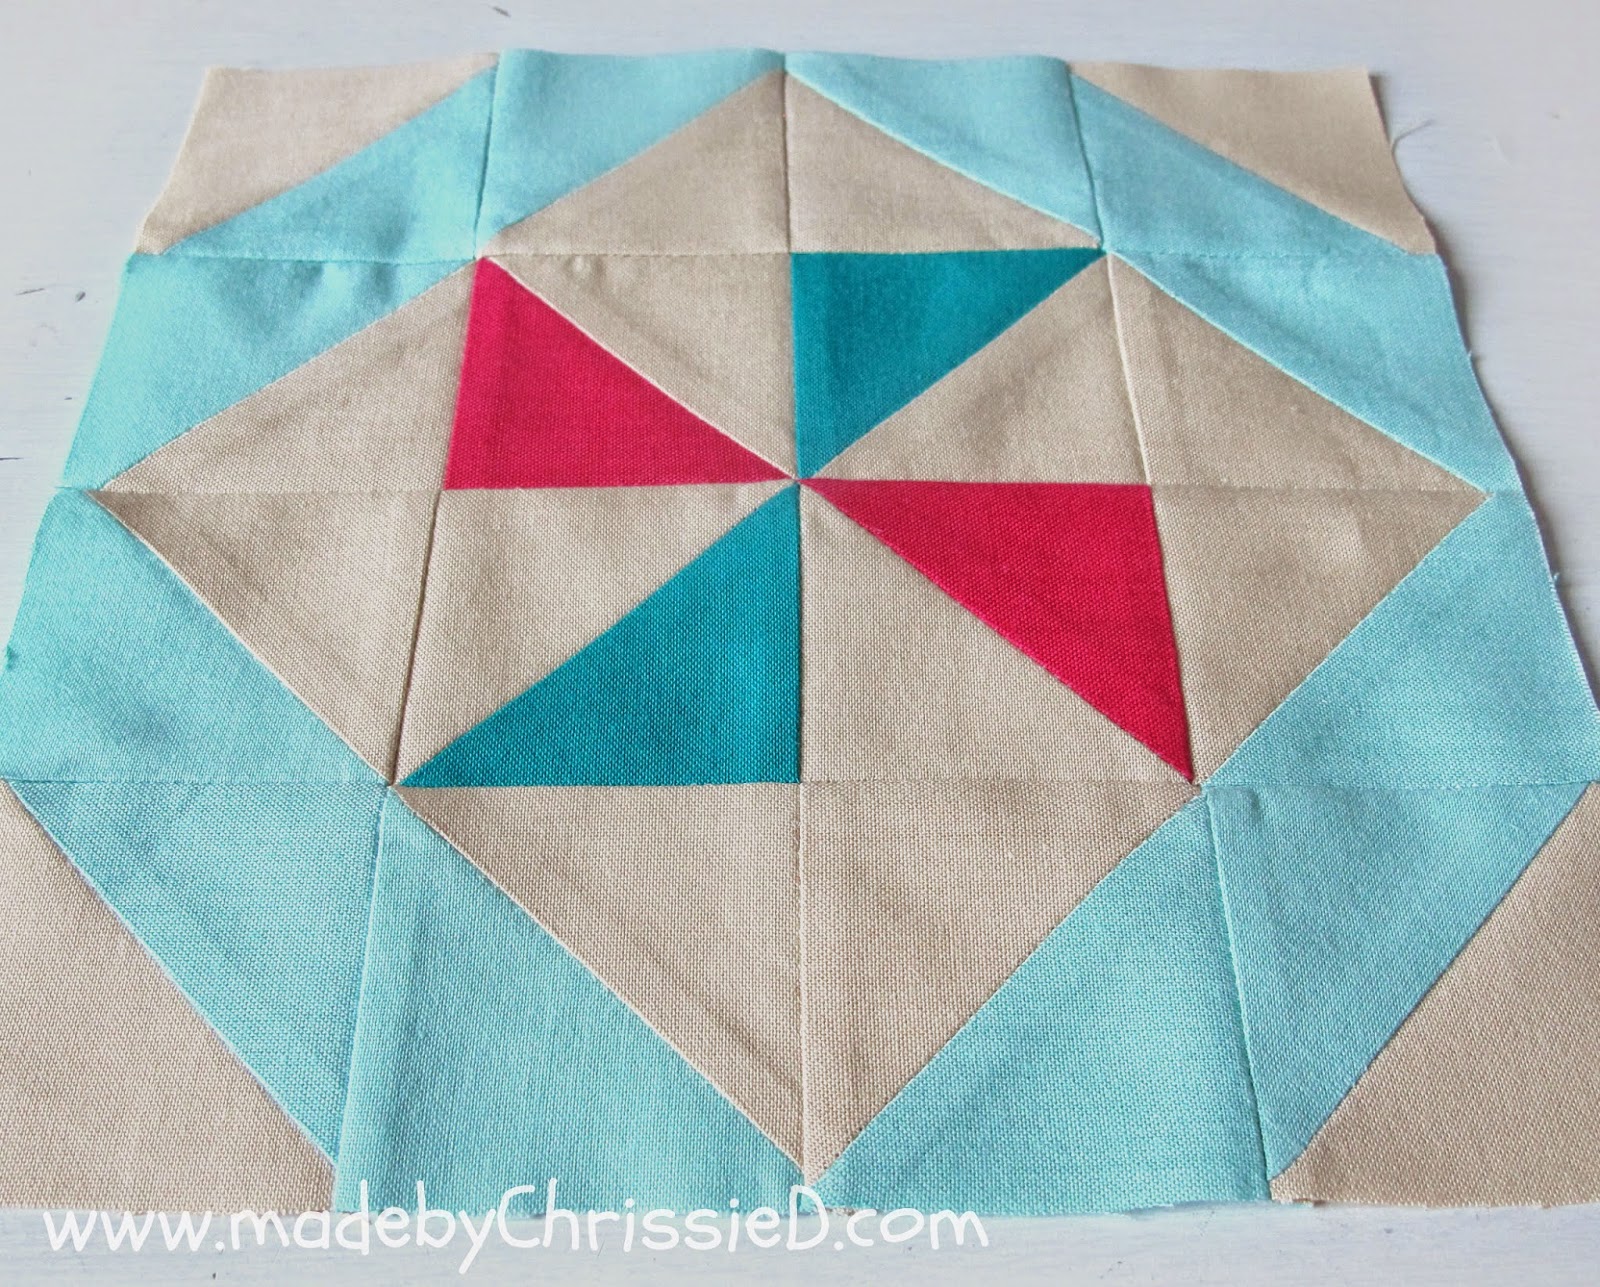
1 x Turquoise, 6 x Rain, 8 x Sand, 1 x Fuschia


HSTs sewn, trimmed and laid out in rows as shown in the design.


My finished Combo 3 - Soothing Block


Another close up of the cross weave fabric.


And the two blocks together.


Michelle will be judging the finished blocks and a 'best block' winner from each of the three colour groups will receive a Fat Eighth bundle of all 21 Cirrus Solids colours.  The finished blocks will be made into a Cloud9 Fabrics marketing sample quilt and after it's made its rounds it'll be auctionned.

You can see all the blocks here on the NYC Mod Quilt Guild website.   

I really enjoyed working with the fabrics, I was nervous that the weave would fray easily but it didn't and it also held its shape well when cut on the bias without needing to use starch.  I was impressed that it didn't shrink when I water sprayed it before pressing - don't know if you've ever noticed but some fabrics do?!!!  It's soft yet has a great weight and I like the look and feel of the texture.  I'm enjoying that there're so many more solids and particularly solids with texture available across the fabric companies these days rather than always turning to Kona (though I do love them!), still it's really refreshing.

Have you tried Cirrus Solids yet - what do you think of them?


Click these buttons to see more of my NYC Mod Guild blocks and my tutorials

Disclaimer: Some fabrics used were supplied by Cloud9 Fabrics at no charge to mbCD otherwise this post is for informational purposes only, no payment or commission is received on click-throughs and opinions are my own.
 
Follow on Bloglovin


Monday, 26 May 2014

Wonky Log Cabin Tute: My NYC Metro MQG Challenge Block


My June Challenge Block for the NYC Metro Mod Quilt Guild is a Log Cabin - Wonky Or Not.  

Rules for the challenge:
finished trimmed block is 12.5" square
the centre of the block has to be red

I'm going with a wonky block.  I've photographed each stage and created a tute to share with you -  there's no set sizes, just go with it until you reach something large enough to trim at 12.5" square. 


I started with a centre red square - you can start with anything and it doesn't have to be a square.
I keep my scraps in boxes organised by colour, so I decided to work in this colour order Red, Orange, Yellow, Green, Aqua, Blue, Purple, Pink to create a rainbow block - of course, you can do anything.


Using a 1/4" seam I chose a piece of fabric from the orange/yellow box and sewed it to the red square.
Then I pressed the seam to one side.


Next, I trimmed off some of the fabric I'd just added to make a straight edge in line with the original red square - you can see how I've cut it in the pic below.


 Then I added a red/orange solid along the newly created edge of the red square and the orange/yellow fabric.- as always with a 1/4" sewn seam.

Once sewn I pressed the seam to one side.


Below you can see how I trimmed the edges away again - always a straight edge but it doesn't have to be at a right angle (90 degrees) to the adjacent edge - if you want a wonky block then create as few right angles to the centre red section as possible.


This pic shows how I've added a pink/orange strip on the third side of the red central square and I've pressed the seam to the side.


And I've trimmed it along the fourth edge of the central red square, in a straight line ready to add fabric to finally enclose that central section.


And the red centre is now enclosed.


And trimmed


I continue clockwise working my way around and around the centre square adding strips and trimming them straight - but don't forget, not at right angles!


Here you can see me moving from yellow to green and sewing the 1/4" seam.  I didn't have a long enough scrap for this side so I sewed two pieces together to create a longer strip.


I carried on adding pieces clockwise in this way until the block was more than the required 12.5" square.
Be sure to use different strip widths and angles each time you straighten the pieces, this is what gives you the 'wonky' effect.


As the block got larger I tried to centre the red central square where the two 6" marks cross on my cutting mat.  This allowed me to keep the block centred although the lines weren't parallel and showed me how close I was getting to creating a 12.5" block.


Once the last strip was added to take me over the 12.5" square I trimmed the block back to the correct size.


And here's my finished Rainbow Wonky Log Cabin block


So simple and it's lovely to work quickly without worrying about measurements.

Click here to see other log cabins on my Quilty - Liberated/Wonky Log Cabin Blocks Pinterest Board.


I've used this tute to make another NYC Mod Quilt Guild Bee Block - totally in love with the fabrics.  Click the image to read more:


I was delighted to discover back in May 2015 that the Emerald Coast MQG were using my tute to make their June 2015 Block Lottery Wonky ROYGBIV 12.5" Log Cabin blocks.


At the July meeting the blocks were won by Wendi and passed to Mary McFarlane and here's the quilt Mary's made with them - I love that she's sliced the blocks it makes me feel like we're just peeping at sections of them through windows.


It's such a treat for me when I hear stories like this - thanks, Elaine McMichael for sharing :D


Click these buttons to see more of my NYC Mod Guild blocks and my tutorials

Disclaimer: This post is for informational purposes only, no payment or commission is received on click-throughs and opinions are my own.


Featured On:


Follow on Bloglovin