Super, super excited to finally share my Maribel Bowties Quilt with you. I've been giving you glimpses as I've gone along via Instagram, Facebook and my Newsletter and I know from your responses that you love it as much as I do. Today, I get to share the whole thing with you, start to finish and that feels really good :D
Disclosure/Disclaimer:
Chris Dodsley of made by ChrissieD was given an electronic copy of A New Spin on Drunkard's Path and a set of DP templates by her friend John Kubiniec in return for a book review. The Maribel FQ collection used to make mbCD's sample Bowties quilt was provided by Windham Fabrics. All items were provided at no cost to mbCD. In all other respects, this post is for informational purposes only, all opinions are mbCD's own and no payment or commission is received on click-throughs to links shared.
Maribel Bowties Quilt
A few months ago Windham Fabrics sent me this gorgeous bundle of fat quarters to work with on any project I wanted - it's the Maribel collection by Annabel Wrigley of Little Pincushion Studio.
Maribel Bowties Quilt
A few months ago Windham Fabrics sent me this gorgeous bundle of fat quarters to work with on any project I wanted - it's the Maribel collection by Annabel Wrigley of Little Pincushion Studio.
I sat on it for a while, there were other projects in the works and I wasn't sure what I wanted to make. Jump forward a month or so and my friend, John Kubiniec @Big Rig Quilting, sent me an electronic copy of his new book A New Spin On Drunkard's Path to review and as soon as I saw the first project in the book I knew right then and there I was going to make a scrappy Bowties Quilt using the Maribel fabric collection.
The Process
I subdivided the Maribel FQs by print design and decided that the stronger geometrics and florals (bottom row and top row fabric 1) would be my foreground fabrics (pie shaped piece + opposite triangle) and the smaller prints (3 designs on the top row right) would be the background (L-shaped piece + opposite triangle).
The 20 FQs would yield 10 block colourways and cutting 3 blocks from each FQ gave me 30 blocks in total - finished block size 6" square.
I cut out the pieces - 3 blocks worth of background or foreground from each fq - and played with the colour layout on my design wall.
When I was happy with the colour balance across the blocks I chain pieced the blocks together.
Did you spot all the bonus half square triangle blocks (HSTs) in the pic above? A few mins spent sewing an additional row of stitches along the triangles you're going to snip off your blocks will give you all these bonus HSTs. Here's a close up and you'll see how I use them in the quilt later.
Once the blocks were sewn up I did play around with the layout and came up with this design which I LOOOOVE.
I was getting carried away and had to remind myself that I was reviewing John's book and working on a Bowties Quilt so I took the above pic, as I think that's a quilt design def worth returning to for a future project and set about placing the blocks in the Bowties Quilt design layout.
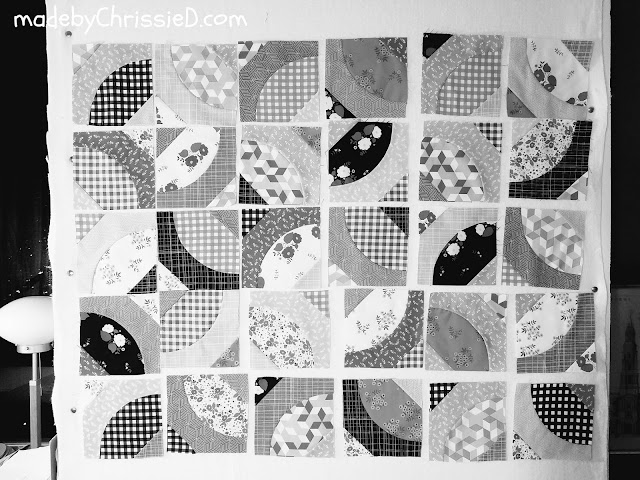
When I'm considering colour placement in my quilts I always turn my photos to greyscale to see how the light/medium/dark balance is working - this is the layout I decided to go with and below you can see it in grey scale. You can also see greyscale easily by looking at your work through transparent red plastic.
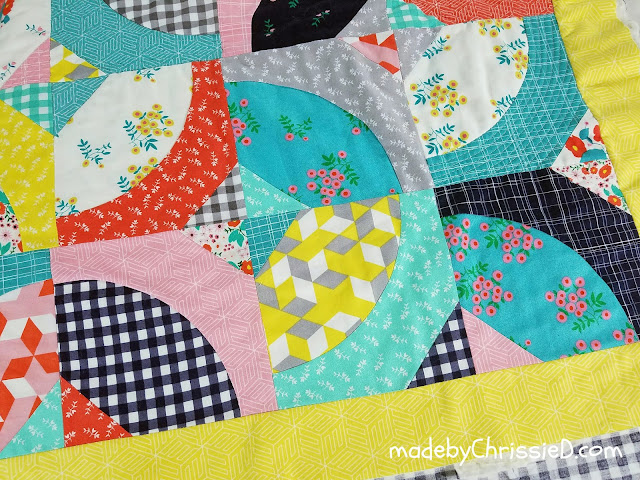
Forgot to take a pic of the quilt top sewn together but, trust me, it was just a case of sewing the columns and rows and then I added a 2" (finished) yellow Maribel border.
I pieced leftover fabric from the Maribel FQs to make the backing, added in some navy solid and pulled everything together with a row of those bonus HSTs I shared with you earlier - how cute do they look?
Here's my quilt sandwich ready to quilt - made using Quilters Dream Request and spray basted using 505.
This is my quilting design - 1/4" quilting using Aurifil 50/2 #2600 Dove Grey along the background fabrics only. As I worked along the first row of the quilt I quickly realised that I couldn't continue the pattern correctly on the end block.
This was because those bottom 3 blocks are in the quilt upside down. I shared my thoughts on this with readers in my last Newsletter and, believe it or not, I did unpick some quilting, the borders and those 3 blocks and turn them around. I'm really glad I did because it meant the quilting could now follow the design I'd planned for the quilt.
Quilting densely in curves over some sections of a quilt and leaving other adjacent sections free from quilting lifts the quilting free sections to create raised areas adding loft and texture to the quilt. If you're not sure what I mean I think you'll be able to see the effect in the rest of the photos.
The Finish
The quilt is machine bound with a narrow grey solid binding.
Look how much movement there is in the quilt due to the style of quilting.
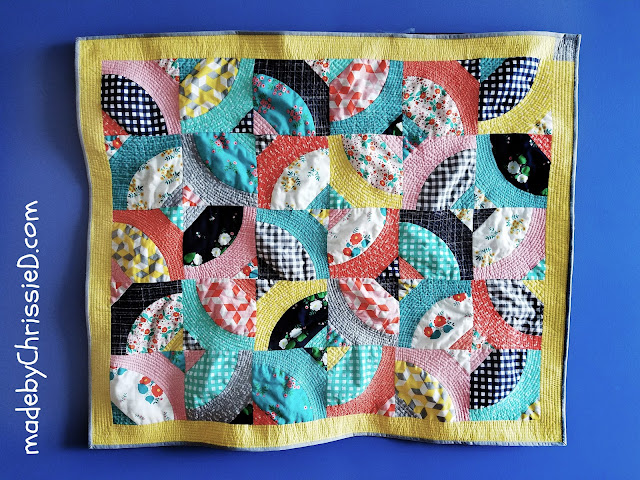
I hung the quilt on top of a painting frame in my kitchen to take these pics - can you believe how those colours POP against the blue wall?!
Plus, you can really see the rise and fall of each section here.
I love shots of quilts taking on a life of their own as they 'fall' from where we've placed them to get photo shoot images.
And finally, a few regular style pics against more neutral backgrounds.
Finished quilt size - 34" x 40"
Fabrics - Maribel by Annabel Wrigley for Windham Fabrics
Quilt block pattern by John Kubiniec, Bowties from A New Spin On Drunkard's Path book
Quilt made and photographed by Chris Dodsley @made by ChrissieD
Maribel Bowties Quilt
Featured on:
Clicking on an image will take you to a new page of crafty goodness :)
Disclosure/Disclaimer:
Chris Dodsley of made by ChrissieD was given an electronic copy of A New Spin on Drunkard's Path and a set of DP templates by her friend John Kubiniec in return for a book review. The Maribel FQ collection used to make mbCD's sample Bowties quilt was provided by Windham Fabrics. All items were provided at no cost to mbCD. In all other respects, this post is for informational purposes only, all opinions are mbCD's own and no payment or commission is received on click-throughs to links shared.
Linky Parties This post may be linked to some great Linky Parties, always a great source of inspiration too. If you click through to my 'Fave Linky Parties' page you can see where I like to share my work.


This is just the COOLEST quilt!! I've been enjoying seeing glimpses of it on Instagram and now it's such a treat to see the whole thing finished. Thanks for sharing your whole process, from fabric selection to quilting "oopsies." I love it!
ReplyDeleteIt's so pretty! I love the combination of fabrics and also the 3D effect of the "bow ties". Thank you for sharing at The Really Crafty Link Party. Pinned!
ReplyDeleteBeautiful and love the colours you worked with
ReplyDeleteAnother beautiful quilt Chrissie
ReplyDeleteI love the way you create the geometric designs, they are so effective #RealCraftyLinkParty
ReplyDeleteA great quilt! I love your colour combo, and I enjoyed reading about your processes!
ReplyDeleteBeautifully done! Love the colors you used.
ReplyDeleteThat is so beautiful - i love not only your choice of fabrics, but also the way you left some areas with loft, and the arcs densely quilted.
ReplyDeleteYou have taken something and made it even more special with the layout and design of the fabrics - I really love this, and I love the puffiness in the piece. Terrific!
ReplyDeleteWow I think that is absolutely stunning from start to finish. I love the colours and the pattern is gorgeous and then you add tiny HSTs down the back and I run out of superlatives!!
ReplyDeleteThat looks great! You have some true talent. :) Thank you for sharing this with us at the #HomeMattersParty
ReplyDeleteThis is a beautiful quilt, I'm just getting into curved piecing myself, and exploring all the variations of this great block, well done on a gorgeous make!
ReplyDeleteHi there
ReplyDeleteJust stopped by to let you know that I featured this on my Round Tuit post this week!
A Round Tuit 331
Thanks again for linking up to A Round Tuit Hope you have a great week!
Jill @ Creating my way to Success
Love this - great use of color! Thanks for linking up to TGIFF!
ReplyDelete