

I'm so excited about making this quilt, not sure I can hold off a whole year until it's finished!
Here's a pic of all my fabrics together
Here's a pic of all my fabrics together
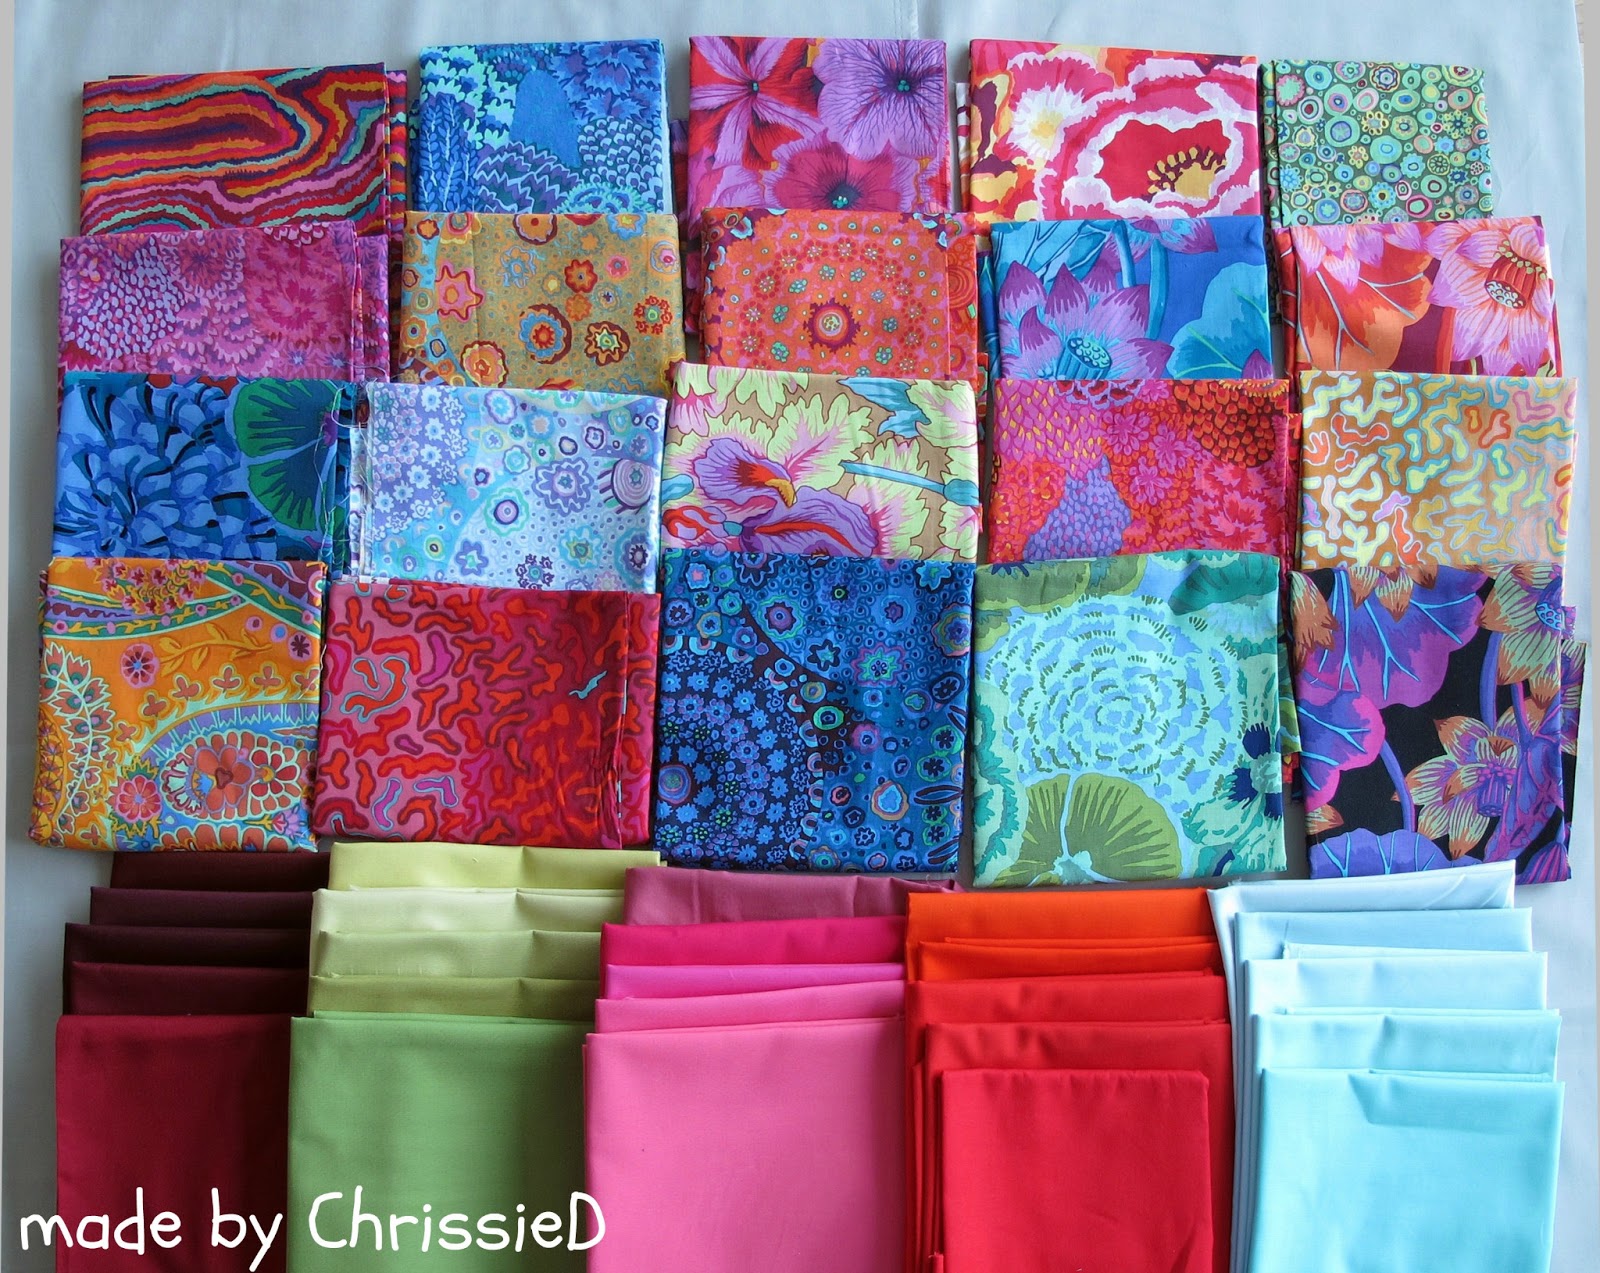
The fabric second down/left 1st column (pink) is a substitute for a fabric that hasn't arrived yet, which is actually lime green based.
And here are my first two blocks.
(I have to admit I'm a bit ashamed to share these photos with you as the pressing marks are soooo bad, and I never pressed anything before that's looked worse after pressing than before, but there's a reason for that which I'll go on to explain!)
(I have to admit I'm a bit ashamed to share these photos with you as the pressing marks are soooo bad, and I never pressed anything before that's looked worse after pressing than before, but there's a reason for that which I'll go on to explain!)
Magnum

Sound Wave

What I've learnt so far:
- Starch your fabric - oh boy is this stuff good! I'm using Mary Ellen's Best Press - the nozzle on my bottle was a bit spitty which left marks on my fabric (these will wash out) but my second bottle is spraying perfectly. Starched fabric holds its shape so much better when you're cutting and piecing - I'm a total convert. Alyssa has put together a great tutorial on how to starch.
- Use a very firm ironing board with NO give - I thought my ironing board was firm but turns out I was wrong. In my photos (oh I'm so ashamed of them, particularly of my Sound Wave block!!!) you can see all the lines where my iron has 'pressed' the fabric and the fabric has also wrinkled and my seams no longer look straight. This is because I've used starch and there's 'give' in my ironing surface. The blocks aren't spoilt/damaged - it'll all come out in the wash but if I make myself a pressing board, rather than using my ironing board, then this problem should go away.
- To make a pressing board all you need is a piece of flat wood - the sort that is used to lay under vinyl flooring is perfect, staple a piece of batting around the wood and then cover with a piece of 100% cotton fabric of your choice and staple that in place also. Home Depot here I come!
- When joining strips together side by side sew each one in the opposite direction to the previous strip. By this I mean when you sew your first two strips together start sewing at the top of the block and when you attach your third strip start sewing at the bottom of the block and keep alternating direction. Adding each strip can cause your block to curve in one direction but if you alternate sewing direction then each curve will work against the last and keep your block and sewn lines straight.
As this is Quilt As You Go (QAYG), the blocks are sandwiched and basted ready for the next stage later this week - Free Motion Quilting (FMQ). I've folded each block back so you can see the backing.

And here's the thread colours I've selected from my stash.

Related Posts:
Woven Star & Woven Chevrons Blocks - Skill Builder BOM: March/HSTs & QSTs & Bias Sewing
Woven Star & Woven Chevrons Blocks - Skill Builder BOM: March/HSTs & QSTs & Bias Sewing
Em Dash & The Mood Blocks - Skill Builder BOM: February/Basic Piecing and Bias Sewing
Sound Wave & Magnum Blocks - Skill Builder BOM: January/FMQ
Sound Wave & Magnum Blocks - Skill Builder BOM: January/Piecing
Sound Wave & Magnum Blocks - Skill Builder BOM: January/FMQ
Sound Wave & Magnum Blocks - Skill Builder BOM: January/Piecing
I love the colours!
ReplyDeleteThank you, I think they're delicious :)
Delete"Please, sir! May I have some more?". Yum! These are absolutely gorgeous!
ReplyDeleteI think I may be more excited about the back of this quilt than the front Jen, I just love Kaffe Fassett :)
DeleteYour blocks look so great. I am so jealous. I'd better get started. Thanks for all the tips.
ReplyDeleteIt's fun and I was so looking forward to doing the fmq on Thursday but I've been too busy - don't think I'll be doing it until later next week, if I'm lucky. It's not going anywhere and it's only 2 blocks a month so it's pretty easy to catch up. Looking forward to seeing what you do with it though :)
DeleteOMGOSH!!! Your quilt is going to be amazing, so glad you folded to see the backing - I do so love to see both (pretty, pretty!). My blocks have press marks as well - for exactly the same reason! I am sooo going to make a pressing board. Home Depot here I come...thanks for sharing your info.
ReplyDeleteHi Lisa, I'm so in love with the Kaffe Fassetts, I'm going to use my left overs to make a 'Dear Jane' quilt with a white solid background. I haven't made it over to Home Depot yet but I did find a thin piece of wood in the apartment that I use for stretching water colour paper and it's exactly the same width as my ironing board - I popped it on top of the board but under the cover and it's done the trick. I'm still going to make a pressing board because I can make it much bigger than a normal ironing board surface but for now my problem's solved. :)
DeleteSo awesome to hear your process thanks for sharing!
ReplyDeleteReally enjoying the BOM and what a great bunch of supportive ladies are coming together already - thanks for organising and all your incredible work :)
DeleteHi!!! Yes Thank You for sharing your great tips!!! I think mine would have been straighter using your every other sewing method!!! I love love your fabrics!!! I am brand new to quilting and using a sewing machine, starch although I like it!!! I've never been much of an iron person either!!! But I am having so much fun learning!!!
ReplyDeleteHi Carla, I recently started following your blog and hadn't realised you're so new to quilting - though I see you've always made dolls so you're obviously very creative but I'm so surprised to hear you've only just started using a sewing machine!!! I've only been quilting 15 months but I've been sewing all my life so it was a pretty transition for me. Keep going, I'm looking forward to seeing more of your work; it's the best fun I've had in years and everyone's so great, helpful and friendly :)
DeleteBeautiful blocks, this is going to make an amazing quilt!
ReplyDeleteThanks Sarah Lou, I really hope I can make the quilt top be as great as the KF backing - if I don't manage it I'll just have to keep it KF side up permanently!!! :)
DeleteI absolutely love your fabric selection. Its gonna be such a lovely quilt...no wonder you can't wait!
ReplyDeleteThanks Cindy - you can't go wrong with KF can you, everything he designs is just amazing :)
DeleteYour fabrics are gorgeous. Can't wait to see your finished quilt (only 11 months to go!) :-D
ReplyDeleteI've used your ironing board tip as well. I covered my with two layers of batting and canvas. LOVE IT! Perfect for ironing when piecing blocks.
www.threadtime.wordpress.com
Oh wow Ramona, I'm thrilled to hear that you made the pressing board and it's working for you, that's made my week! :)
DeleteBeautiful blocks and the fabrics you chose are amazing. I can't wait to see your finished project. Quilt as you go sounds really fun and easier to manage.
ReplyDeleteHi Martha, I've not done QAYG before but one of my good friends does it a lot and tells me that there are several methods to choose from, not sure which method Alyssa has in mind for this BOM quilt finish. Talking with my friend it seems that there's a lot of work at the end to finish off the quilt, usually handsewing long sashing strips along each block join to hide it - that's the downside but the big plus is the different and more complex FMQ that you can do just working with one block at a time - I'm looking forward to trying it :)
DeleteLovely Kaffe Fassett fabrics Chrissie! I have a few of them. Your quilt will be gorgeous! Your tips are awesome! Even though I've been using them it's always nice to be reminded! Made my own board when I started to see the pattern of the ironing board in my fabrics, I thought I'll have a heart attack! I can suggest to also use the silver ironing board cover fabric by the yard from Jo-Ann.
ReplyDeleteThanks for the tip about the silver ironing board fabric - I have a silver ironing board cover for my ironing board (which I wouldn't be without) but I had no idea you could buy it as fabric to cover a pressing board with. I'm on to that straight away :)
Delete