I'm off to Japan on Friday morning for several weeks. The first week my husband is working so I'll be exploring Tokyo alone and maybe, just maybe, there'll be fabric involved at some stage ;D Weeks two and three we're on vacation and travelling a little further to Mt Fuji, Nara, Kyoto, Osaka, Miyajima, Kurashiki and Hiroshima.
As always tips, recommendations and coffee/lunch invitations are very welcome :D
While I'm in Tokyo I'm spending a day with one of my students from Manhattan who has recently returned home to Tokyo after seven years in NYC. This was her wonderful leaving gift to me just a few weeks ago.
Since her arrival home, Aya has given birth to her first son and I've made this snuggly to give to her when we meet up.
I know the snuggly I made for my Grandson, Oliver, last year is a firm favourite so seemed like a good idea to make another.
Do you need a baby gift? - you really can't go wrong with a hand tied snuggly so I've put together a tute.
20" HAND TIED SNUGGLY TUTE
Materials:
20" x 20" square flannel fabric
20" x 20" square Sherpa fleece
90" x 2-1/4" fabric for binding
matching or contrasting thread for sewing binding
matching or contrasting embroidery thread for hand tying (you'll need approx 5" thread for each tie)
Tools & Notions:
basting pins (or spray baste if you're happy using it for baby items)
embroidery needle
small scissors
measuring ruler/tape
Place flannel and Sherpa fleece squares wrong sides together and baste together ready for sewing.
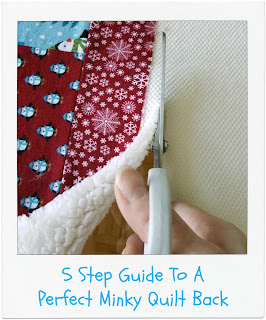
Working With Minky
Notoriously difficult to work with, don't let the Minky backing put you off making this quilt, follow my 5 Step Guide To A Perfect Minky Quilt Back.
Zig zag around all four sides of fabric square - I use the widest zig zag stitch my machine can do - 5.5 mm.
Add binding using your favourite binding method. I'm machine sewing my binding so I've sewn the binding to the fleece side first (above pic) then turned the binding to the flannel side to do the final visible stitching.
I've used a blanket stitch to sew my binding in place - I'm a huge fan of using decorative stitches to machine sew the binding.
Once the piece is bound it's time to finish with some hand tying.
Using a non-permanent marker, mark the chosen tying points on your snuggly.
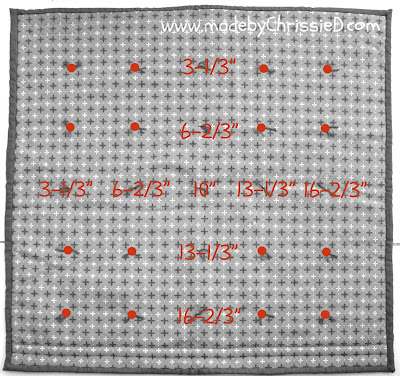
For a 20" x 20" snuggly there's three good hand tying options:
9 x 5" apart ties;
16 x 4" apart ties;
and 25 x 3-1/3" apart ties.
It's useful to know that creating each tie uses approx 5" embroidery yarn but the final choice obviously is yours and for a tute within a tute here's my technique for
HOW TO HAND TIE A QUILT
To start:
Thread your embroidery needle with embroidery yarn that's twice the length from your hand to your elbow (that's the longest pull you can physically achieve, helps prevent knotting from too long a length of thread and stops thread becoming damaged from passing too many times through fabric during sewing).
Tying Steps:
1: From the top of the quilt put the needle through all the quilt layers at your marked tying point - leave a 2" thread tail on the quilt top.
2: Bring your needle back up through all the quilt layers approx 1/8" from the first needle entry point.
3: Ensure there's still a 2" thread tail visible at the first needle entry point.
4: Put the needle back into the first entry point again and passing the needle through all the quilt layers.
5: Bring the needle back up again through the same return point as in Step 2. Don't pull the thread tight through the quilt, leave a small loop of thread visible on the top side of the quilt.
6: Pass the needle through the raised loop on top of the quilt...
7: ...this ensures the tie is fully tied together and not simply looped through the fabric.
8: Pull the tie ends until the tie lies flat against the quilt - it should be firm but not overly tight causing the fabric to pucker (unless, of course, this is the effect you want to achieve).
9: Tie the thread ends into a knot.
10: Add another knot - creating a double knot.
11: Ensure knot is firmly fastened and lying snuggly against quilt surface.
12: Trim both thread ends to chosen length - I like a 1" length, I think if the knot was to loosen at this length it is less likely to come undone than if it were shorter.
The flannel's from my stash, I don't think it's available anymore - Quilting Treasures: Poky Little Puppy and the Sherpa fleece is a 5 mm ivory, also from my stash.
Snuggly Pattern Available In 3 Sizes
I love to see what you make from my tutes so if you do make a hand tied snuggly please share your photos with me on my Facebook page or Instagram using the #madebyChrissieD hashtag. You can also add them to my made by ChrissieD & my Flickr group or you can email them to me and I'll share them on your behalf.
Update at March 2016:
Aya sent me this photo of her son, Yu with his hand-tied snuggly, it makes my heart sing and he's just gorgeous :D
Made by You:
Here're some images of snugglies 'made by you' using my tutorial.
Thanks for contacting me, it's such fun to see how others interpret my tutes - Chris :D
20" HAND TIED SNUGGLY TUTE
Featured on:
Clicking on an image will take you to a new page of crafty goodness :)
Disclaimer: This post is for informational purposes only, no payment or commission is received on click-throughs and opinions are my own.
Click to follow me on
Linky Parties
This post may be linked to some great Linky Parties, always a great source of inspiration too. If you click through to my 'Fave Linky Parties' page you can see where I like to share my work.


What a great idea using Sherpa fleece. It would be warm and cuddly.
ReplyDeleteOh what fun! I have travelled all over, but not to Japan. Can't wait for your pictures
ReplyDeleteWow...that's a nice vacation, but even better tute! Thank you, I love that sherpa...I may have to give this a try! I'm going to find the wool now! Safe travels.
ReplyDeleteNini~
Thanks for all your tips - I liked how you finished off the binding with a blanket stitch - also the tips on how to work out where/how to tie it off. I also loved your Grandson's snuggly, with the UK additions :)
ReplyDeleteGreat idea for a baby gift!!! It seems like it would work with minky instead of the fleece, would you agree? My LQS has a great selection of minky, but not fleece... Have tons of fun in Japan!!!!!
ReplyDeleteMinky would be so soft and snuggly Sarah though harder to work with than Sherpa. If you do use it here are my tips:
Delete1: Add lots more basting pins, I mean lots, say 1" apart - Minky moves, slips and stretches lots when you're working with it,
2: Minky sheds like crazy and I'm not 100% sure how easily that'll clean off the flannel once you've finished your project - maybe using a sticky lint roller will work to clean everything up.
3: Sew with a walking foot, consider an 80/12 or 90/14 or jersey/stretch needle and polyester thread and have the Minky facing down (the bottom layer) on your sewing machine as you sew.
4: Increase pressure on your pressure foot if your machine can do this.
5: Use a longer stitch and a 1/2" seam (Minky curls) and be sure to check your tension.
6: Don't iron the Minky - it melts.
7: Cut with a rotary cutter not scissors due to the stretch.
8: Clean out under your machines foot plate when you're finished.
Making this snuggly you're not working with huge pieces of either fabric so it should be manageable with a little extra effort. If you do make one let me know what you learn as you go and I'd love to see a pic - Chris :D
I love the idea of using sherpa fabric on the back of one of these. I wish I'd have thought of that. I hope you find lots of amazing fabrics on your trip through Japan. The kawaii prints are lovely, though more expensive here. Thanks for sharing.
ReplyDeleteThat fleece looks so snugly and you've finished the corners so beautifully. What a lucky baby!
ReplyDeleteThis is so sweet, I love the idea and thanks for the tutorial too, I'm pinning ('cos you just never know when I'm gonna need to know how to do this!)
ReplyDeleteHave a lovely time in Japan, My husband went earlier in the year and visited Hiroshima which is twinned with Coventry in the Uk where we are. We have matching "reconciliation" statues. He said it was very moving.
Love the Pokey Little Puppy fabric! Thanks for linking up (again!) with TGIFF!
ReplyDeleteCute blanket. Love the blanket stitch. The thread looks heavy. What did you use?
ReplyDeleteI wish I had some babies in my life to make these for, very cute. Thanks for sharing on the #HomeMattersParty . Hope you will join us next week.
ReplyDeleteHello, probably too late for tips about Japan... still.
ReplyDeleteTry and take in a Shibori dying workshop in Kyoto at the Kyoto Shibori Craft Centre, near Nijo castle.
See here, for example:
http://robynppblog.blogspot.fr/2012/11/shibori-class-kyoto-japan.html
I've taken it too. Even if there is a language barrier (my instructor didn't speak much English), they will show you! Note: removal of shoes necessary (as if you were in a home, and not in a shop).
The address might be in the monthly Kyoto guide sometimes found in hotels. or here, online:
http://www.kyotoguide.com/
Do make time to visit the needle shop in Kyoto (bring a printed map with the address in Japanese to show people in the shopping arcade if you have a hard time locating the entrance):
http://made-by-melanie.blogspot.fr/2015/05/misuyabari-needle-shop-kyoto.html
Wish I had known it when I was in Kyoto!
And take time to stroll side streets.
Aww what a gorgeous gift! I love your use of blanket stitch to attach the binding :) x
ReplyDeleteCongratulations on the new arrival, such a wonderful snuggly gift for him.
ReplyDeleteEnjoy your trip, it's sounds like you'll be having a fantastic time :)
What a lovely little snuggly, I'm sure she'll love it.
ReplyDeleteWhat a beautiful baby gift. Am sure your ex-student will treasure it.
ReplyDeleteLove this and sure will give it a try. Thanks for sharing and have a good time in Japan.
ReplyDeleteLovely quilt! I've never done a hand tied project, but thanks for the clear instructions as to how to do it!
ReplyDeleteWe just did this trip this summer, it was fantastic! While in Hiroshima, go to Miyajima. It is gorgeous and one of my favorite places we visited.
ReplyDeleteMy pen pal, Sachiko, and I have exchanged letters for 50 years. She lives in Osaka. Wish I could stowaway on your trip! Enjoy!!
ReplyDeleteI love this & think I'm going to make one up for each of my daycare babies (one is 4 mo & the other 2). I've heard sheep fleece is good for littles to sleep on and may give it a try.:) where did you get your sew in labels? I've been looking for something like that for my Therapy Pack business.
ReplyDeleteLet me have your email Tina and I'll send you my label details :D - madebyChrissieDathotmaildotcom
Delete