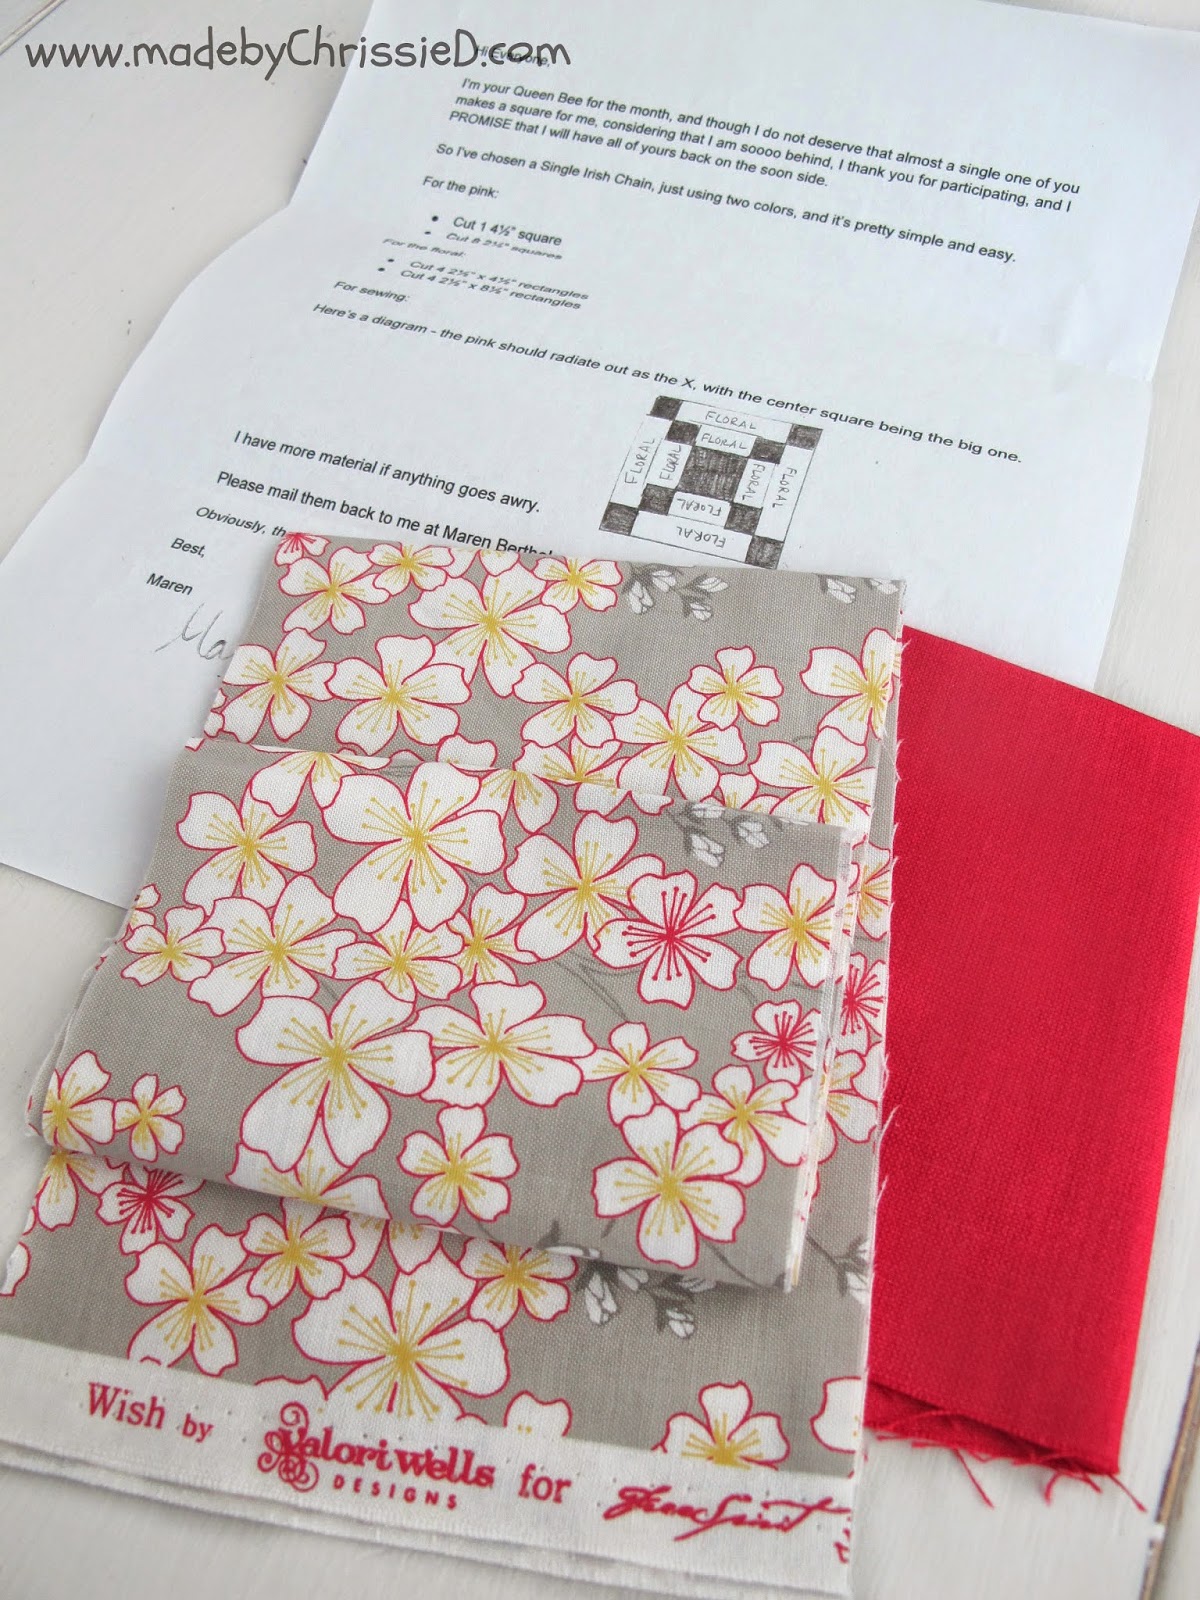
Maren is the final Bee Block of the Bee year and April's NYC Mod Guild Queen Bee. Her fabric selection is Treasure - Patience from the Wish Collection by Valori Wells for Free Spirit. A yummy raspberry pink solid. She's chosen a Single Irish Chain block for us to make.
If you'd like to have a go at making the block yourself, here's my photo tutorial
Single Irish Chain Block Tute
Single Irish Chain Block Tute
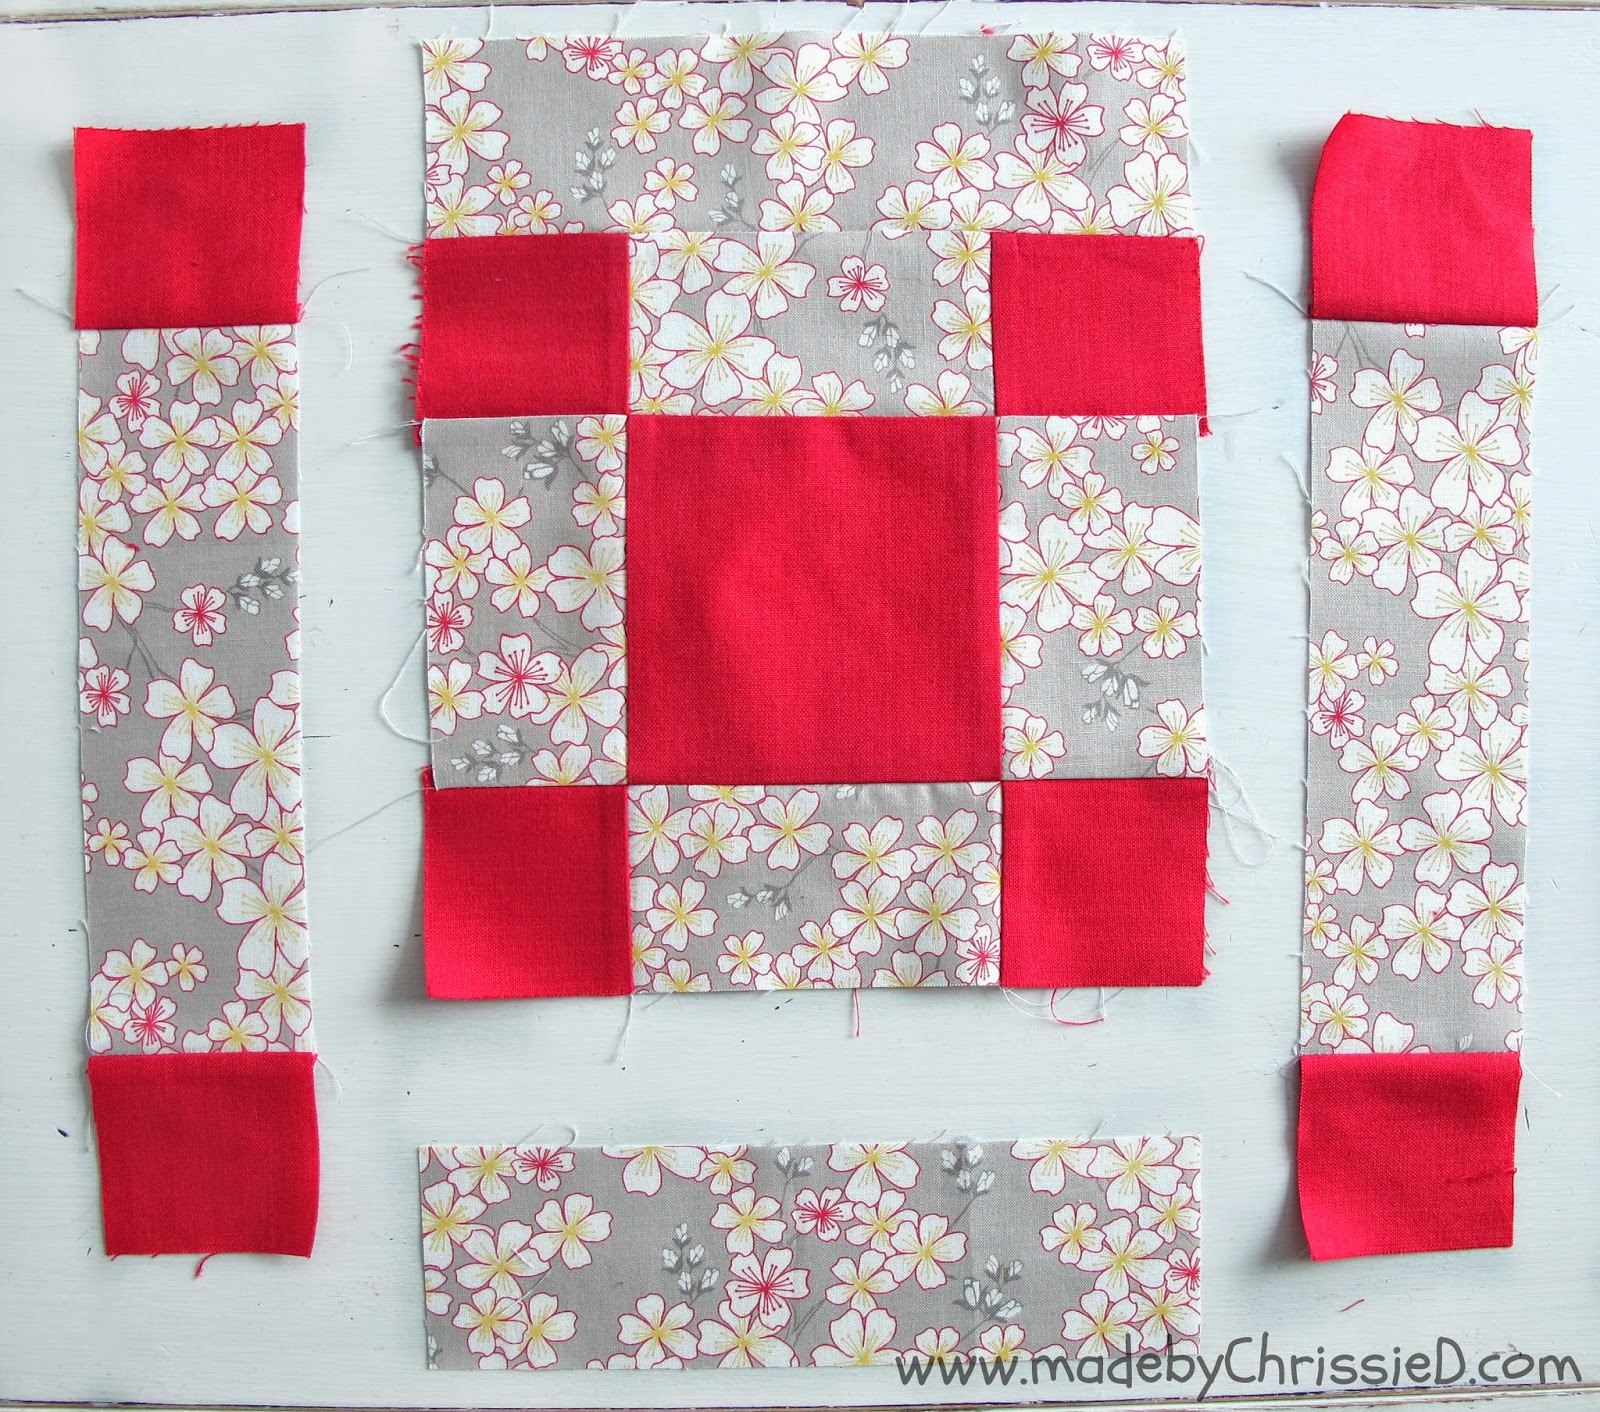
Cut 4 of 2.5" x 4.5" rectangles (shown floral)
4 of 2.5" x 8.5" rectangles (shown floral)
1 of 4.5" square (shown solid)
8 of 2.5" squares (shown solid)
4 of 2.5" x 8.5" rectangles (shown floral)
1 of 4.5" square (shown solid)
8 of 2.5" squares (shown solid)
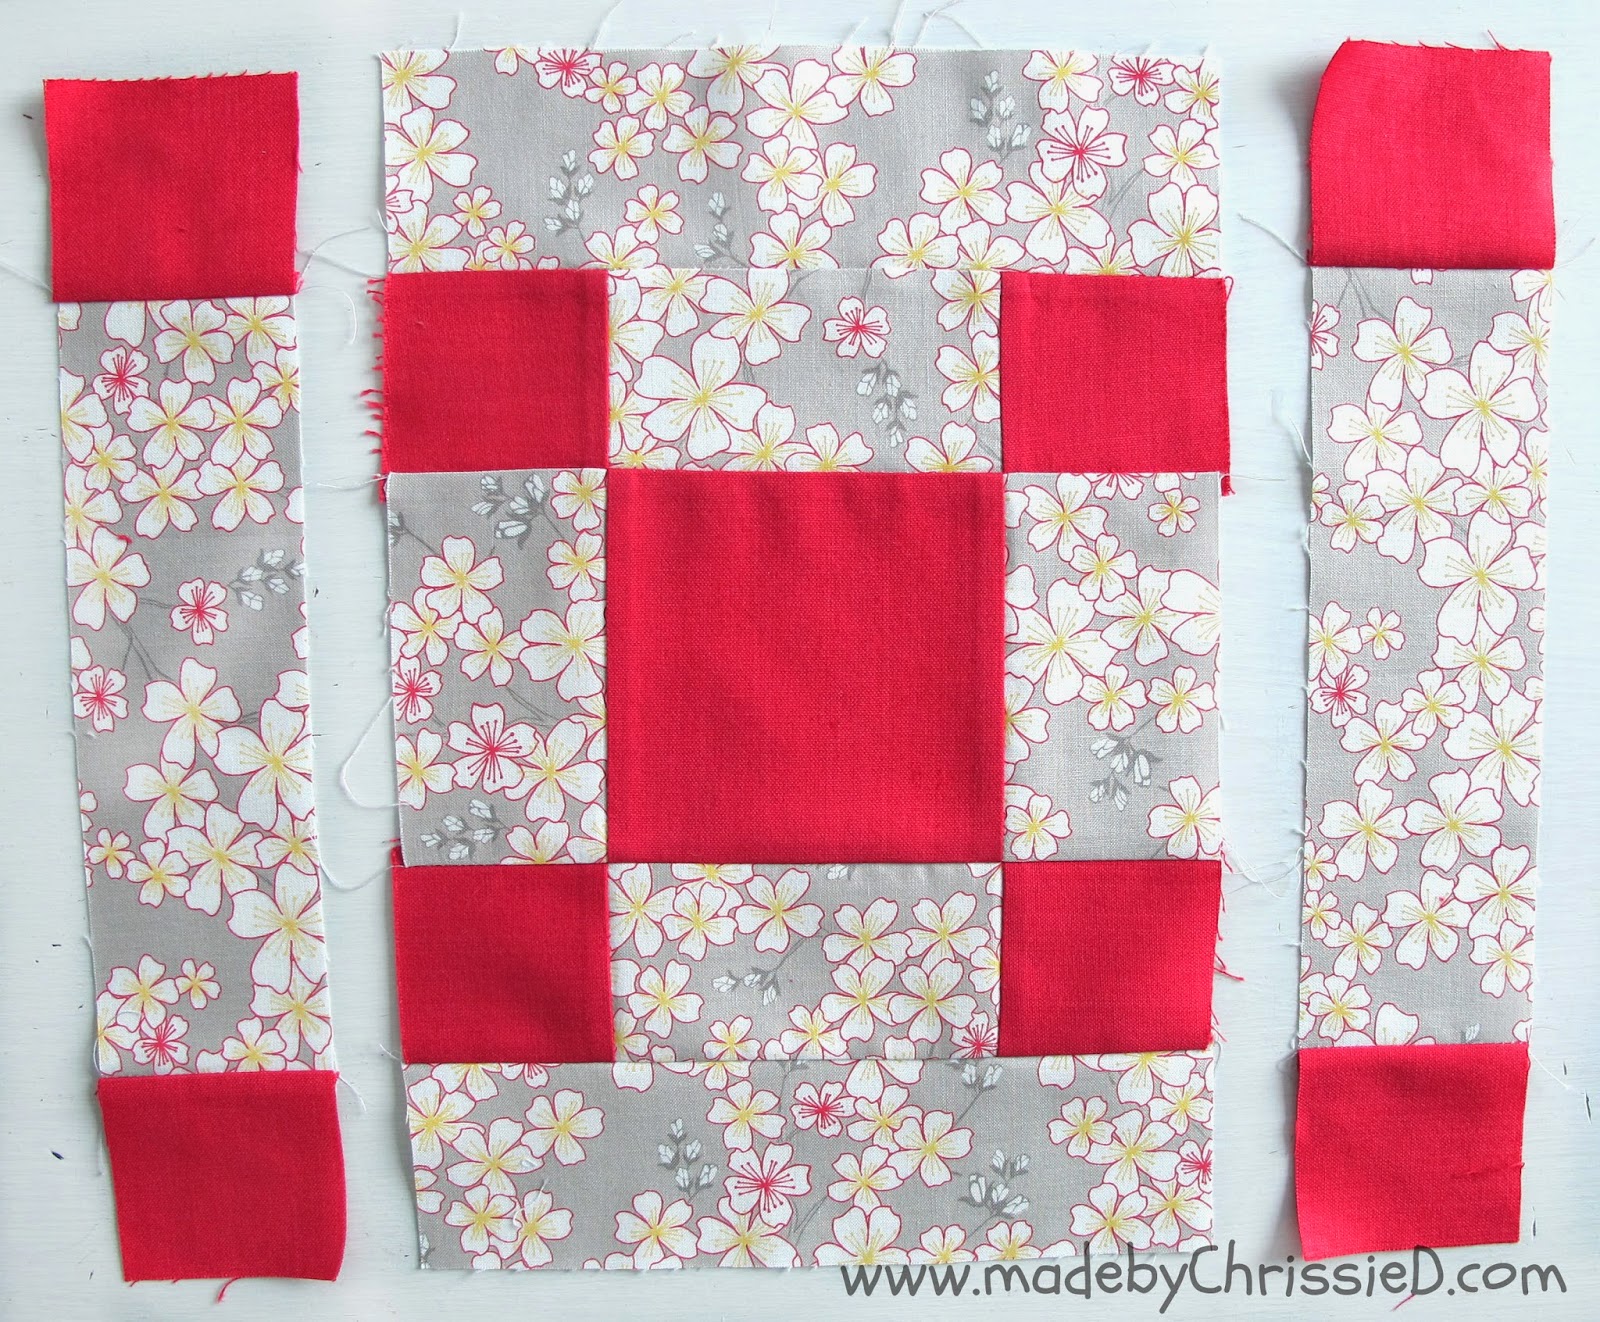
Layout design as shown below
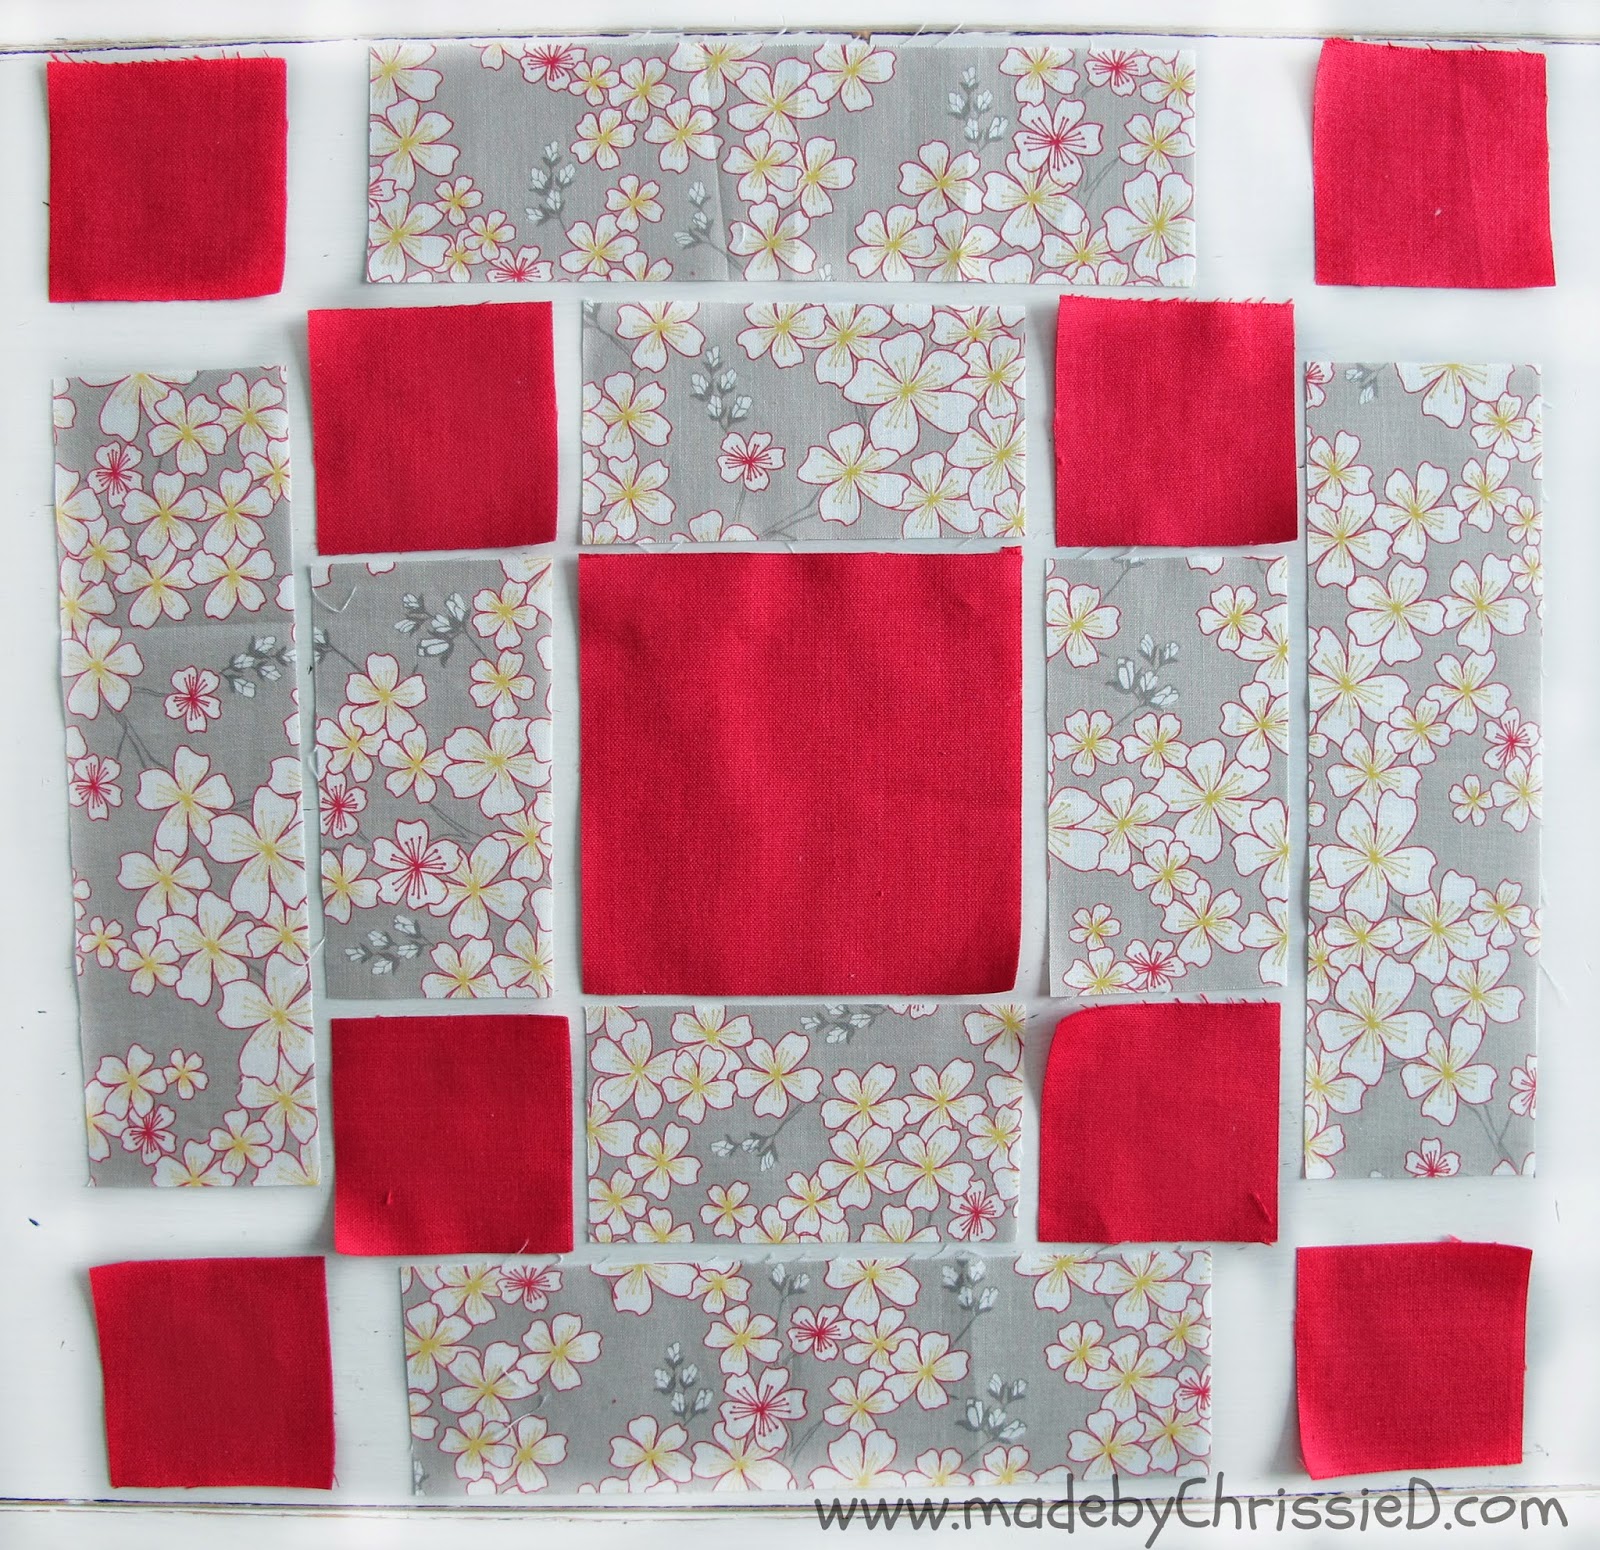
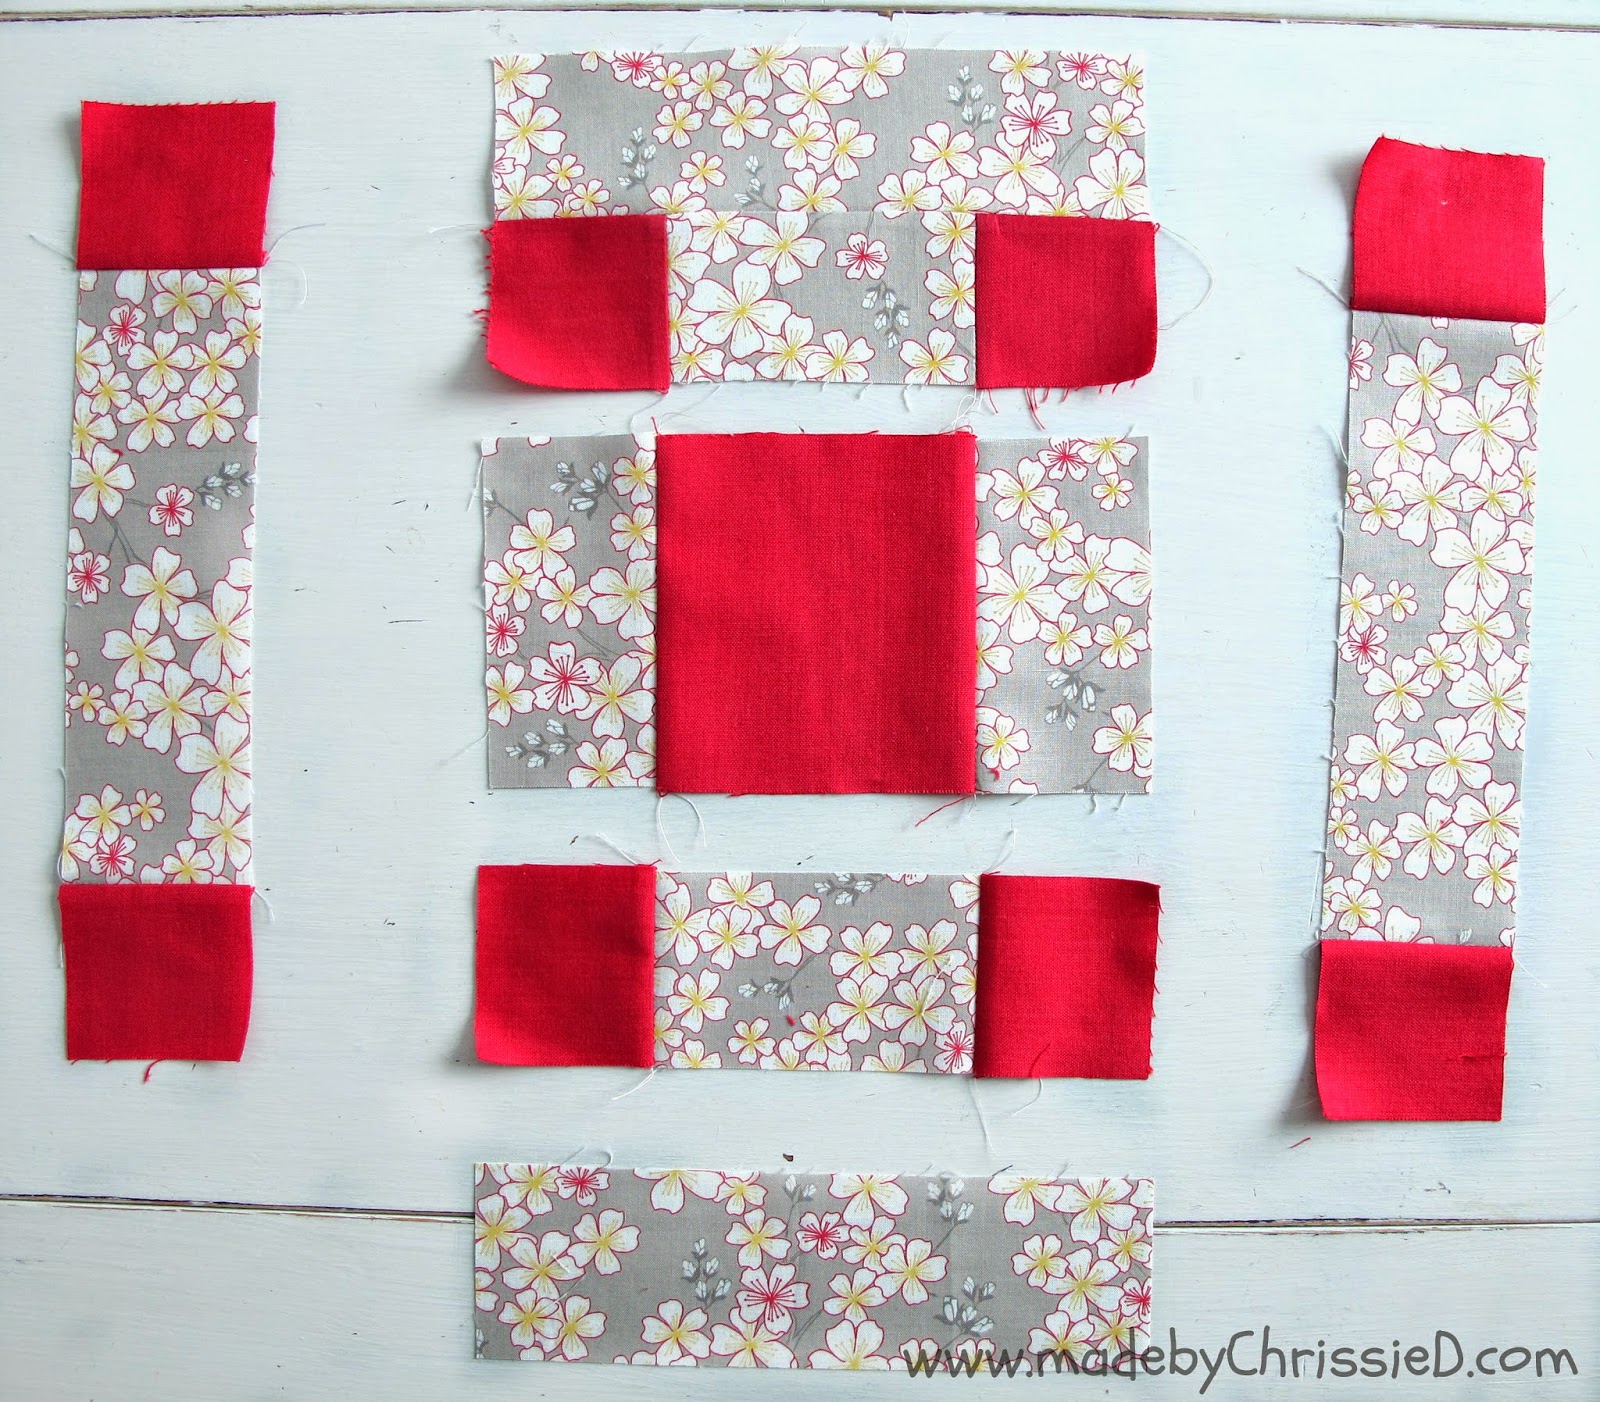
Sew each of the centre rows and the two outer columns of squares together using a scant 1/4" seam. Follow me in the photos below, noting how I've separated the pieces and moving on with me through each image, joining the seams as shown. Wait to press your seams - we'll talk about that when we're further ahead with the sewing.
Let's start with the centre section.
Now, those side columns.
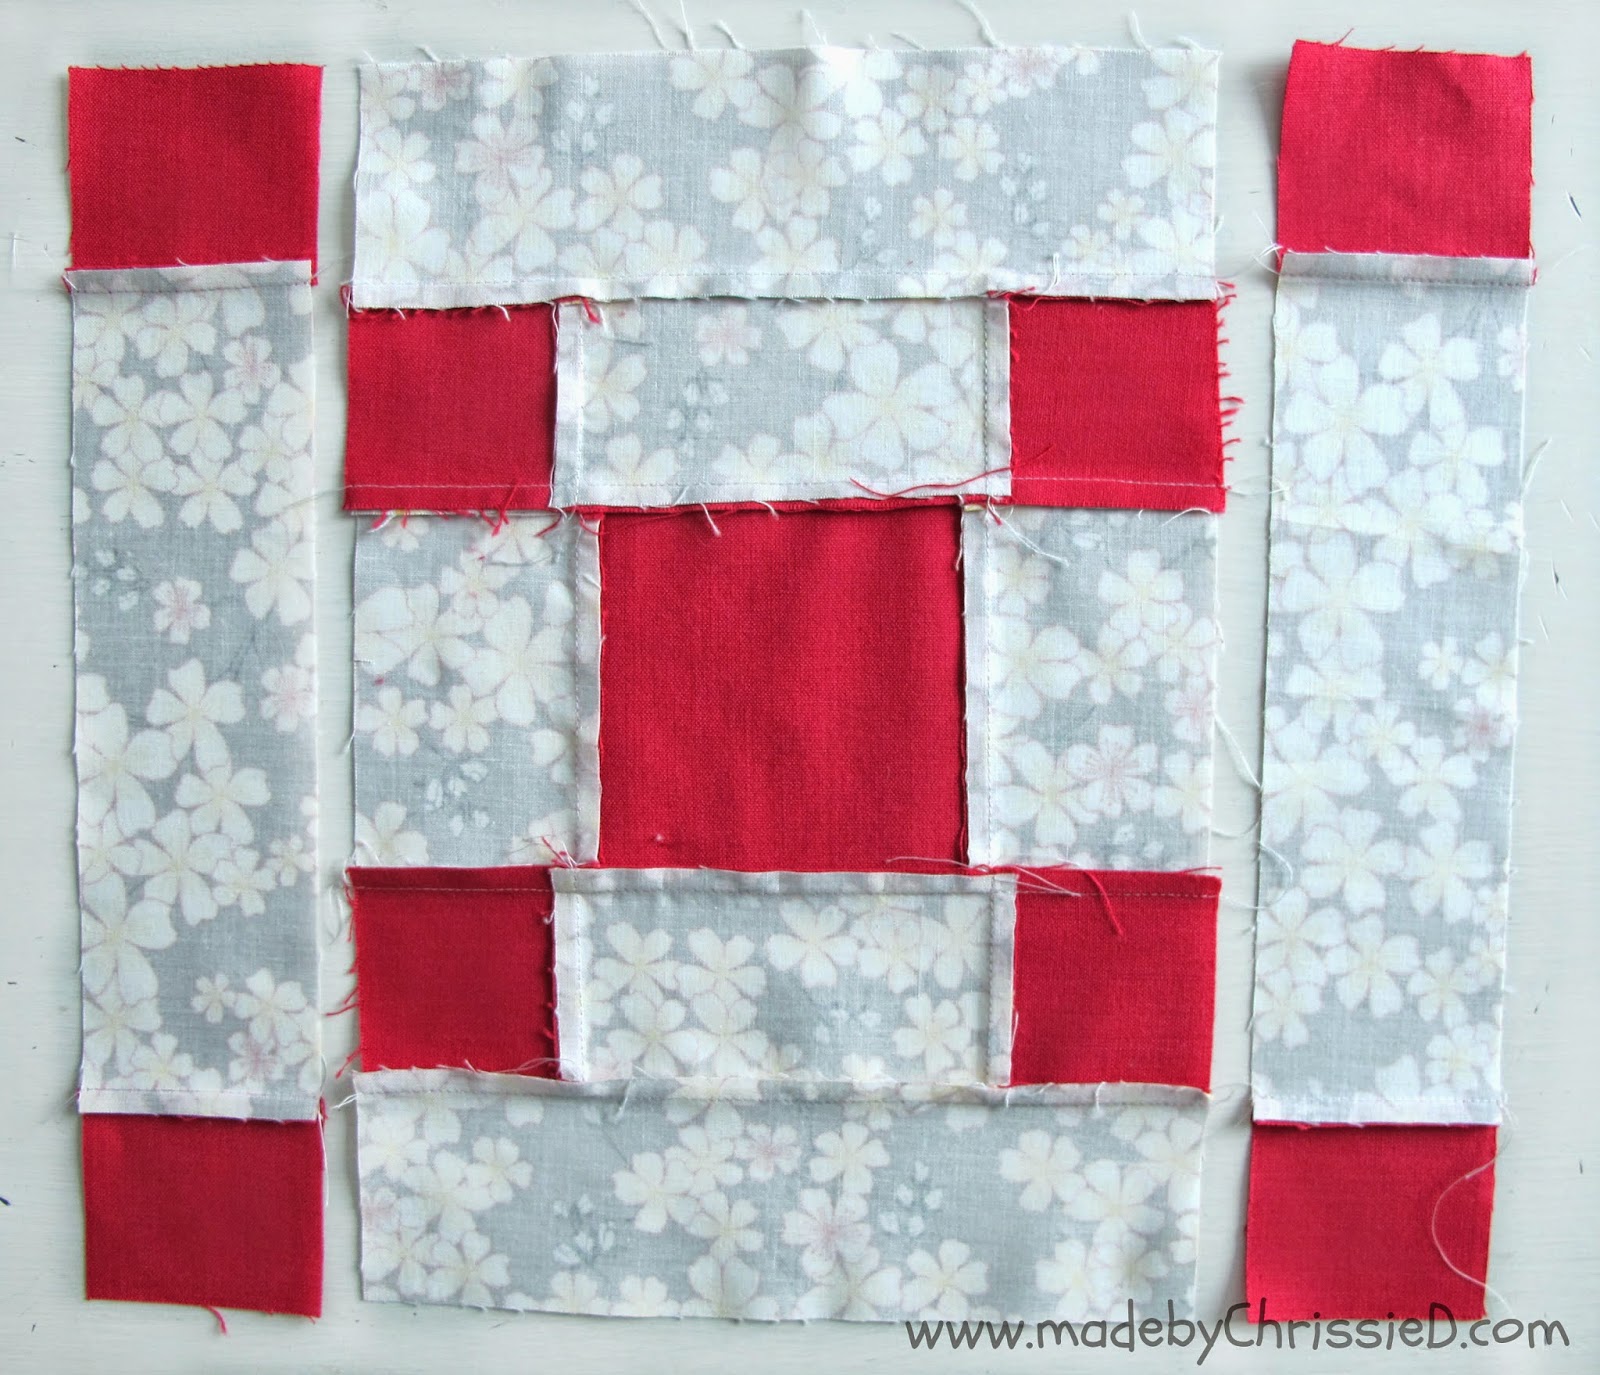
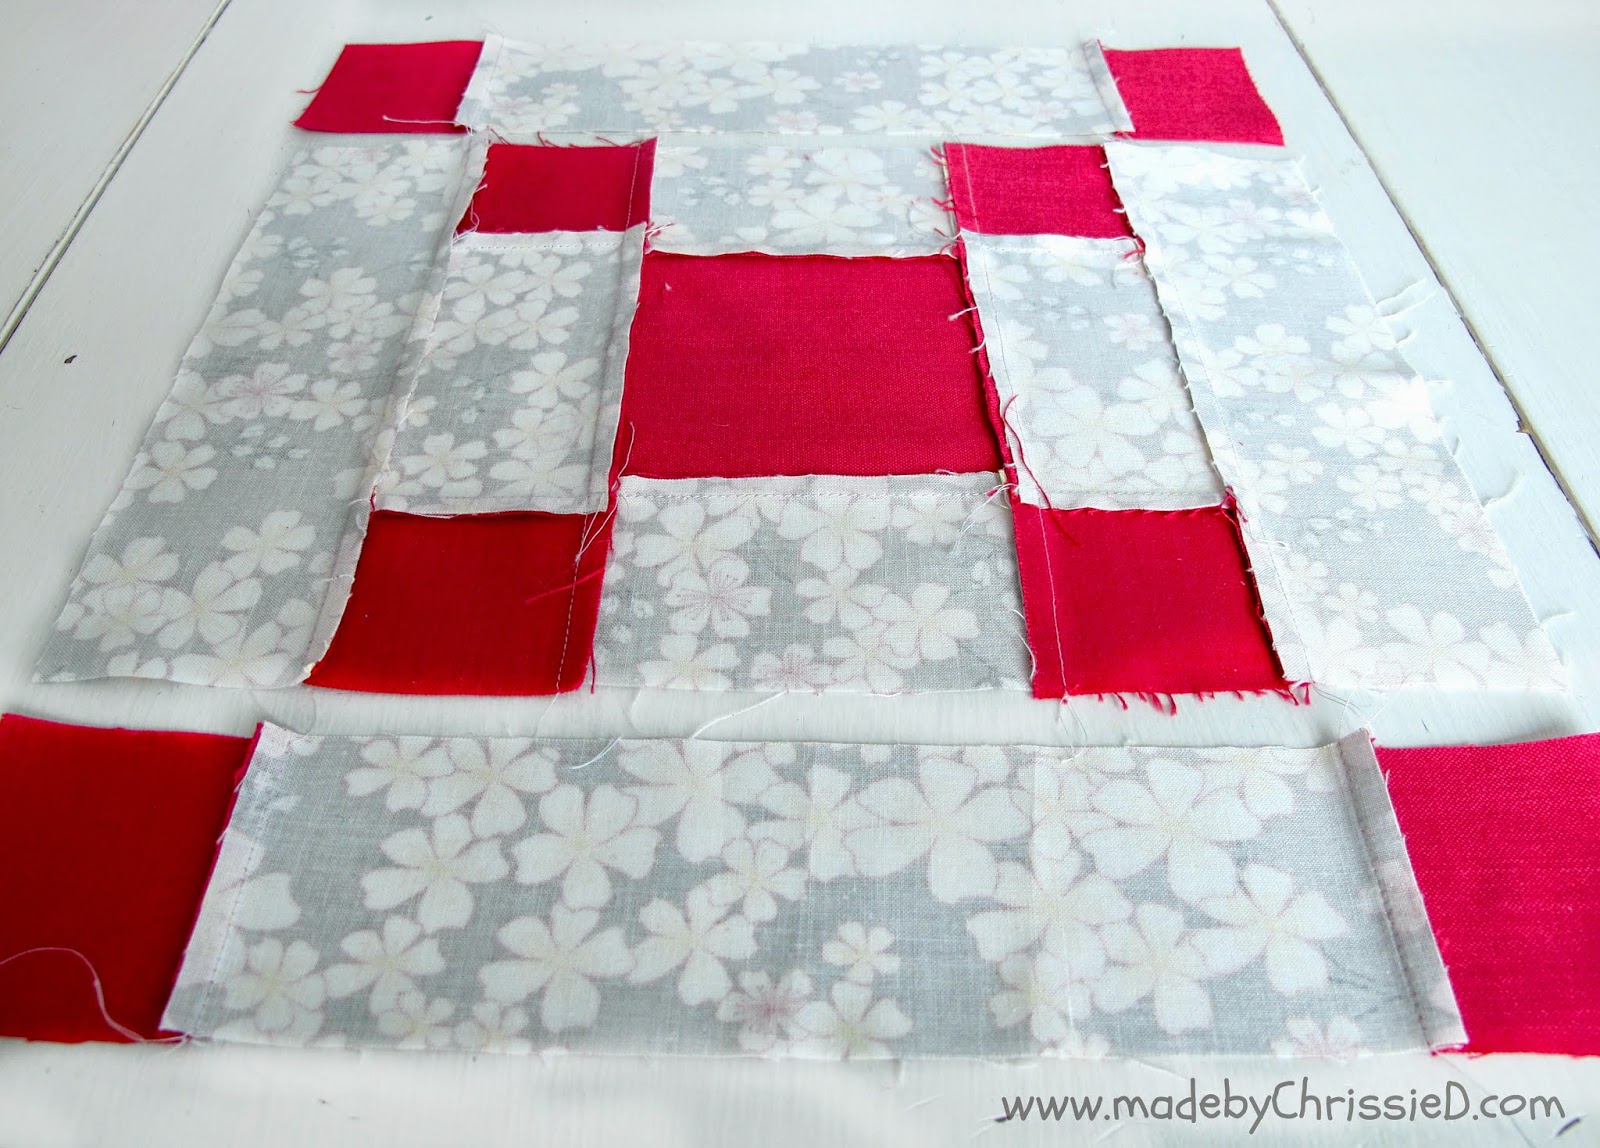
As you can see above, the 3 sections are coming together, so let's look at the back to see how I've pressed each seam. I've alternated the direction of each row so I can nest my seams together in the next stage and create perfect seam joints - you can read more about pressing seams in my Pros + Cons of Pressing Open Or To The Side post. If you need help to nest your seams, you can learn how to do it here in my How To Nest Seams tute.


Now, back to the sewing. Again, use a scant 1/4" seam to join the rows of the centre section, as shown in the photos below.
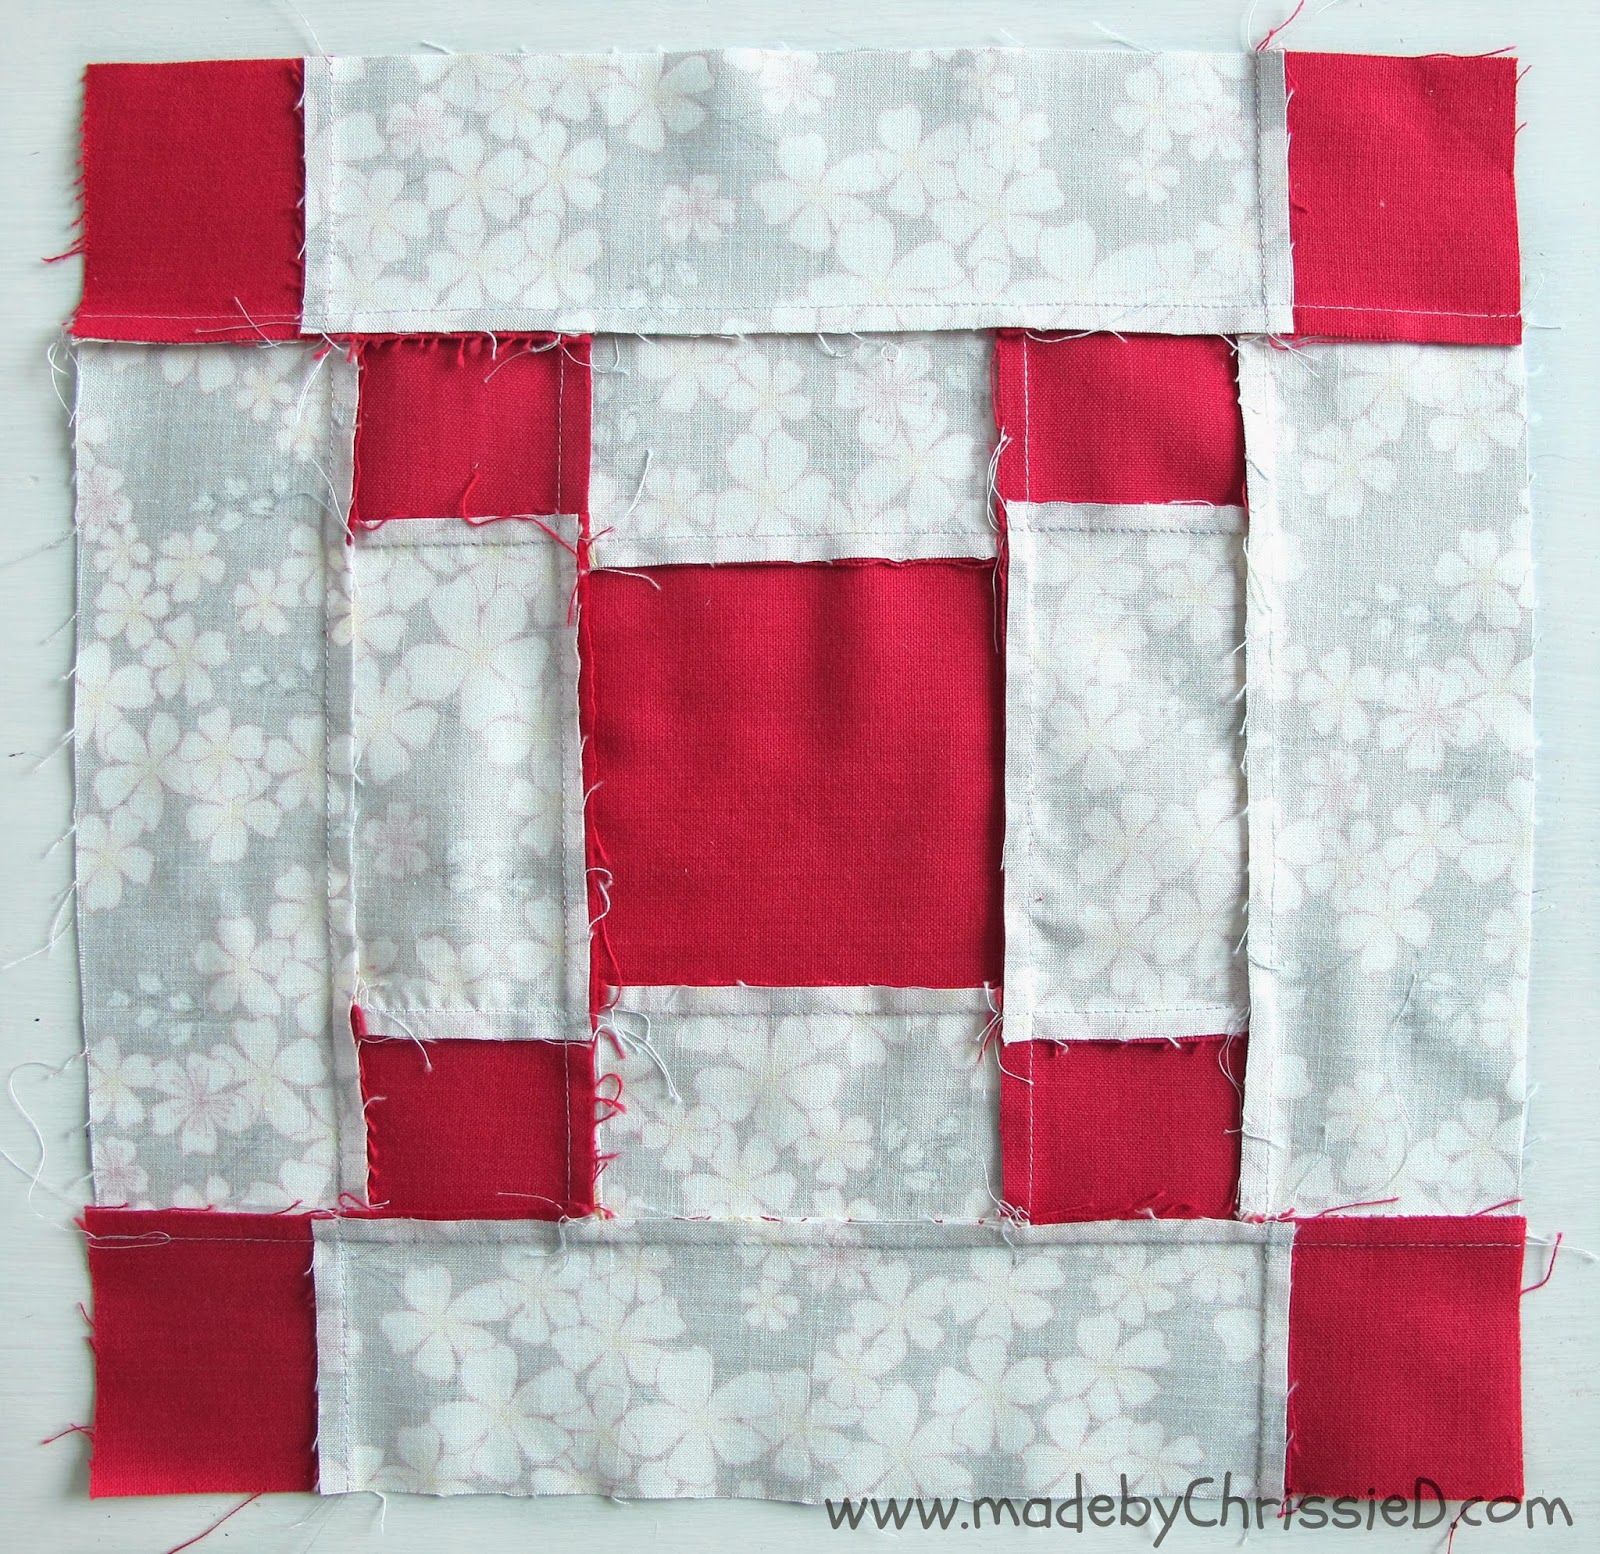
Time to check the direction of those pressed seams.
Then, join the side columns to the centre section.
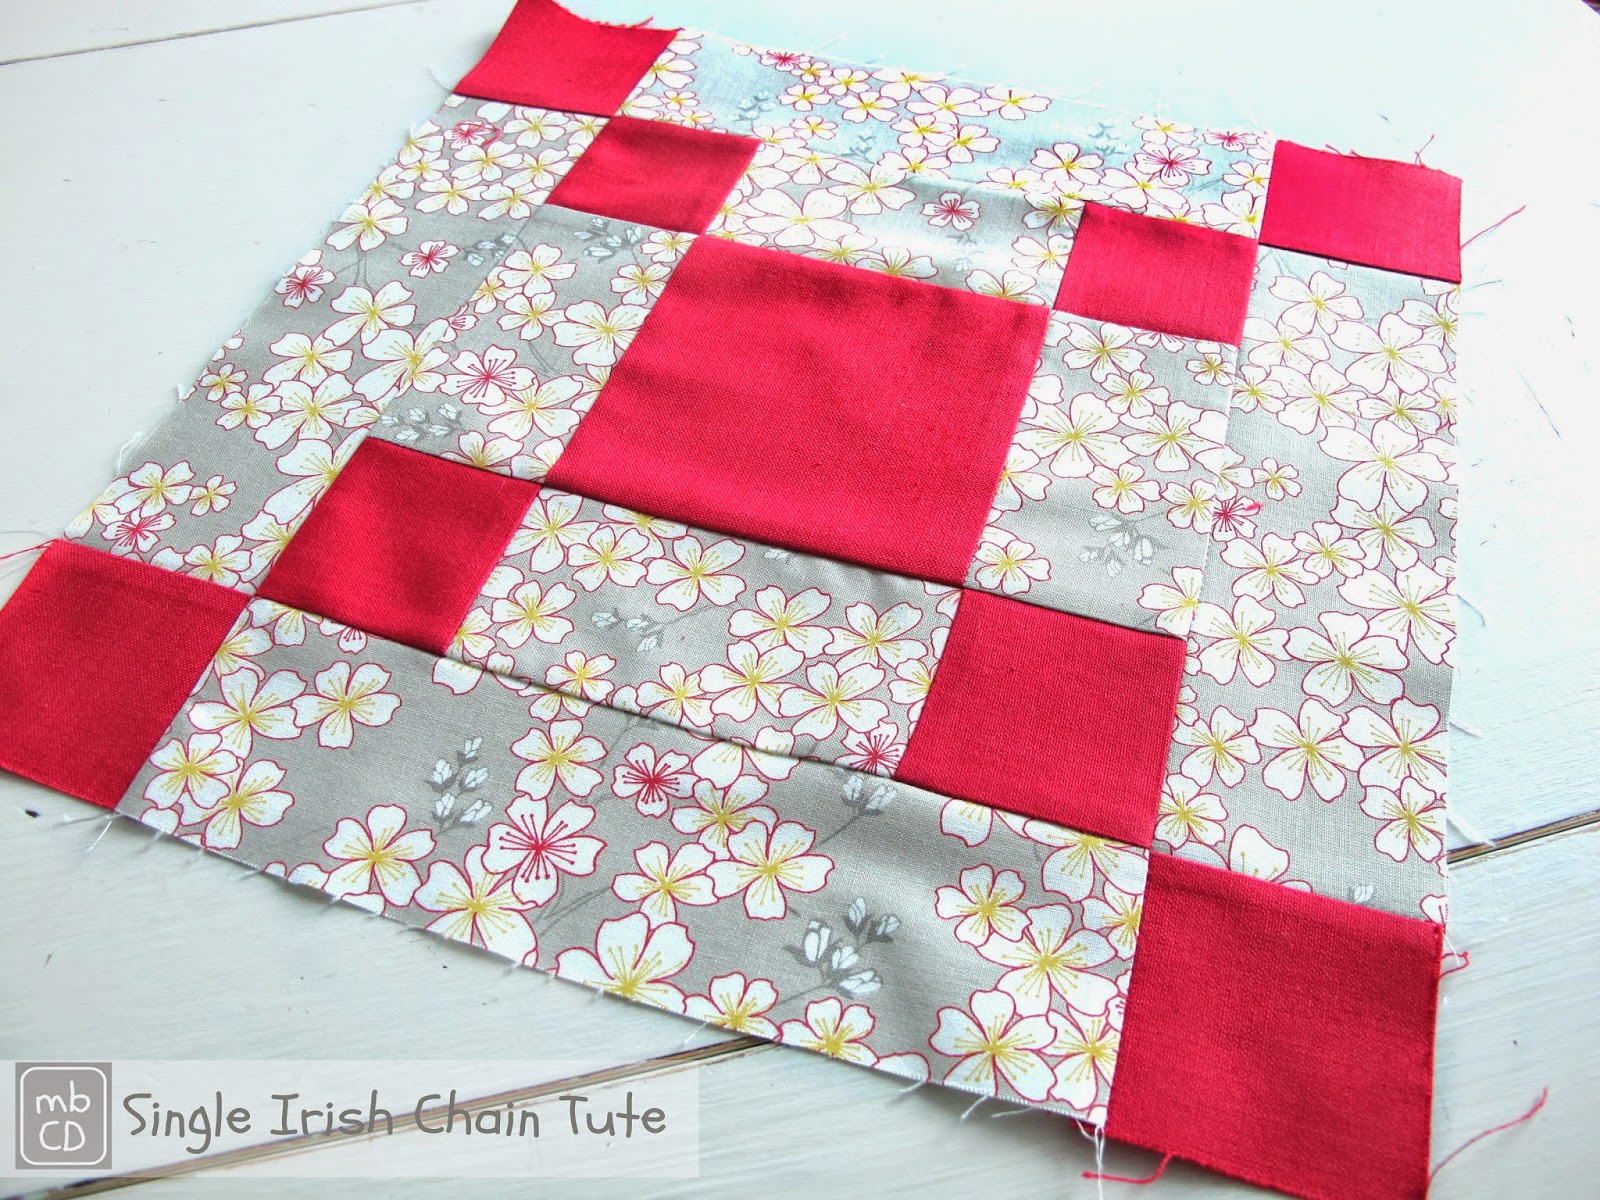
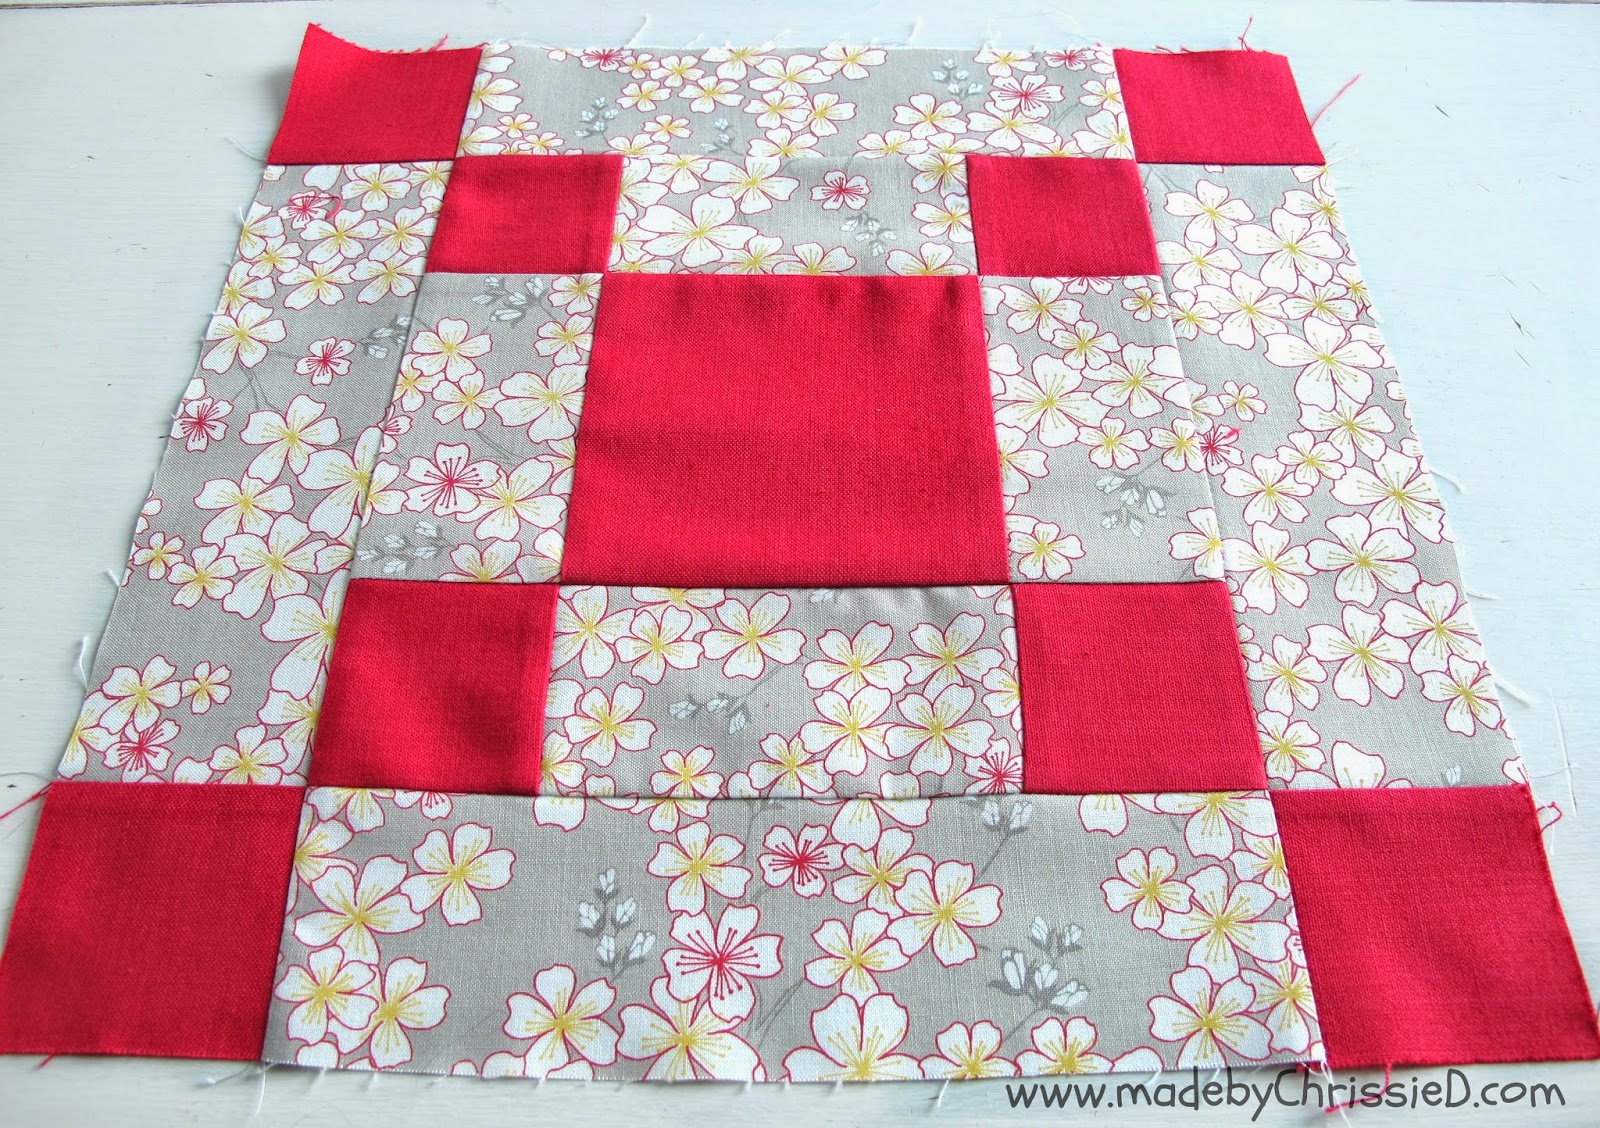
And here's your finished block with perfect seam joints.
Unfinished size 12.5" square/Finished size 12" square.
And a final look at the back seams.
And the last look at that block. In this photo below, you can see the 3D effect that we've given the block just by the direction we pressed the seams - the centre block is the highest, and the outermost perimeter blocks are the lowest. Maren's colour choices have made this more evident with a strong, warm raspberry that comes towards you while the cooler grey floral sits well back.
TIP: You can use this visual receding and advancing achieved through colour and seam pressing in all blocks to create different effects in your quilt design.
As always, you can check out all the blocks that our Bee makes for Maren on my Quilty - Single Irish Chain Block Pinterest Board - I'll add more pins as each person in the Bee posts photos of their finished blocks, and you can see my NYC Mod Quilt Guild Post here too.
Single Irish Chain Block Tute
Featured on:
Clicking on an image will take you to a new page of crafty goodness :)
Disclosure:
This post contains Amazon affiliate links for which I am compensated on click-through purchases (at no additional cost to you). Otherwise, the post is for informational purposes only; all opinions are mine.
Copyright:









So pretty!! Lovely tute!
ReplyDeleteLove this block! Great tut.
ReplyDeleteVery nice block, Chrissie! You broke it down so well to make it look easy. Thank you!
ReplyDeleteThanks for the detailed tutorial, Chrissie... so much information that's new to me. Love the 3D effect. Pinning for future reference.
ReplyDeleteYou're learning fast though Pam - with all those years of sewing experience quilting's easy, that's how I took to it so quickly too :D
DeleteVery nice tutorial, with lovely fabrics! I found your through the linky party on JAQS Studio. Greetings.
ReplyDeleteAn Irish Chain quilt has been on my "want to do" list for a while now. Your block looks great, and it's another great tutorial from you!
ReplyDeleteSweet block and really well written tutorial! You sew, girlfriend! Thanks so much for sharing!
ReplyDeleteI love your choice of fabrics!
ReplyDeleteKathi
Thanks for sharing this tutorial for the Single Irish Chain.
ReplyDeleteWhat a wonderful tutorial for a beginner.
ReplyDeleteThank you for sharing with the Clever Chicks Blog Hop! I hope you’ll join us again next week!
Cheers,
Kathy Shea Mormino
The Chicken Chick
http://www.The-Chicken-Chick.com
Great tutorial and thanks for sharing.
ReplyDeleteGreat block Chrissie! Thanks for sharing.
ReplyDeleteFreemotion by the River Linky Party Tuesday
Great tutorial! Thank you so much for sharing your creativity with us at Show-Licious Craft & Recipe Party! Join us again on Saturday morning at 8:00 am EST!
ReplyDelete~ Ashley
Fabulous clear tutorial! Wonderful job and I absolutely ADORE the fabrics that you used. Love it!
ReplyDeleteI love the simplicity of an Irish Chain quilt. great tute, Chrissy!
ReplyDeleteThanks so much for linking up to Needle and Thread Thursday!
:) Kelly @ My Quilt Infatuation
Very pretty, love the colours.
ReplyDeleteBeautiful! Amazing work! Thanks so much for sharing tutorial.
ReplyDeleteHave a fabulous week!
Hugs from Portugal,
Ana Love Craft
www.lovecraft2012.blogspot.com
Great tute! Thanks for linking up to Inspire Us Thursdays on The Inspired Wren.
ReplyDeleteI have been looking for this block for awhile. Thank you. The instructions are very clear and precise.! Great job!
ReplyDeleteThank you for the tutorial. Your directions are so easy to follow. Love it! Gonna make it!
ReplyDeleteThanks, for a very easy to understand tutorial, i'll give this a go
ReplyDeleteI've checked my strips and they are accurately cut. However when I join say, the top strip to the centre section, the top strip is longer than the centre section . Why is that and how do I fix it. How do I prevent this from happening again?
ReplyDeleteIf your pieces are cut to the correct size then there are two other possible reasons for the sections now being different sizes. The top strip isn't pieced so is the exact size you cut it at while the centre strip has 3 pieces so has 2 seams. Measure your seam allowance on the back of the pieced section - is it a true 1/4"? Don't trust your machine foot even if it's a 1/4" foot or your machine foot plate even if it has a 1/4" mark on it, feet and foot plates aren't always reliable and also your needle may be slightly out of alignment. Measure your seam to check it's accuracy and adapt your sewn seam line to achieve the correct 1/4" measurement. The other place you may have lost fabric is in pressing the seams. If the seam isn't pressed fully to the side you can also lose a fraction of an inch here too. Pressing seams to the side always loses a fraction in the turnover of the seam and can be altered by adapting the size of your 1/4" seam to a scant 1/4" seam instead. Alternately you can press your seams open which gives a truer finished measurement. Unfortunately there's no email address attached to your blogger id making your account 'no-reply' so I'm not able to contact you with my response. Hopefully you'll visit again and see my reply here; good luck, I hope this is helpful :D - Chris
DeleteLove this lesson and wonder if there is a PDF FILE that I can print from. That way I can check it as I sew at the machine. I have chosen this pattern for my Oldest Grandsons gift.
ReplyDeleteJust saw this and was very excited. Your clear tutorial solved a "mystery block" mystery that has been hiding in my stash for years. Thanks.
ReplyDeletedelighted you found it useful, thanks for visiting and taking the time to comment :D - Chris
DeleteI am going to start this one with my grandson...he will be hooked on quilting
ReplyDelete