teaching sewing confidence, tip by tip
Showing posts with label Nine Patch. Show all posts

Tuesday, 11 November 2014

Happy Flowers - A Liberated Nine Patch Semi Tute


Queen Bee Rossanna set quite some challenge with November's Bee Block.

Some months ago Rossanna asked us all to start collecting wrappers from sweets or biscuits, tea or coffee - well wrappers from just about anything ready to make her November Bee Block.  

I drink tea, lots and lots of tea, so I started saving the wrappers from my tea bags.


As November came around Rossanna sent out her instructions and fabric.

Here's the fabric - Turtle Bay in olive for the Prince Charming collection by Tula Pink.


and the gist of her instructions were:

The blocks are to be part of an enchanted garden of a quilt.

1. ... make two 8.5" totally creative, free form, liberated, nine patch blocks using greens.  Use the green fabric provided in each.
2 ... over the green nine patch blocks create awesome happy flowers from combinations of fabric (any type) and your saved wrappers.
3  ... feel free to use embellishments whatever you decide!


I wouldn't like to call what follows a tute but I have explained my process so I'm calling it a semi tute.


Pulling some green from my scrap box I discovered I didn't have that much really - plenty green with other colours but I wanted to keep the blocks just green - so this was my pretty poor fabric selection.


Next, I cut the given Tula fabric into six random pieces.


Here goes for the first block.  I sewed 3 fabrics together into a strip and trimmed, then I added another strip of 3 fabrics and then a third strip.  I cut in any direction, paying no attention to seams and joins apart from making sure I was working larger than the 8.5" required for the block so I had plenty fabric for trimming down to size.


For the second block I included much more of the given fabric and created it the same way as the first.


And that's the two liberated nine patch blocks completed.


On to the flower embellishment.  I really didn't know where to start - only that I had all these tea bag wrappers.


My instant idea is to make a flower petal from each tea bag wrapper, layer them up to create the flower, so I just go with it and start cutting a large petal from the first wrapper.  I keep one section of the fold of the wrapper in place to hold the two sides of the wrapper petal together - my thinking here is this will make the petal thicker, slightly stronger at the centre of the flower and give the petal colour on both sides.


Here's how I layered up my first flower:
Pic 1: I used extra large petals and sewed around the centre;
Pic 2: then I sewed a circle of orange/yellow netting over it;
Pic 3: added another layer of 5 petals slightly smaller than the first layer;
Pic 4: another circle of orange/yellow netting;
Pic 5: a final layer of 5 petals smaller again.; and
Large Pic: then I sewed the flower onto the block.


I finished the flower off by hand sewing two buttons on top of each other over the centre of the flower - sewing right through to the back of the block.


And for the second flower:
Pic 1: I took a piece of lime green sheer ribbon and sewed two rows of straight stitch 1/4" apart along one edge of the ribbon - I used my Bernina's maximum stitch length;
Pic 2: I knotted one end of the two rows of straight stitch together to hold that end and then pulled one piece of each thread at the opposite end which ruffles the ribbon, pulled the ends tight and knotted them;
Pic 3: I sewed the ribbon circle onto the 8.5" block;
Pic 4: As in the previous block I sewed 5 petals to the centre of the ribbon;
Large Pic: I made another ribbon circle as before and sewed it on top of the petals. 


As previously I sewed two buttons on top of each other through from the back of the block to finish the centre of the flower.


And a couple of close-ups of those flowers.


 Really wasn't sure what I was going to make for this month's Bee Blocks or how they'd turn out, I'll go as far as to say I didn't think I'd like this one at all but, as is often the way with my Bee Blocks I enjoyed the process and love the finished blocks.  My husband, Simon's thrilled the blocks are finished too, he said: "does that mean we can stop saving our tea bag wrappers now?"!


I have no idea how Rossanna is going to sew all the blocks together - the flowers we're making are going to be so fragile and I can't imagine quilting around them either.  I'm guessing it's going to be an art quilt as, again, it's too fragile to use and can't be washed.  When I know more I'll share it with you, in the meantime, you can check out all the other blocks as they're made here on my Quilty - Happy Flowers Liberated Nine Patch Blocks Pinterest Board.


And you can click this button below to see all of my NYC Mod Quilt Guild Bee Blocks and Challenge Blocks/Quilts.


Disclaimer: This post is for informational purposes only, no payment or commission is received on click-throughs and opinions are my own.

Featured on:


Follow on Bloglovin


Saturday, 22 March 2014

Spots Before Your Eyes - April 2014 NYC Metro MQG Block Lotto


The NYC Metro Mod Guild Guild Block Lotto for our next meeting on 5 April is 9 patch polka dot blocks.  (Not sure how to piece and press 9 patches?  Read my easy tutorial here.)

So the idea is that you make as many blocks as you like and take them along to the meeting.  Each block you hand in gives you one entry in the raffle and the raffle winner wins all the blocks brought along by guild members.


I've used the 7 polka dot fabrics that I picked up on my trip to Britex in San Francisco two weeks ago and added a purple that I used in my Sparkle Plenty Quilt and a pink from my Drunkard's Path Quilt.


Blocks can be straight or wonky but have to have 9 polka dot patches and measure 9.5" square unfinished - with a quick bit of maths that's 9 x 3.5" squares.


And there it is ...


Does it look like a lucky Polka Dot block?

I hope so!  I'd love to win that raffle!!!

If you're interested in seeing the Show & Tell from our February NYC Metro Mod Guild meeting here's the link.  You might want to nip over just to take a look at my Show & Tell - a quilt I made for Simon for Christmas but haven't got around to photographing and blogging about yet.  It's a pleated quilt and I was dreading ever having to wash it because I really didn't want to ever have to iron it - but Watson, our new Havanese pup, vomited on it last week and by the time I got home from work Simon had washed and tumbled it absolutely bone dry.  I'm not sure it'll ever be quite the same again and not a photo to show for it :(  I'm going to give it another wash and try ironing it when it's still pretty damp, that's the plan but life keeps being too busy and getting in the way, I'm sure you know how it is!

Can't help loving Watson though, he's such a cutie!!!  Haven't shared too many pics so here's a few and some of Tatty too.


Love them so much I think I can just about let them off a bit of vomit on a quilt.

What about you, do you have vomit stories (or worse!) about your quilts?  Did you love the culprit enough to forgive them too?!!!


And you can click this link to see all of my NYC Mod Quilt Guild Bee Blocks and Challenge Blocks/Quilts.


Follow on Bloglovin


Thursday, 6 February 2014

Easy Scrappy Nine Patches Tute: My February 2014 NYC MQG Bee Block
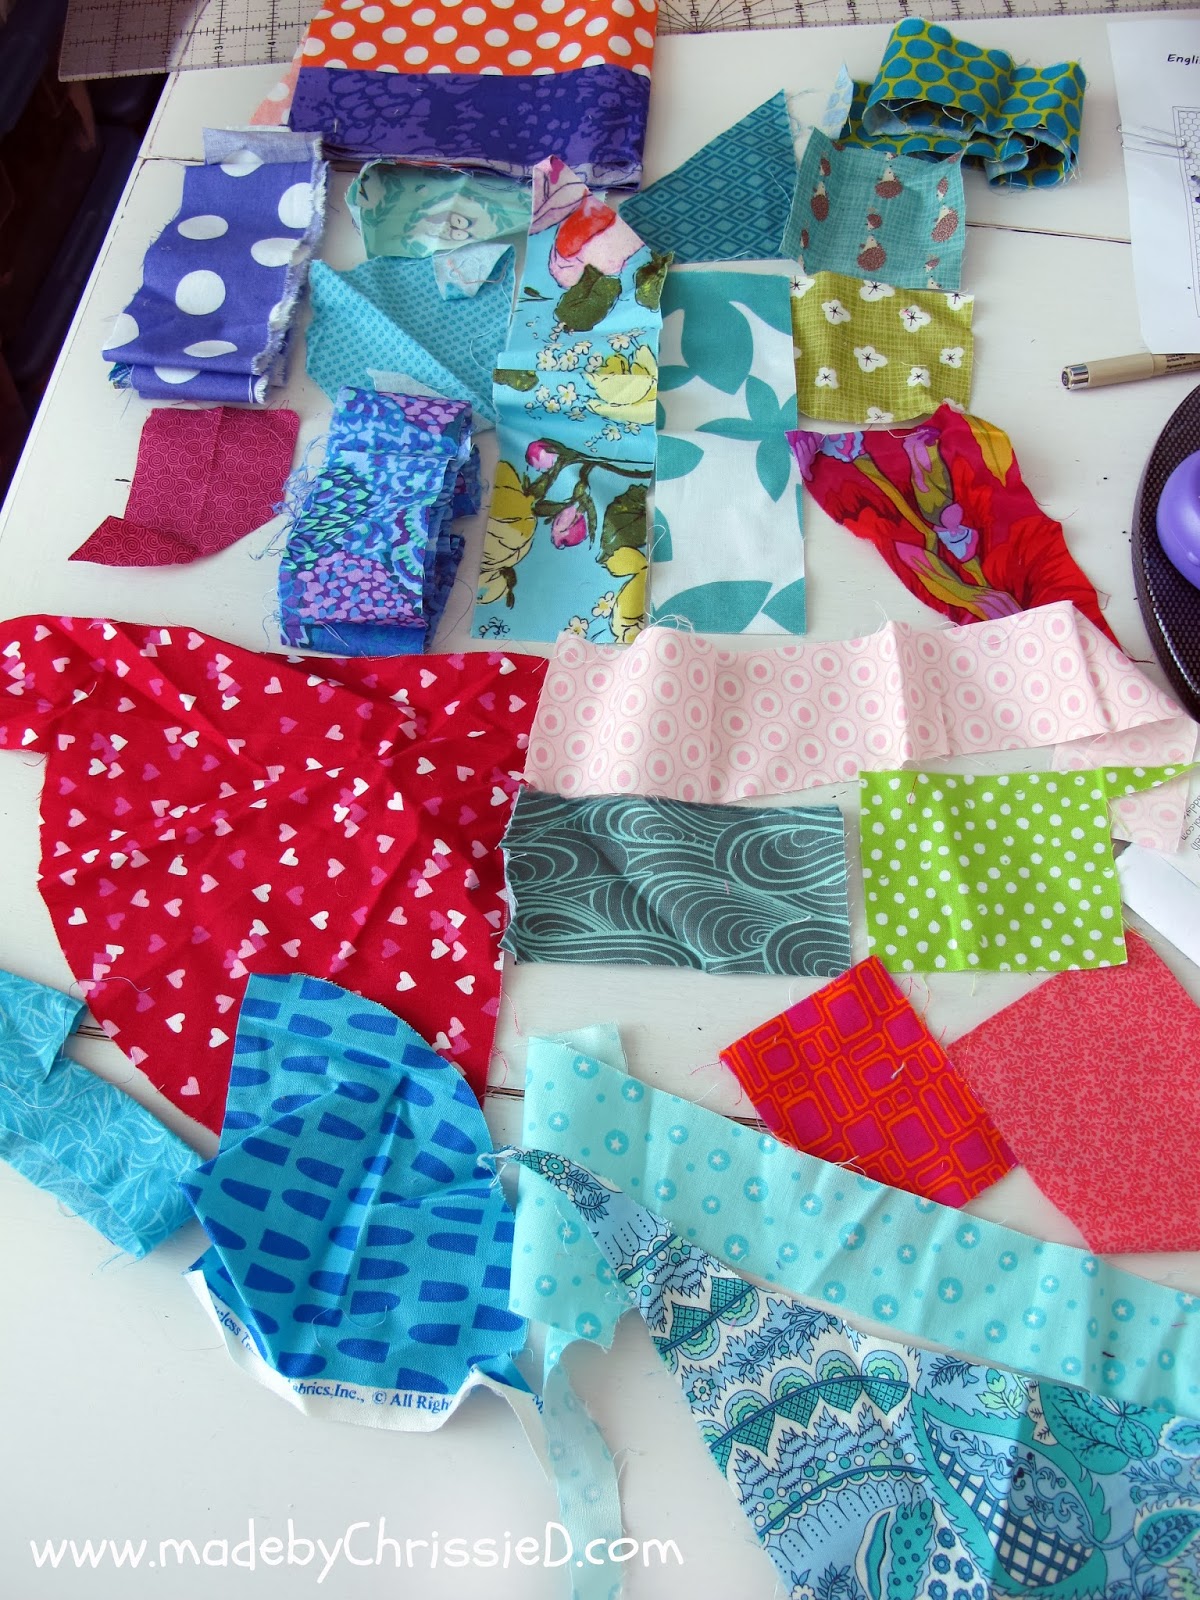
Easy Scrappy Nine Patches Tute by www.madebyChrissieD.com

February's NYC Mod Guild Queen Bee is Kim H and she handed out her block packages at last weekend's NYC Metro Mod Quilt Guild meeting (you can read more about our meeting on my Facebook page and also on our President Lisa's blog @The Red Headed Mermaid).

Easy Scrappy Nine Patches Tute by www.madebyChrissieD.com

Easy Scrappy Nine Patches Tute

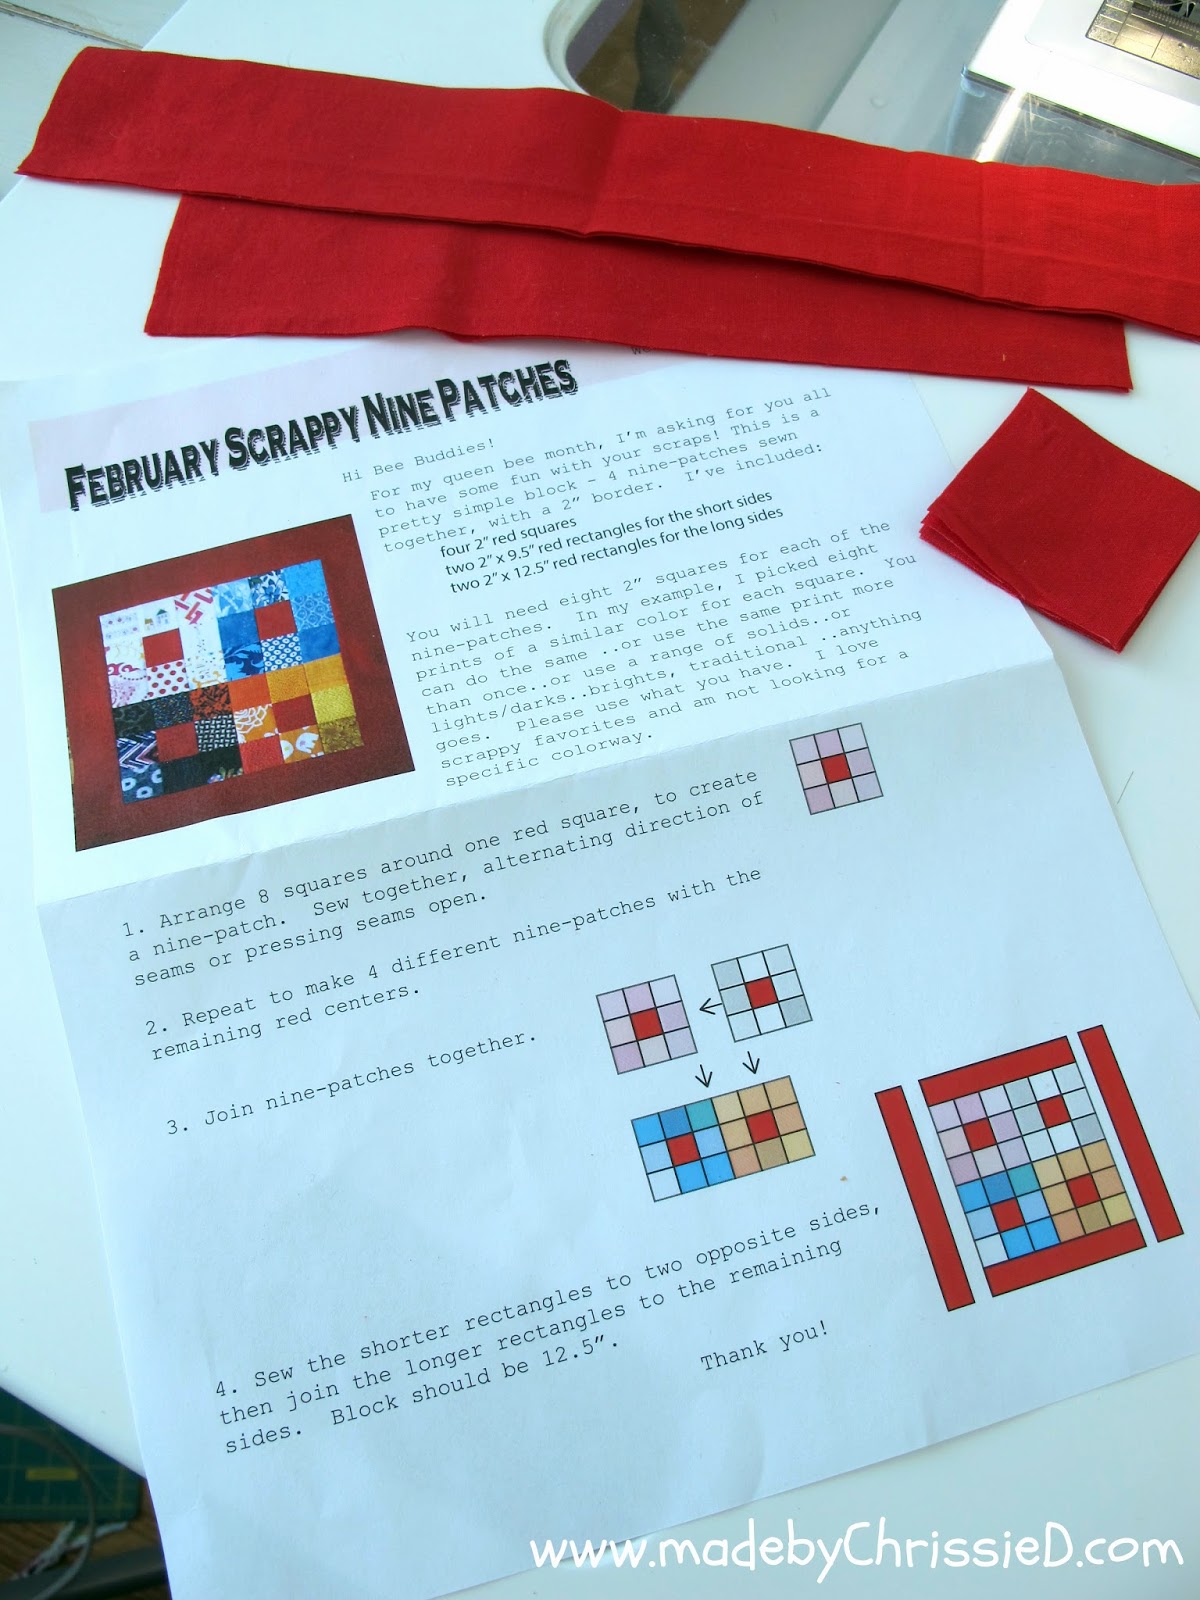
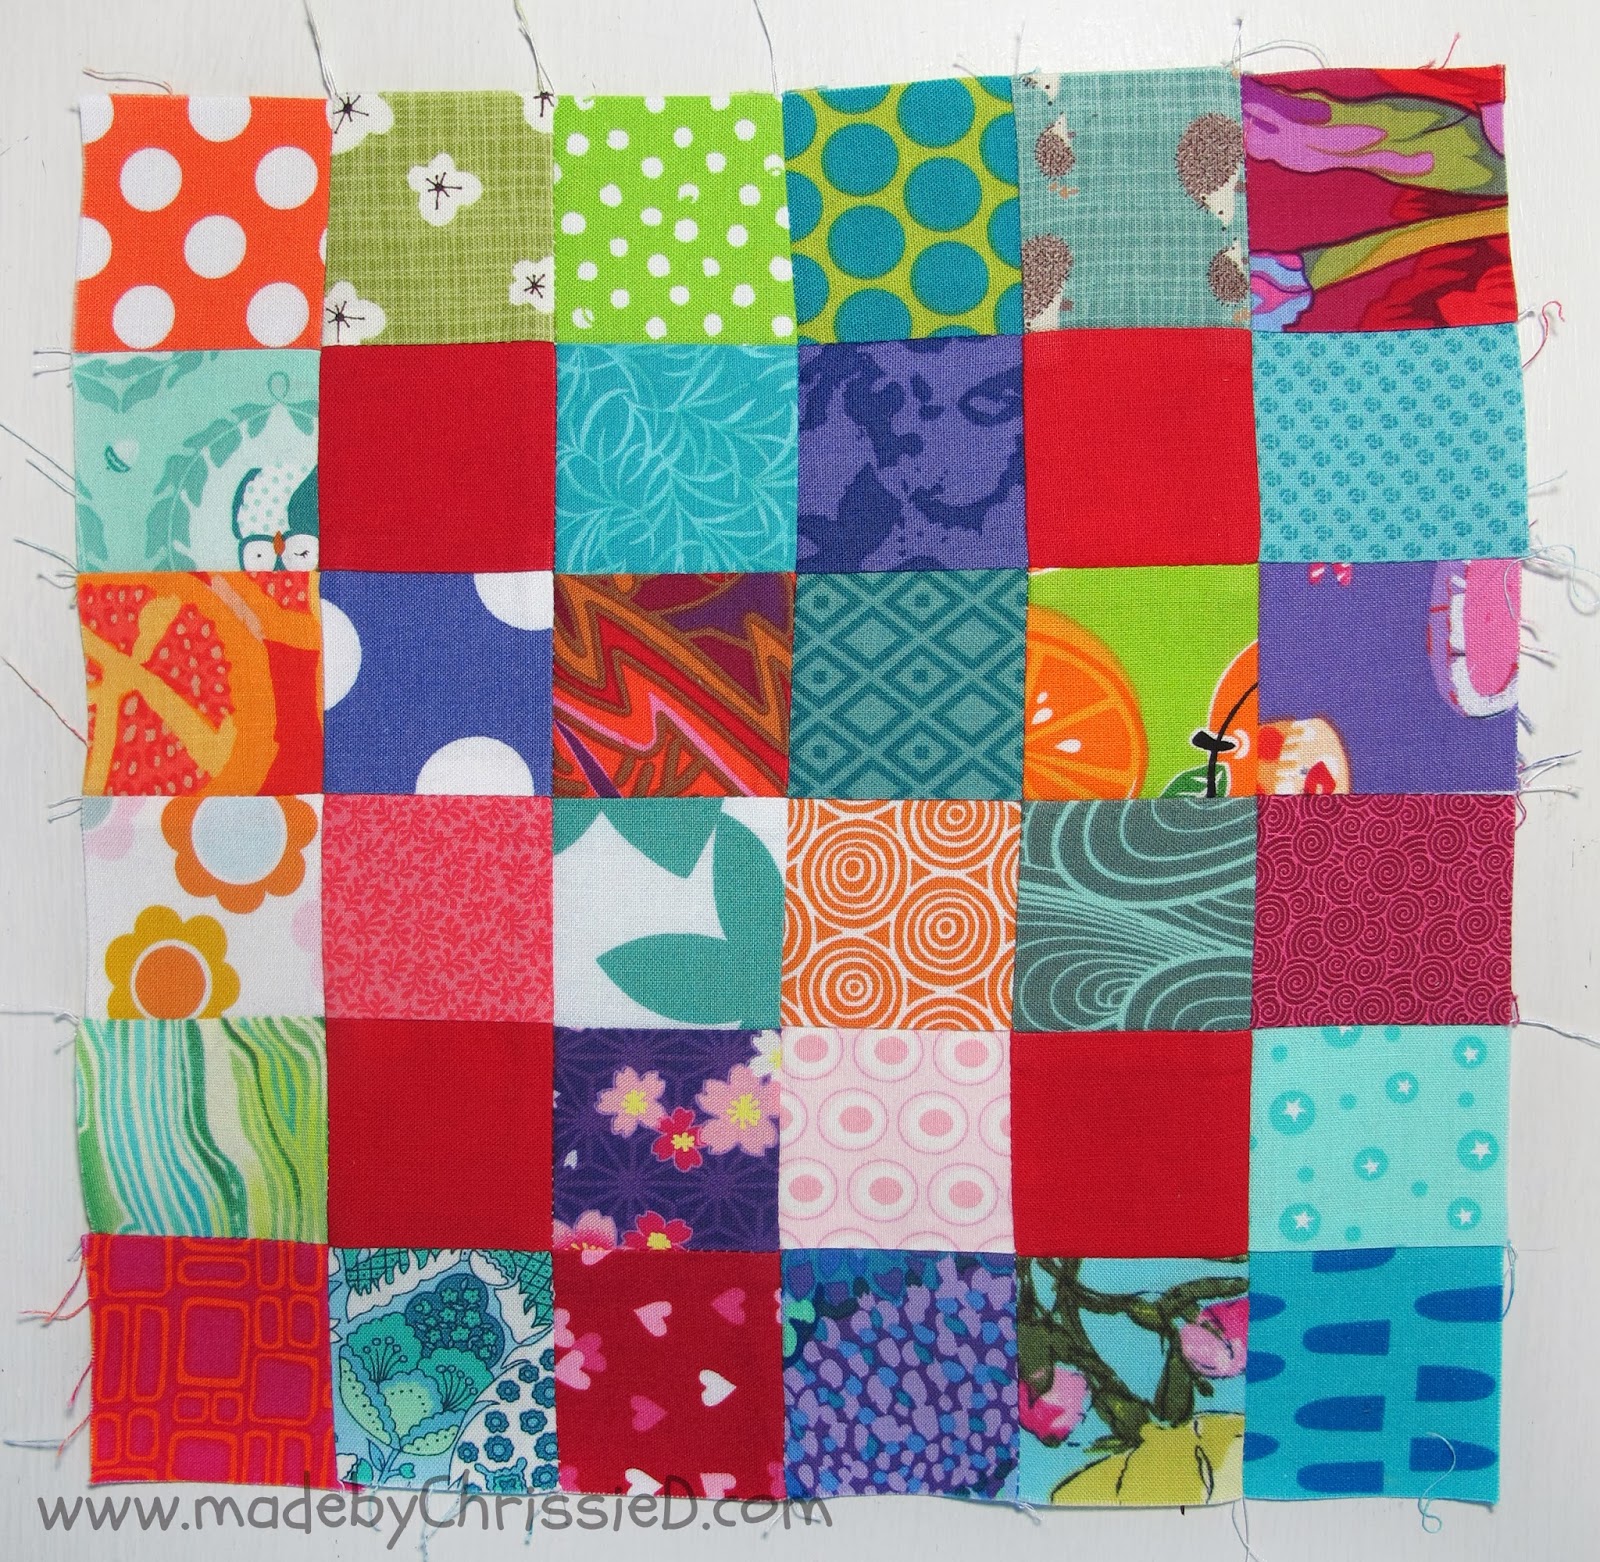
And here's Kim's instructions.  She gave us the 4 centre red squares for the 4 nine patch blocks and the outside red strip border fabric and asked us to use our own scrappy fabrics to create the other 32 squares saying we could use any prints, solids, colours, "anything goes".  You can see Kim's block on her instruction sheet - she used prints in 4 definite colour ways which make her 9 patches really obvious and she puts them together as 4 nine patch blocks.

I've got a different way of putting this block together that I want to share with you:

For each 12.5" x 12.5" finished block you'll need:
4 x 2" solid squares
32 x 2" print squares
two 2" x 9.5" rectangles for the border short sides
two 2" x 12.5" rectangles for the border long sides

If you're interested in finding a tool to make cutting those 32 x 2" squares really fast and easy how about reading my Tutorial: Charm Squares - An Easy Way To Cut Multiples Quickly.  On this occasion, I had to cut each square individually as I was using a different print for each but if you're cutting multiple squares from the same fabric then this is the tute/tool for you.


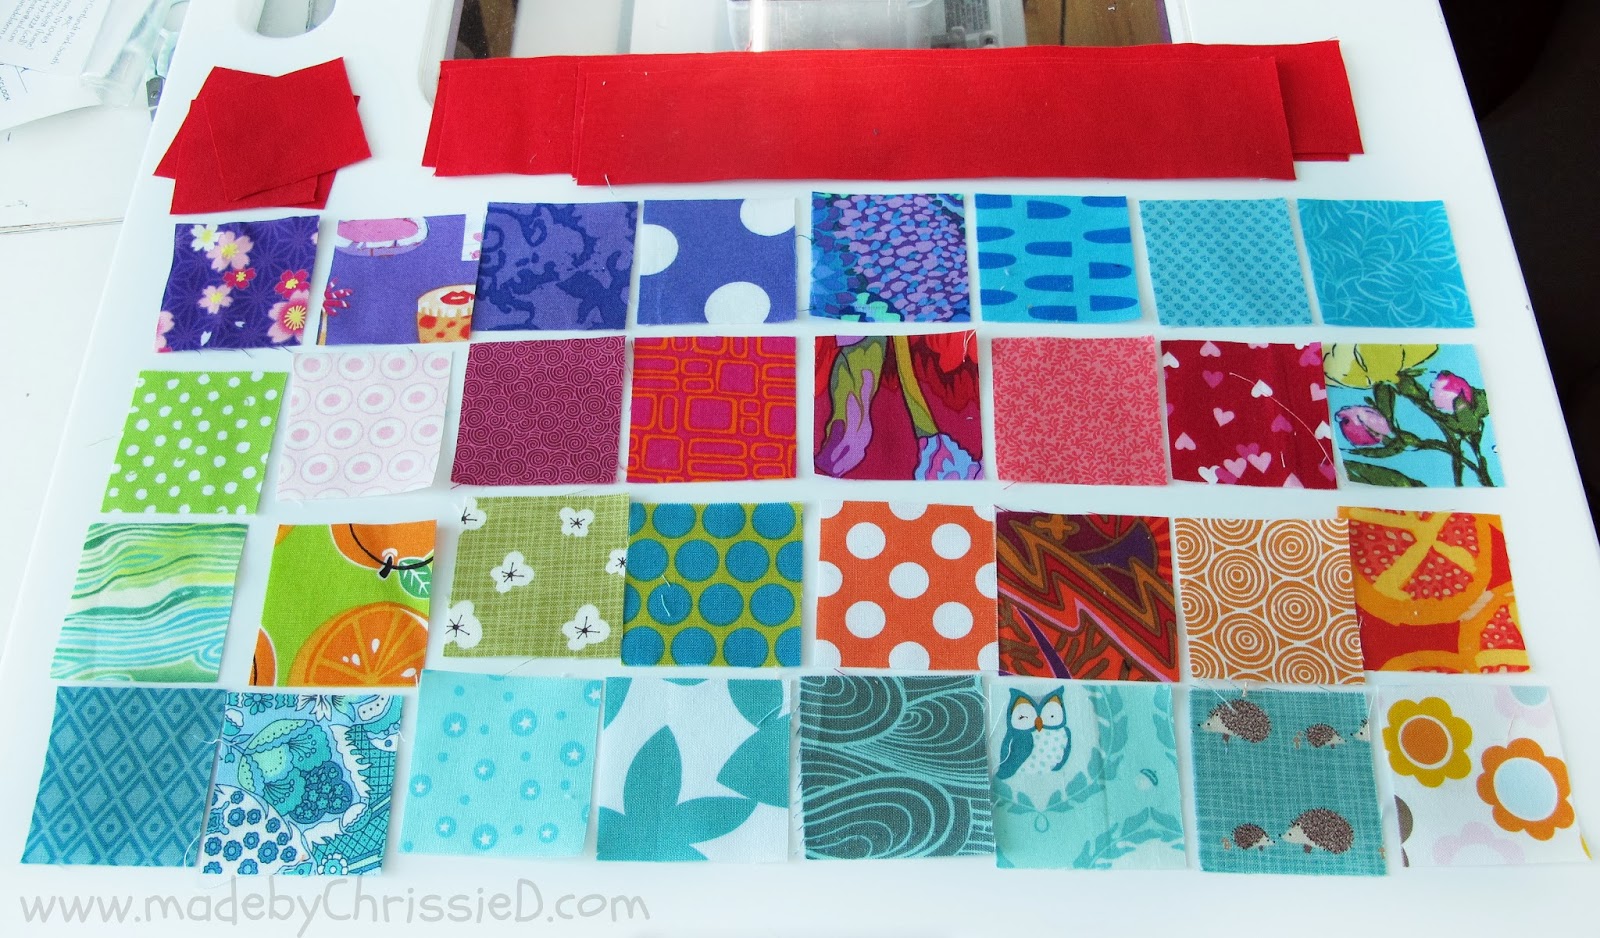
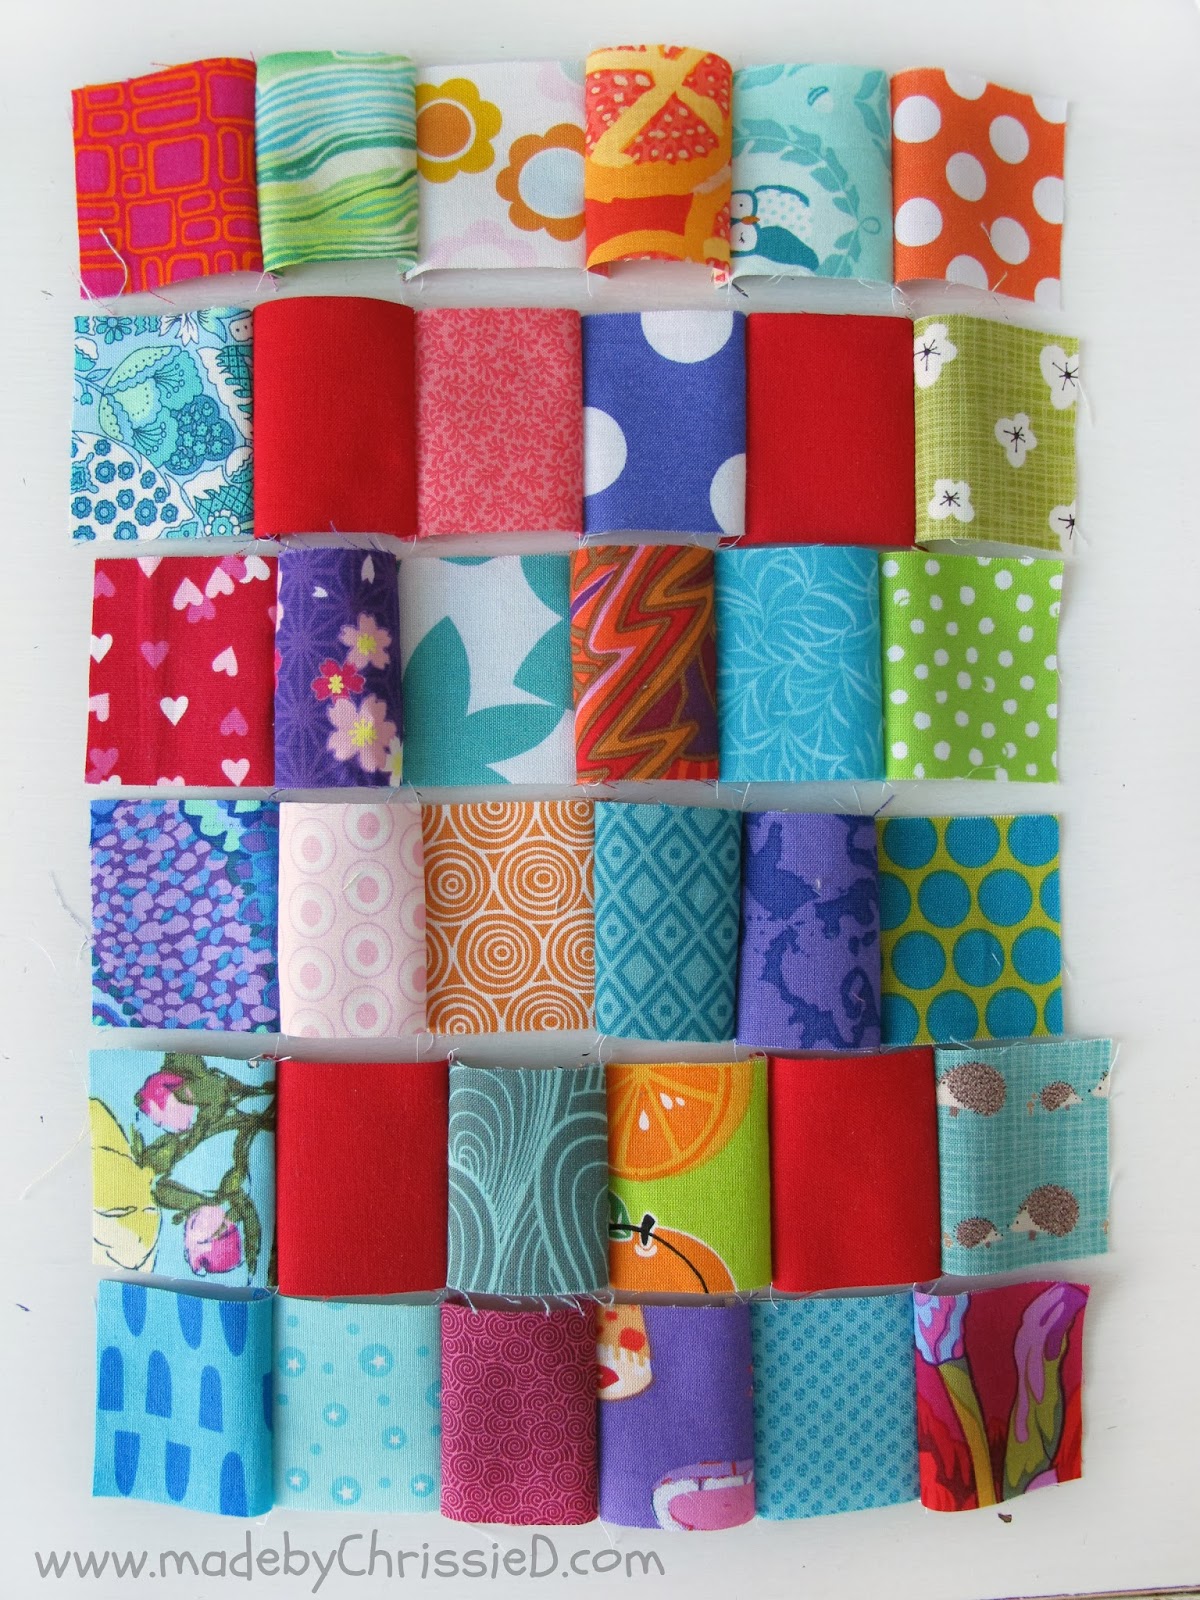
I decided to use 32 different prints and pulled this selection from my scrap bin;

Easy Scrappy Nine Patches Tute by www.madebyChrissieD.com

lined them up in colour order;

Easy Scrappy Nine Patches Tute by www.madebyChrissieD.com

started to place them in quite deliberately according to colour around the four central red squares and realised that this was too formulaic and just wasn't going to work.

Easy Scrappy Nine Patches Tute by www.madebyChrissieD.com

Instead, I tossed the 32 print squares into a heap;

Easy Scrappy Nine Patches Tute by www.madebyChrissieD.com

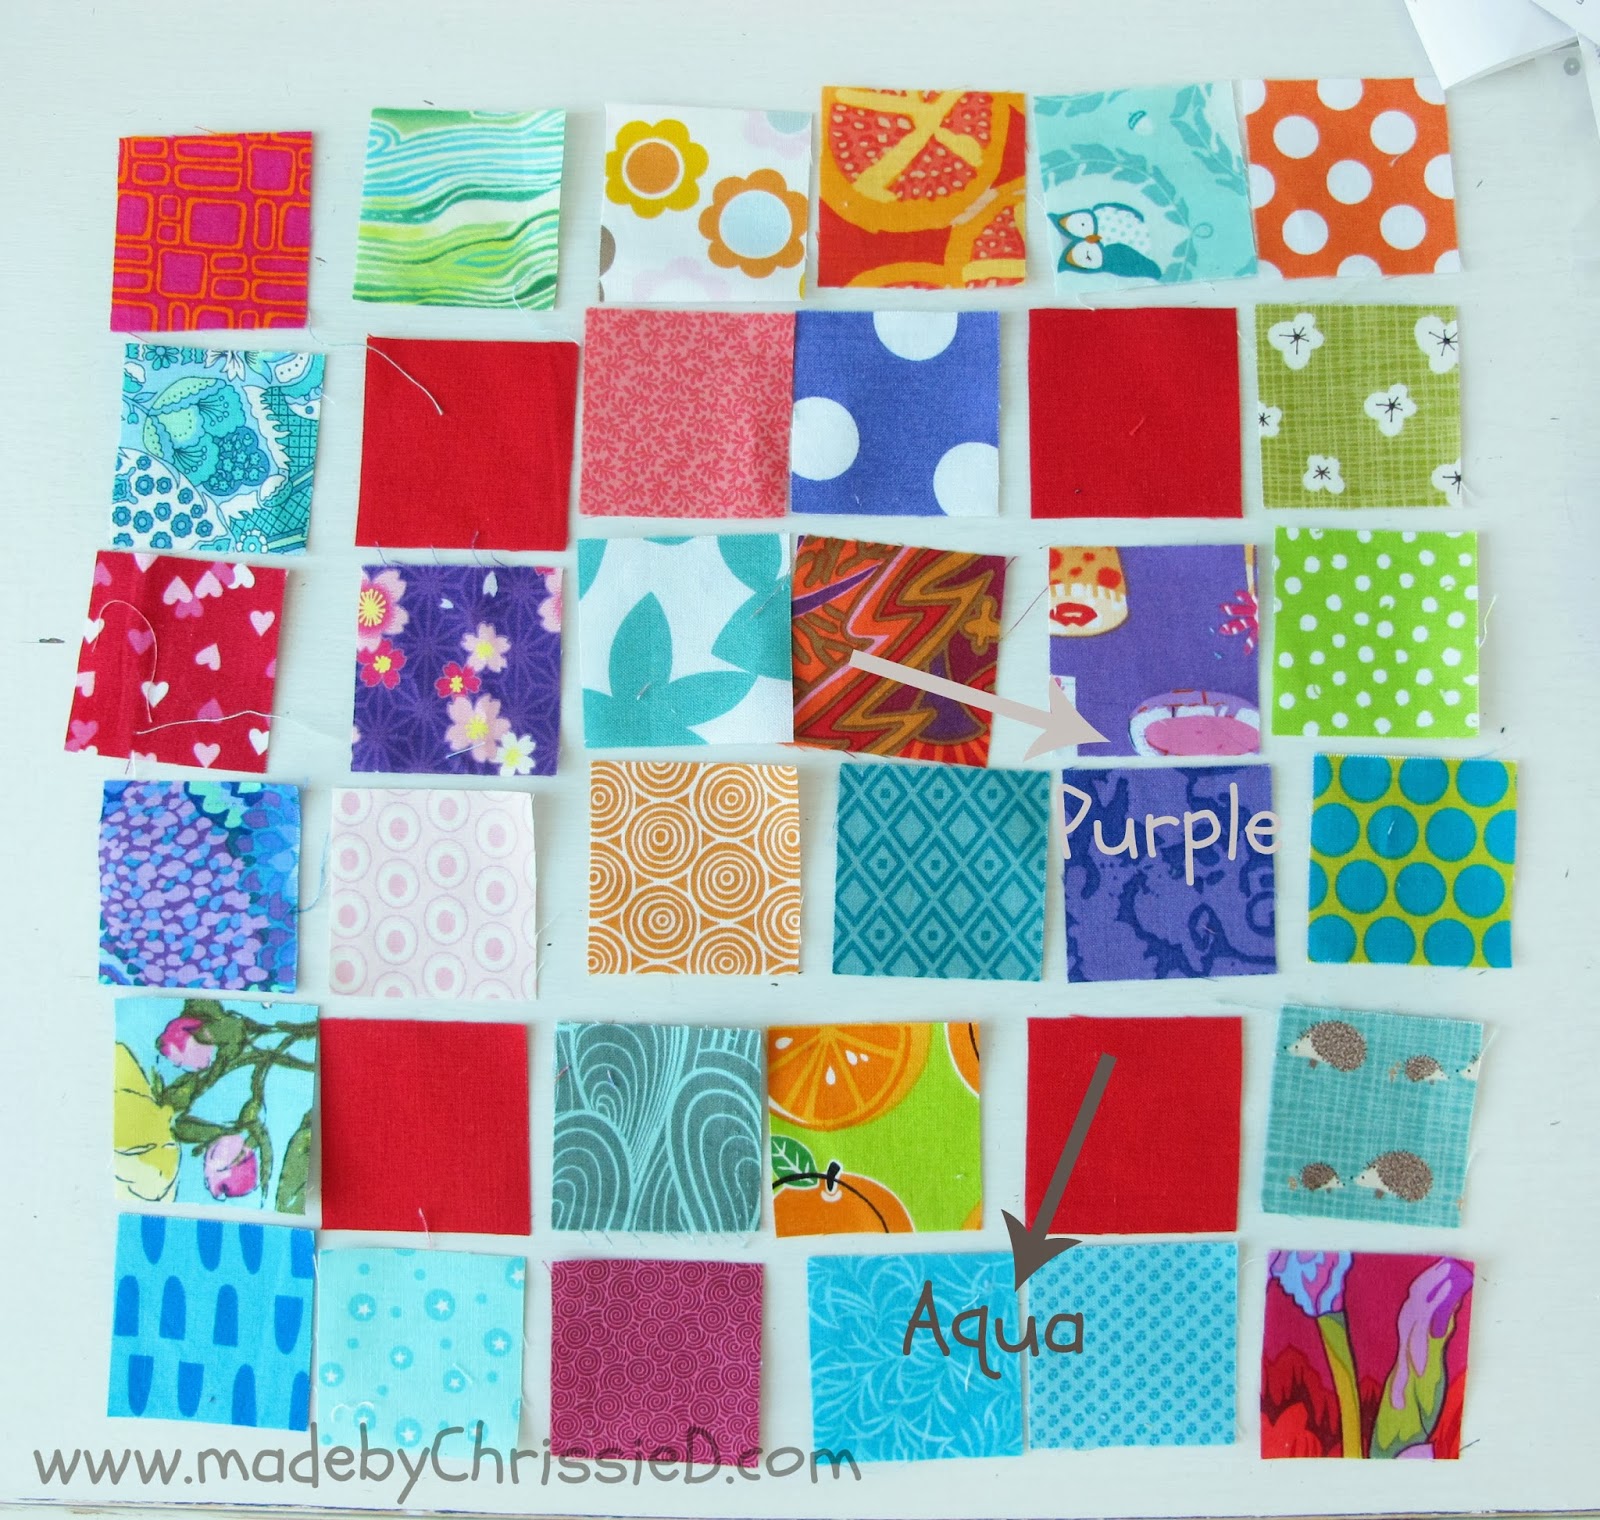
tidied them randomly into a pile and laid them out row by row around the solid red blocks just as they came off the top of the pile.

Easy Scrappy Nine Patches Tute by www.madebyChrissieD.com

This is how they looked - but there are two purples together centre left and two aqua next to each other on the bottom row;

Easy Scrappy Nine Patches Tute by www.madebyChrissieD.com

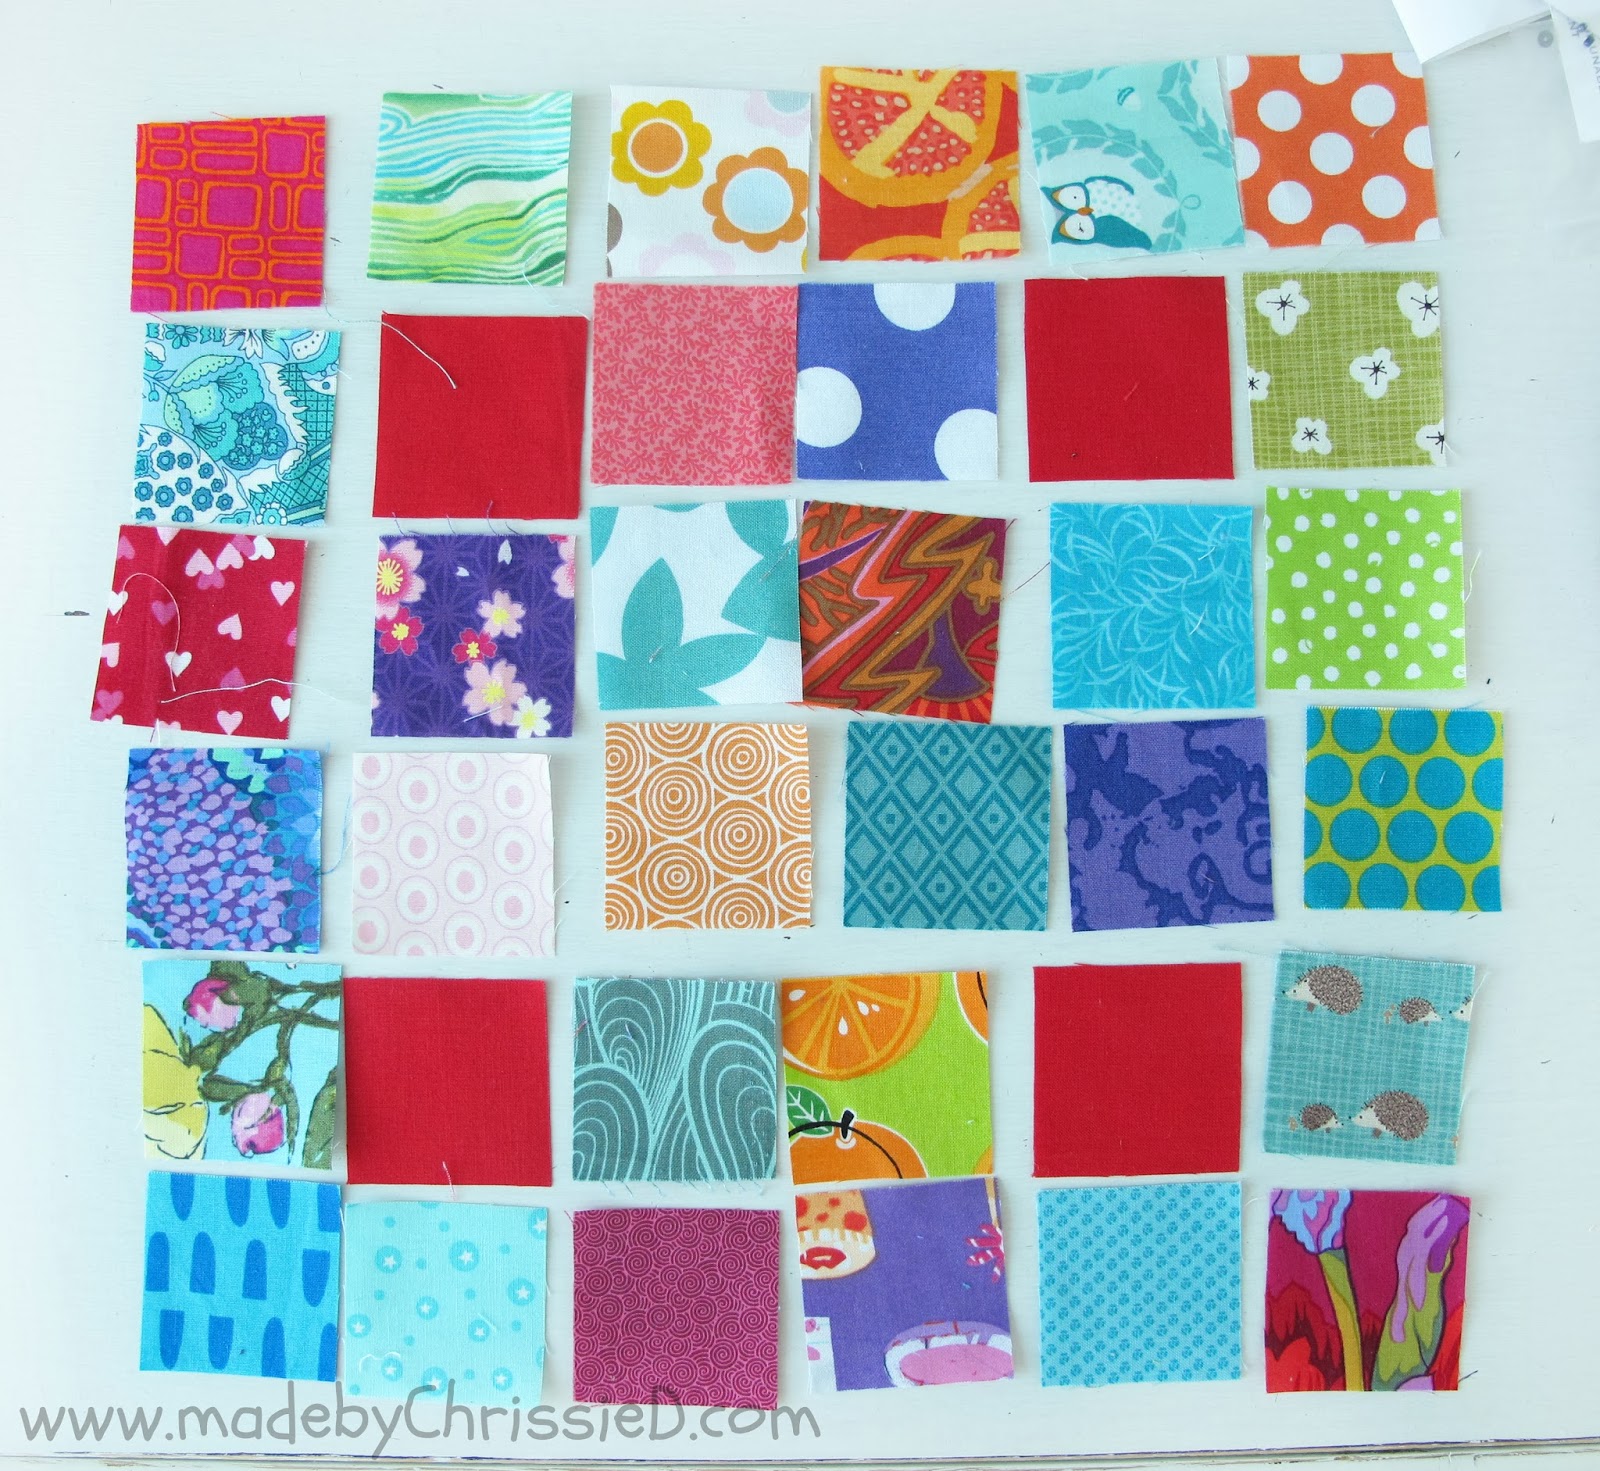
I just swapped two around and this was my final layout (I've since realised that I've got 3 lime greens down the far right column but it's too late now!).

Easy Scrappy Nine Patches Tute by www.madebyChrissieD.com

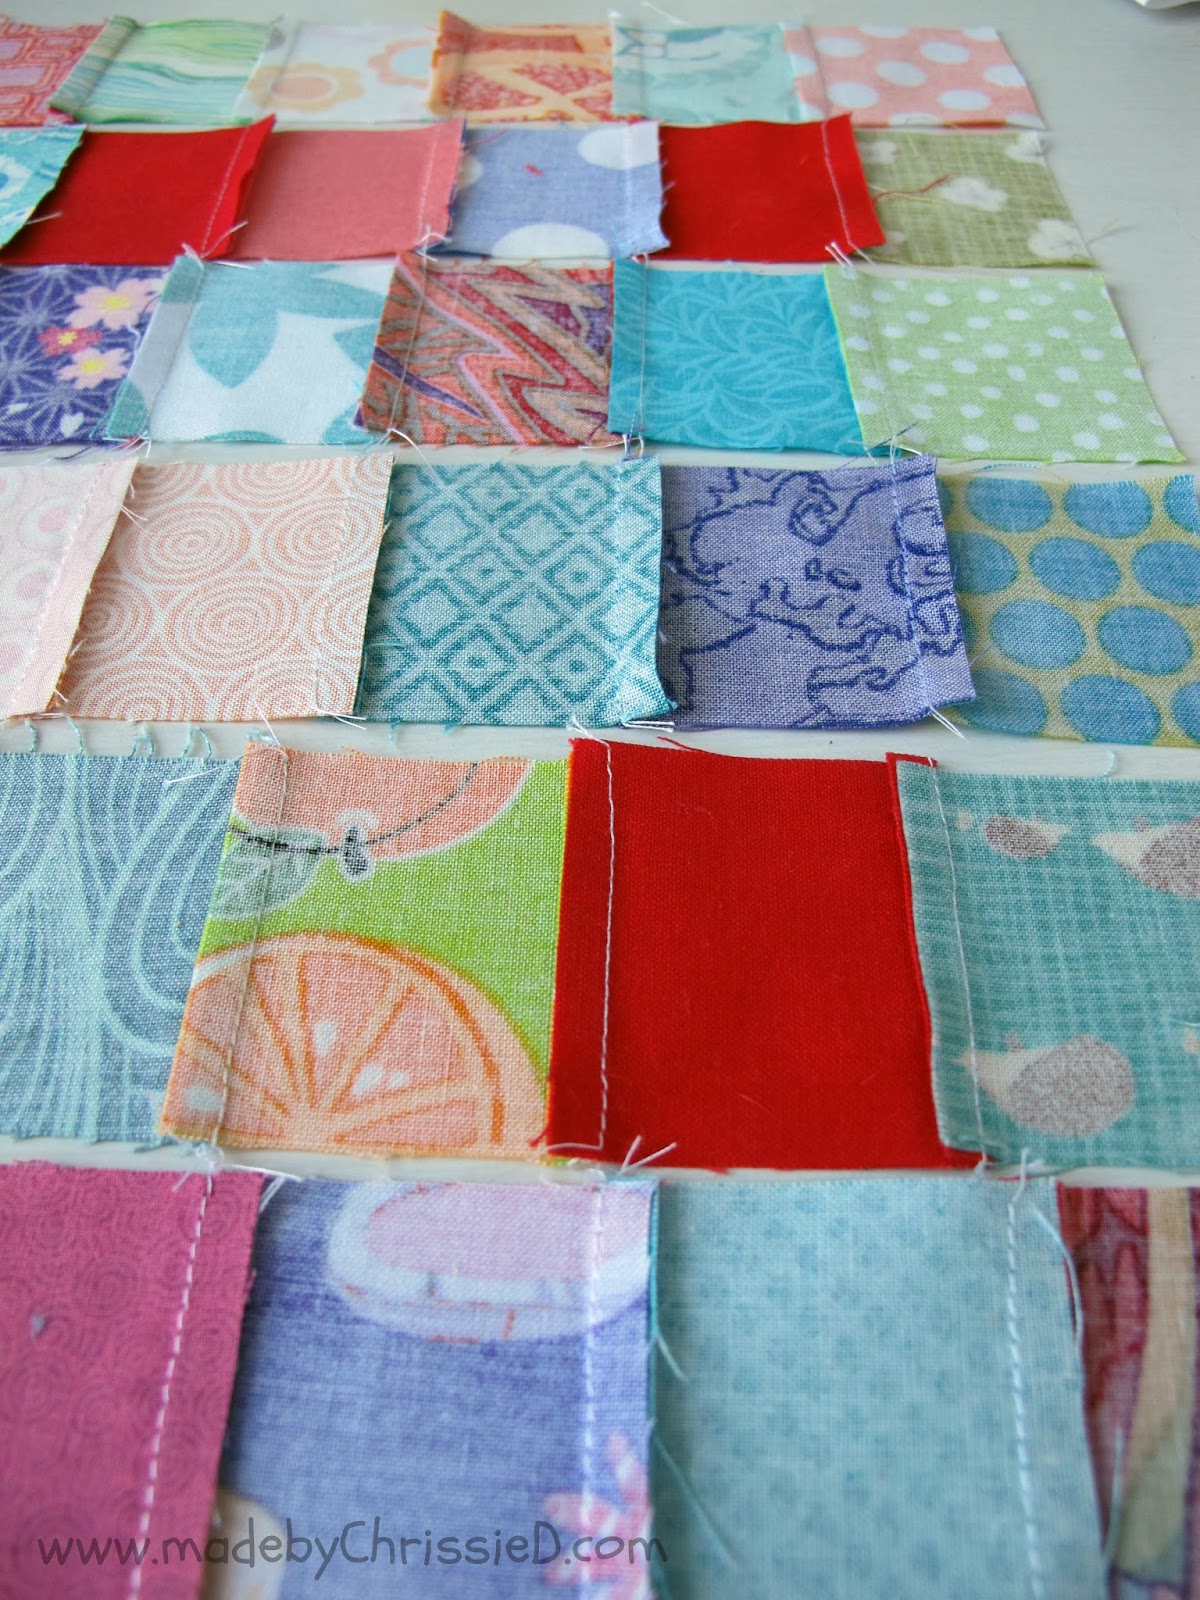
Instead of creating nine patches I sewed each square together along a row using a scant 1/4" seam.  Why a scant 1/4" - over the whole block we're having 7 seams in each direction - if you're as much as 1 mm (that's about the width of one thread on the fabric's weave) out on each seam then you'll lose or gain 7 mm over the whole block - 7 mm is a 1/4", add this up over a whole quilt and you're talking a significant difference in size of a couple of inches.  A scant 1/4" will allow for any slight movement in your needle and you can adjust any extra width when you trim the block at the end - better to have something to trim than for the block to be too small.

Easy Scrappy Nine Patches Tute by www.madebyChrissieD.com

I moved on to the second row and did exactly the same.

Easy Scrappy Nine Patches Tute by www.madebyChrissieD.com

And the same again for each row until all six rows were sewn.

Easy Scrappy Nine Patches Tute by www.madebyChrissieD.com

I pressed the first row, third and fifth rows to the right and the second, fourth and sixth rows to the left.
Notice I said 'press' and not 'iron': ironing (moving the iron over the fabric) will move and stretch the fabric causing it to misshape and it will no longer be the correct size and your seams won't match while pressing (pressing the iron in one place on the fabric and lifting it off the fabric to move to the next area) will flatten the seam and fabric to its new position without changing the fabric's size/shape.

Easy Scrappy Nine Patches Tute by www.madebyChrissieD.com

Alternating the direction of the seams on each row will allow me to piece the rows together with beautifully matched seams that nest together perfectly.

Easy Scrappy Nine Patches Tute by www.madebyChrissieD.com

How to Nest Seams by www.madebyChrissieD.com

If you press to alternate sides you can now nest your seams.

Place your two fabric layers on top of each other and give them a slight wiggle between your fingers - you should feel the fabrics lock together - it's hard to put into words but when you give it a go you'll understand what I mean.  The two seams will butt up against each other perfectly and lock in place.

 This is how a perfectly nested seam will look (below), see how the four fabrics are butted right up to each other and locking together.

How To Nest Seams by www.madebyChrissieD.com

You can pop a pin on either side of the seam to hold it in place while you sew down the length of the row again using a scant 1/4" seam.  Even if you don't normally sew over your pins this is one time to maybe break your rule - it's the best way to get perfectly matching seams.  I always use Clover Patchwork Pins (Fine) - they're so fine that my Bernina doesn't even know they're there, on the odd occasion that the needle does come in contact, it bends the pin rather than breaking the needle.  I also love that these pins have glass heads and they won't melt onto your fabric or ironing board if/when you press over them.

Easy Scrappy Nine Patches Tute by www.madebyChrissieD.com

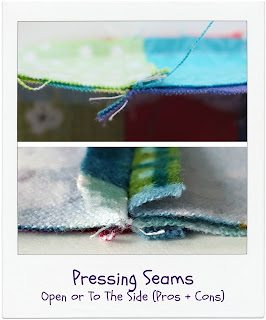
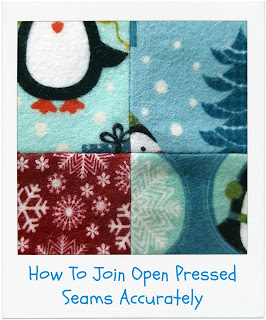
I have two other posts about joining/pressing seams, click the images to read more:

How To Press Seams - Open or To The Side by www.madebyChrissieD.comHow To Join Open Pressed Seams Accurately by www.madebyChrissieD.com

Continue sewing the six rows together to form the centre of the block.

Here're the seams - sewn but not yet pressed - I love opening the layers and seeing that the seams all match!

Easy Scrappy Nine Patches Tute by www.madebyChrissieD.com

Again press the seams to one side.
And below is the pressed centre section of the block.
Even with pins and pressing and care there's still a wiggle to the rows - perfection is tricky to achieve!

Easy Scrappy Nine Patches Tute by www.madebyChrissieD.com

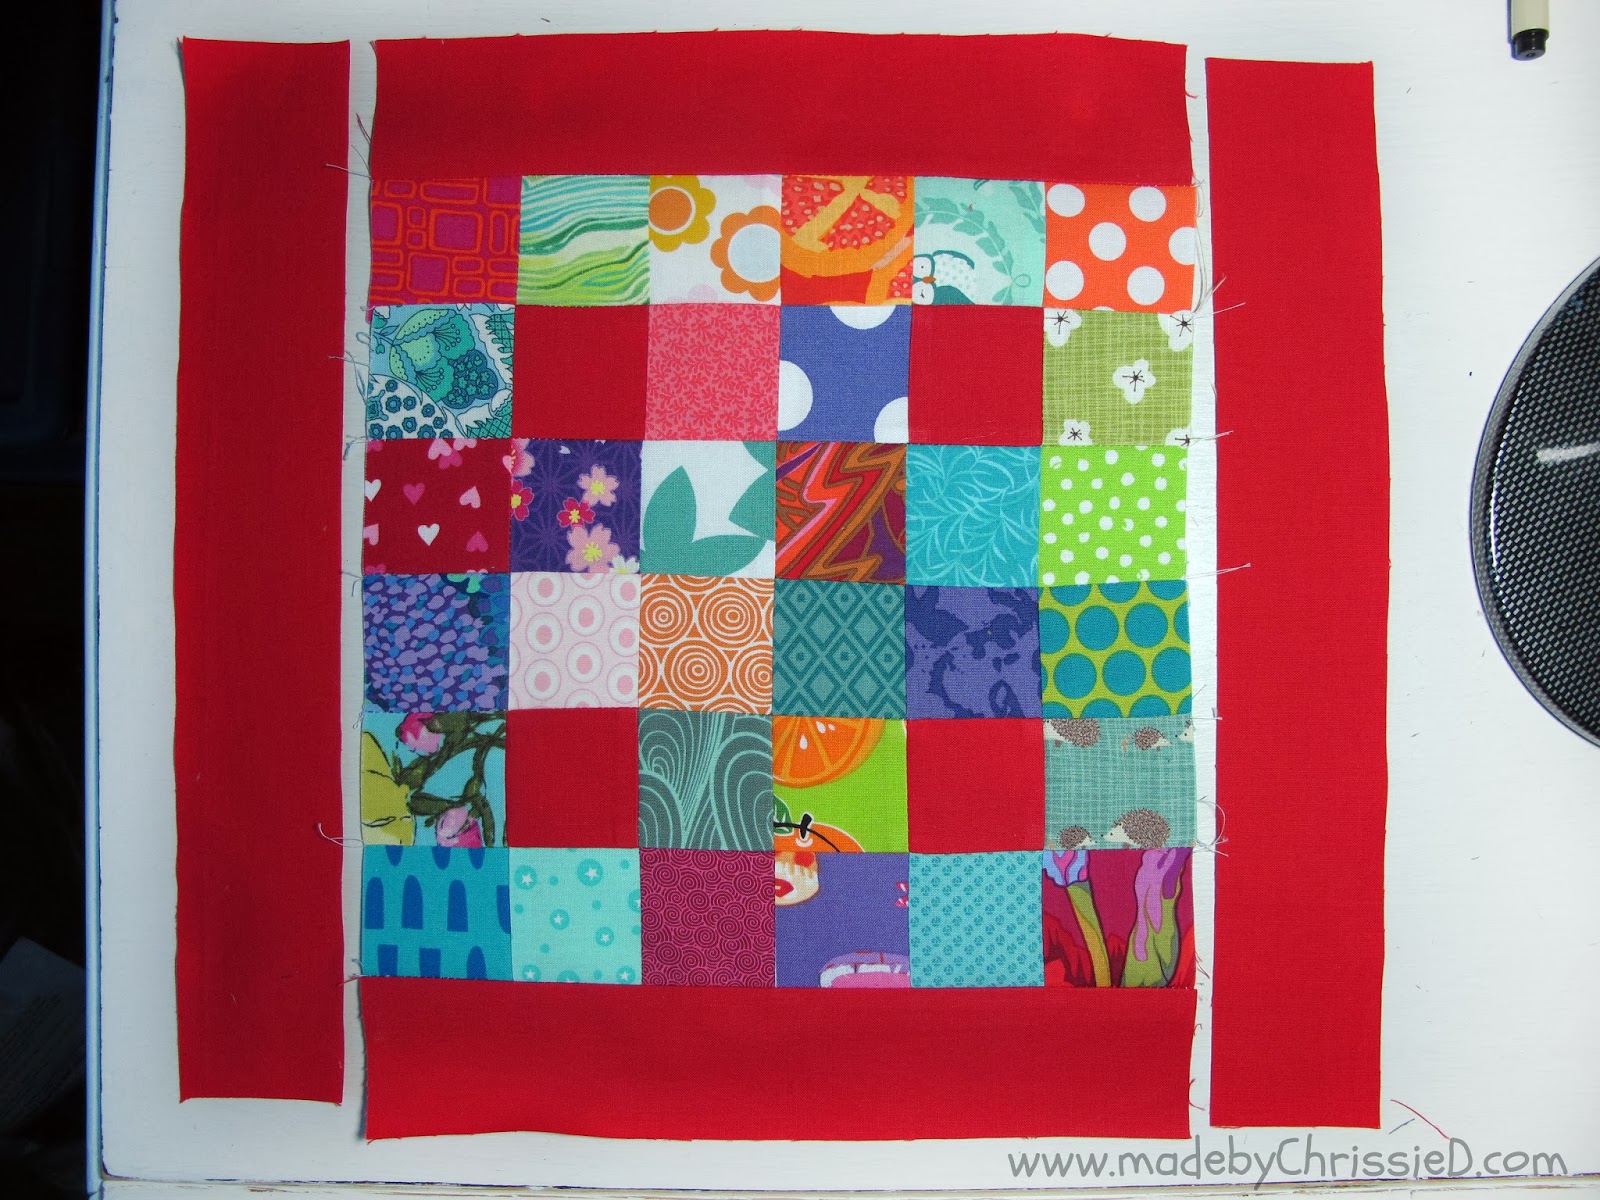
Layout the block with the short rectangle borders along the top and the long rectangle borders along the bottom

Easy Scrappy Nine Patches Tute by www.madebyChrissieD.com

Sew the short rectangles to the top and bottom of the block first using a scant 1/4" seam.  This is another time that I use pins.  There're lots of seams and I don't want the border to stretch and become misshapen so, I think, the pins help to keep everything pretty straight and give a better finished block.

Easy Scrappy Nine Patches Tute by www.madebyChrissieD.com

Borders added.

Easy Scrappy Nine Patches Tute by www.madebyChrissieD.com

Press the borders back with the seams facing away from the centre block.

Easy Scrappy Nine Patches Tute by www.madebyChrissieD.com

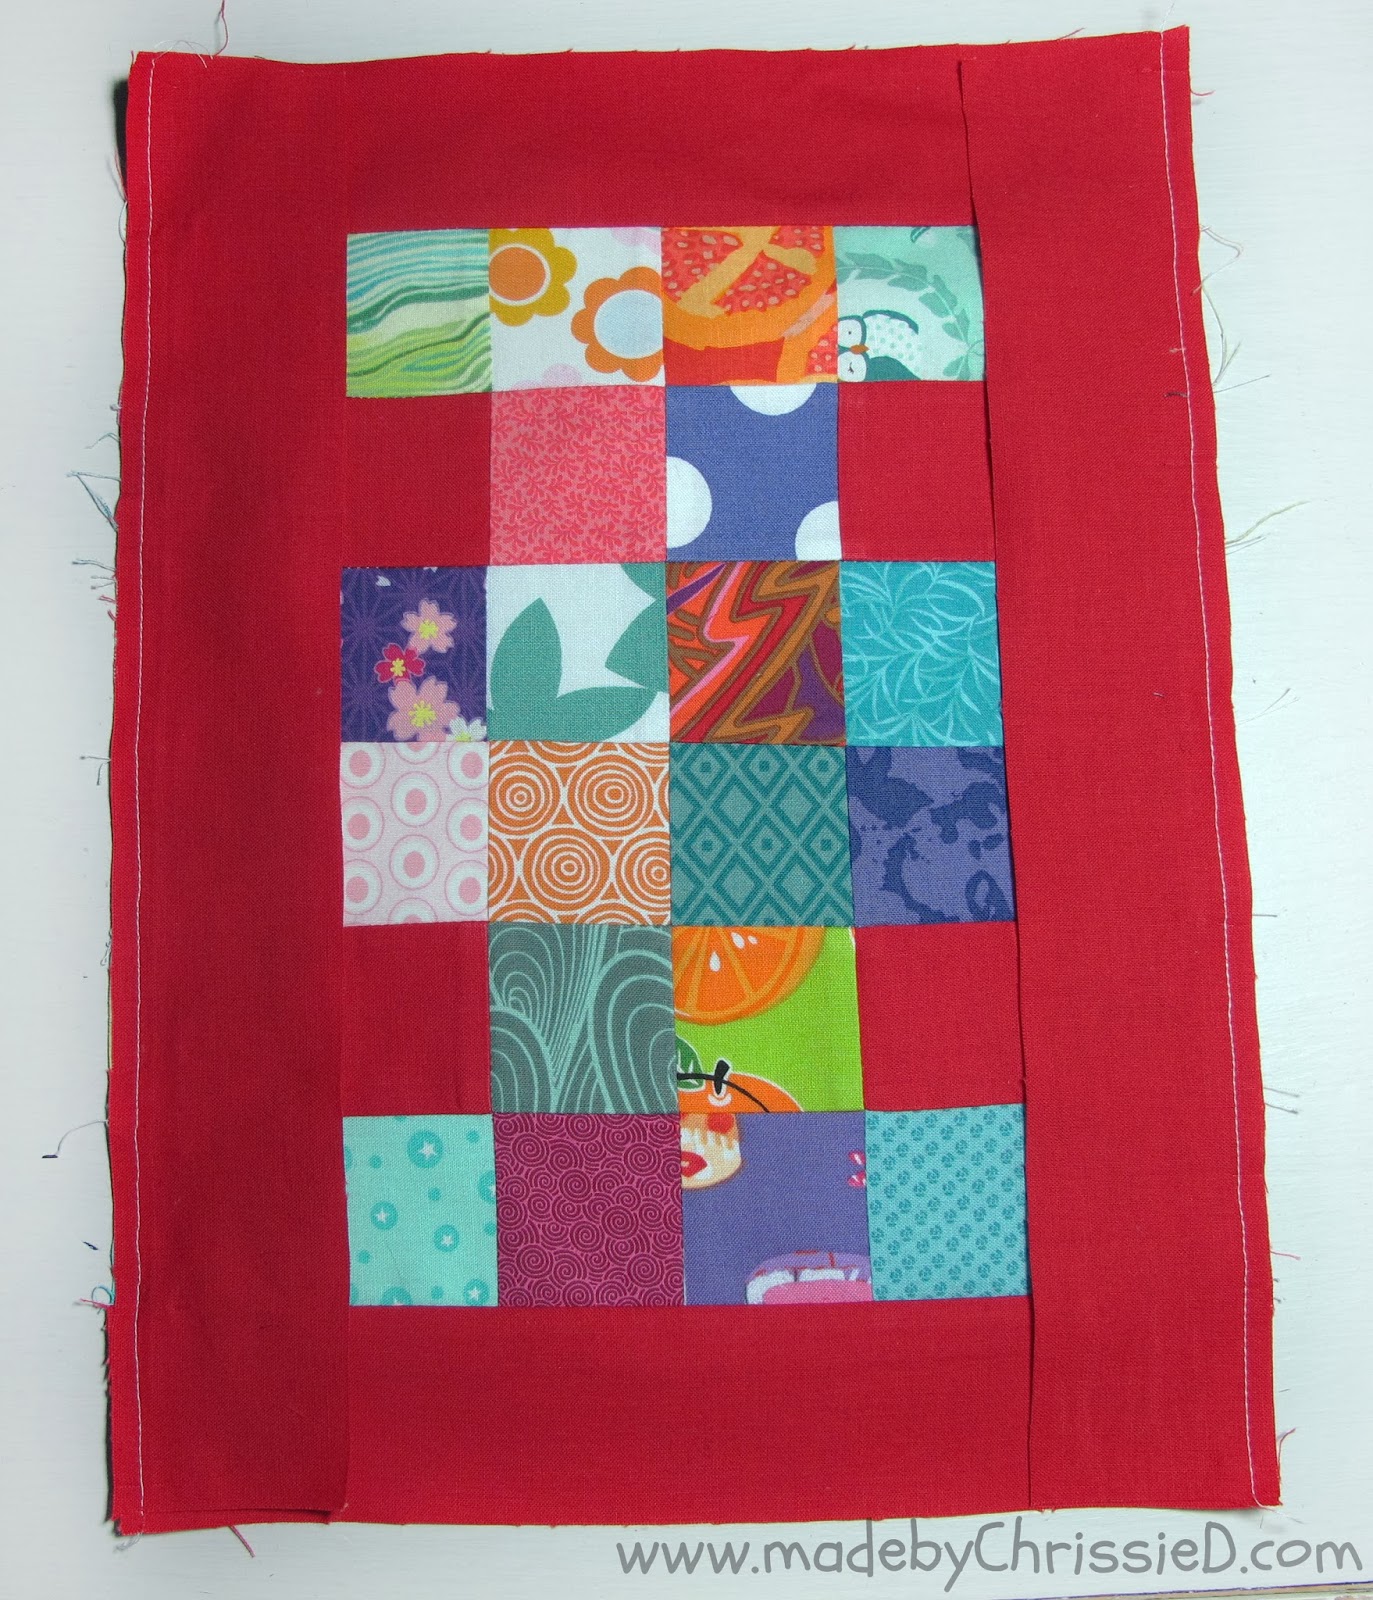
Now sew on the long borders again with a scant 1/4" seam.

Easy Scrappy Nine Patches Tute by www.madebyChrissieD.com

Press your seams towards the centre of the block.

Easy Scrappy Nine Patches Tute by www.madebyChrissieD.com

Trim your block to 12.5" x 12.5" and stand back and admire.

Easy Scrappy Nine Patches Tute by www.madebyChrissieD.com

Easy Scrappy Nine Patches Tute by www.madebyChrissieD.com

As always you can check out all the blocks that our Bee make for Kim H on my Quilty - Scrappy Nine Patches Pinterest Board - I'll add more pins as each person in the Bee posts photos of their finished blocks and you can see my NYC Mod Quilt Guild Post here too.


Made By You:
Here's a fab doll's quilt and pillow made by Ingrid @kuka and bubu using my tutorial - click the image to go through to her blog post.  Thanks Ingrid for sharing, it's such fun to see how others interpret my tutes :D


Easy Scrappy Nine Patches Tute


Easy Scrappy Nine Patches Tute by www.madebyChrissieD.com


Clicking on an image will take you to a new page of crafty goodness :)

Disclosure: 
This post contains Amazon and Craftsy affiliate links for which I am paid compensation on click-through purchases (at no additional cost to you). Otherwise, the post is for informational purposes only and all opinions are my own.

Copyright: 
Uncredited reproduction of all content, text and images on this site is prohibited.
All content, text and images must be credited to Chris Dodsley @made by ChrissieD and include a link back to this site.

Protected by Copyscape


Craftsy Unlimited FREE 7 day trial at Craftsy.com