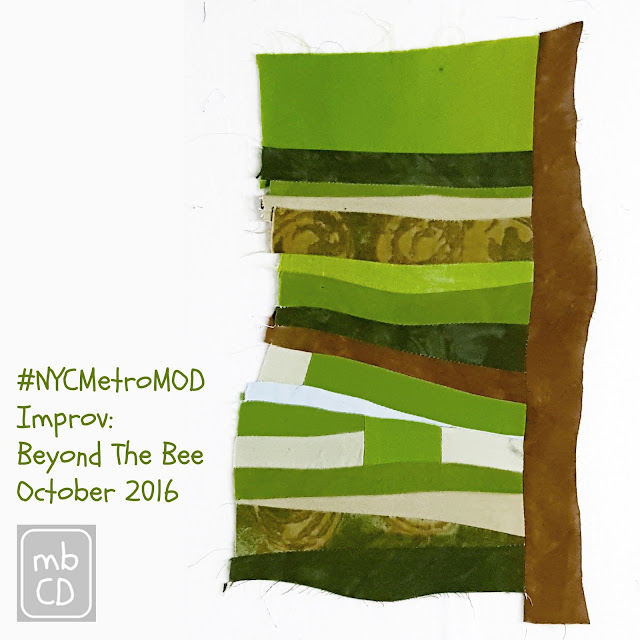
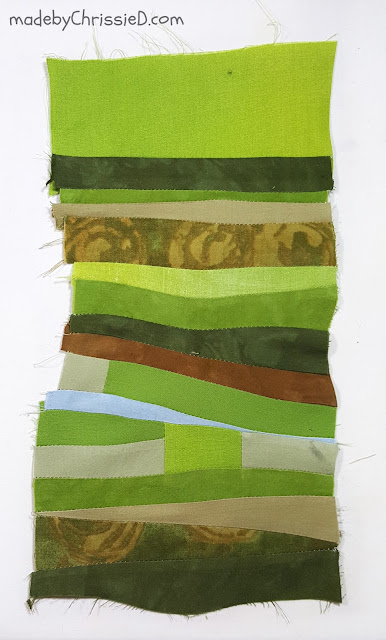
Do you see a tree, fields and a glimpse of pale blue sky? I do and it reminds me of my home in England. It's my October Improv: Beyond The Bee block for Cynthia.
Improv: Beyond The Bee
As members of the NYC Metro Modern Quilters Guild, as a Bee, we are using many of the ideas in The Improv Handbook For Quilters by Sherri Lynn Wood and working with scores (rules open to self-interpretation) set by that month's Guild Queen Bee.
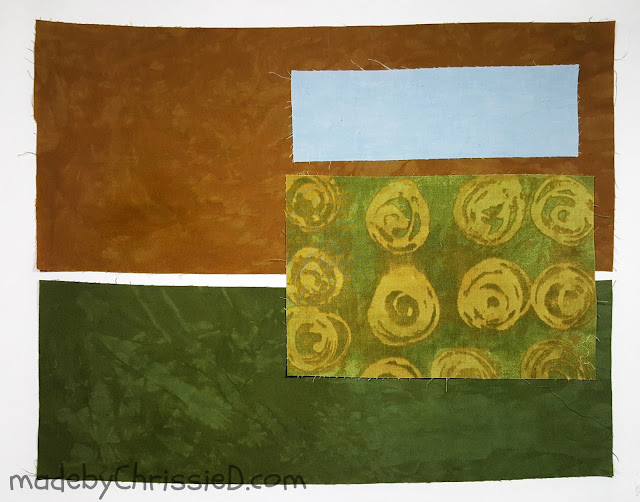
Queen Bee for October 2016 is Cynthia and she sent me these fabrics.
Cynthia's Score:
a Postcard size strip rectangle
Cynthia's Rules:
Colour:
✦muddy greens and browns only Earthy/yellowy greens/deep browns - NO blue tones
✦colour determines direction
✦use accent fabric (blue) anywhere but ONLY ONCE
Fabrics:
✦only solids, textures and tone on tone
✦NO flowers, juveniles, checks, patterns
✦use abstracts only in colour range
✦100% good-quality cotton only
Size and Shape:
✦'postcard'; horizontal or vertical, 6.5" x 9.5".
✦strips of fabric - even/uneven, curved/straight/pieced
✦greens - horizontally
✦browns - horizontally or vertically
Choosing Fabrics
I raided my scraps...
...and settled on this selection
Idea Conception
I didn't start with a plan or sketch, I decided to jump straight in, sew strips together and develop the piece as I created it. I did decide to use scissors instead of my rotary cutter as this would allow me to create more unevenness across a small block.
Making My Block - The Process
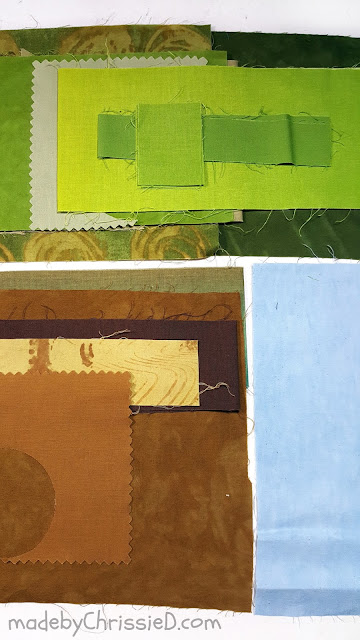
Below are step-by-step photos of the fabrics as I sewed each stage together. I used a technique for joining the strips that I've developed myself, it works for me. Of course, this doesn't mean it's a new technique or that it belongs to me, I expect many others join improv strips in the same way, I just haven't come across it so far.
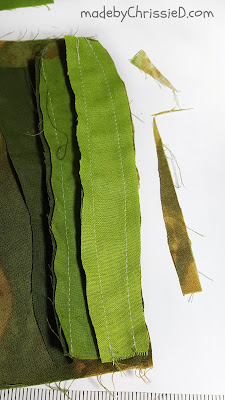
How I Join Curved And Uneven Improv Strips [Technique]
✦Don't cut the edges to match, I work with them as they are.
✦Place the curved/uneven strip on top of a more regular straight strip of fabric or it can be another uneven strip.
✦Ensure the uneven edge is fully within the edge of the fabric you want to attach it to.
✦Follow the curved, uneven edge and sew an approximate 1/4" seam down the length of the strip.
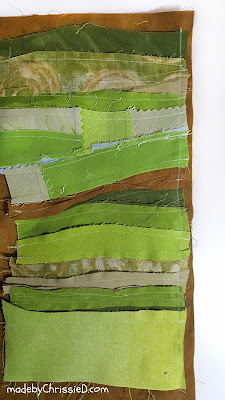
This is how it looks when it is sewn together - you can see my sewn line on the right edge of the lightest green. Trim away the excess from the regular edged fabric so it matches the curved, uneven edge.
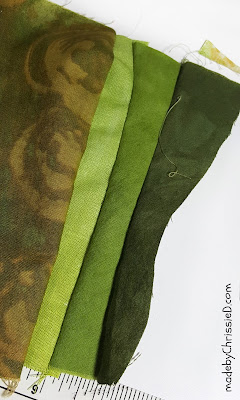
This is how it looks on the other side - it's the two fabrics on the left of the pic.
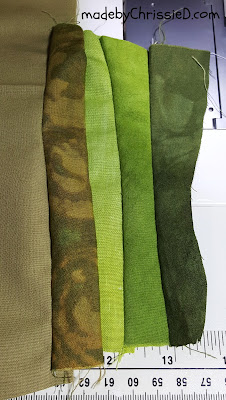
I'll show you how I do it again on this next piece. I'm attaching a curved, uneven edge to a large piece of khaki fabric behind it.
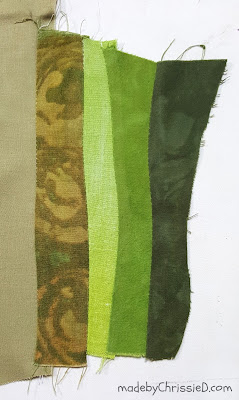
Give those seams a press and you can see just how wonky they are - which is exactly the look we want to achieve here.
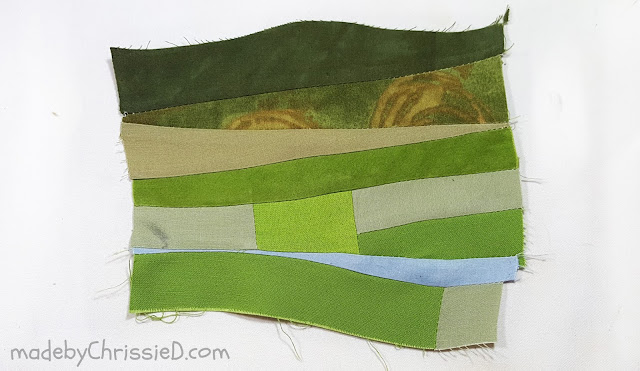
Back to creating my Improv block for Cynthia, I continued adding strips to create the horizontals...
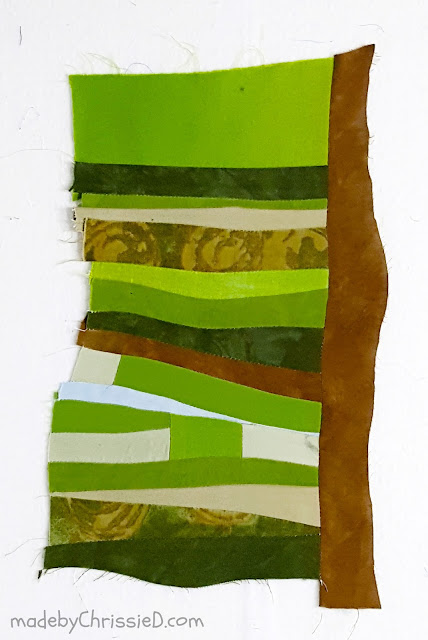
...and then I used the same technique to add a vertical brown.
And my block was finished. I didn't trim it to size, I left it so Cynthia can resize and fussy cut it to suit her final design.
This is the pile of leftover scraps I sent back to Cynthia. I included some of my unused pieced sections and scraps in case they're useful to her in making her quilt top.
Assessing My Work Against The Score
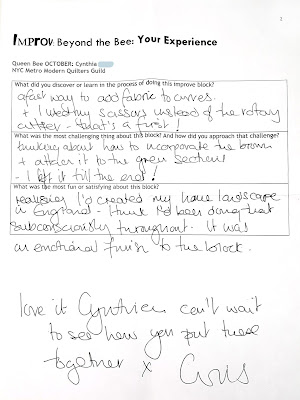
Cynthia had appreciated my idea to include an Evaluation with my September Improv: Beyond The Bee block so she also included something similar with her block instructions.
Surprises
As soon as I stepped back from the finished block I realised I'd created my home landscape in England - I think I'd been doing that subconsciously throughout. I'm can step into that block and find myself standing by a tree on the edge of the forest and looking out across the fields. There's a glimpse of blue sky before the tree tops fill my uppermost view. Realising this was an emotional finish to the block.
Discoveries
This is a fast way to add fabric to curves and I using my scissors instead of the rotary cutter made it even easier and gave a more detailed, uneven finish.
Satisfactions
I think I'm happy with the finished block. I know I am from a personal perspective, the realisation that it was a view of my home village was a perfect finish for me.
Dissatisfactions
I am slightly dissatisfied with how I've met Cynthia's score requirements, I think the end result is predictable and I haven't included and vertical brown strips. As I was creating the block, I wasn't sure how to incorporate brown into my strip piecing without it looking random and strange so I left it until the end and attached it alongside the green sections.
Improv: Beyond The Bee
Have you made a quilt using scores from The Improv Handbook For Quilters?
I'd love to hear your thoughts and experiences too.
I'm Vice President of the NYC Metro Modern Quilters Guild #nycmetromod and from 2012-15 I was a member of our Guild's first Bee and I shared how I made each block with you here on this page along with our Guild's challenge and charity blocks and now the Improv: Beyond The Bee blocks too.
Clicking on an image will take you to a new page of crafty goodness :)
Disclosure:
This post contains a Craftsy affiliate banner for which I am paid commission on click-through purchases. Otherwise, no payment or commission is received for click-throughs to shared links; the post is for informational purposes only and all opinions are my own.
Copyright:

Linky Parties This post may be linked to some great Linky Parties, always a great source of inspiration too. If you click through to my 'Fave Linky Parties' page you can see where I like to share my work.











What an interesting Bee this is Chris, I like how you also reflect on the process. The final quilts will be an amazing collaborative effort.
ReplyDeleteHappy St Patrick's Day too!
Such a wonderful quilt block. It really looks like an English landscape with the soft green colours.
ReplyDelete#handmadeMonday
I love the rolling curves - it reminds me of Yorkshire:)
ReplyDeleteI think this is the book I got for Christmas, fully intending on exploring Improv this year. I haven't tried yet...for some reason I'm nervous! I really like your block, good job!
ReplyDeleteLooks strange, but I kind of like all those different shades of green stacked together. Thank you for sharing at The Really Crafty Link Party this week. Pinned!
ReplyDeleteIt's very English countryside, could be anywhere from Yorkshire to Dartmoor, the New Forest to the Warwickshire fields just down the road from me. I think it's beautiful and the process is really interesting.
ReplyDelete