teaching sewing confidence, tip by tip
Showing posts with label City Quilter. Show all posts

Saturday, 12 April 2014

An Amy Butler Bed - It's A Dog's Life

Last August I was asked to guest post a tutorial over at Sew Can She, eight months on it's time to share that tutorial with you here just in case you missed it first time round.  Enjoy :D


Hi everyone, I'm Chrissie of made by ChrissieD, having studied Art & Design and Textile Art back home in England I now find myself quilting, sewing and blogging alongside working at The City Quilter in Manhattan and I'm a member of the NYC Metro Mod Quilt Guild.

If you've ever read my blog you'll know that much of what I make is influenced by my daughter, Flicky, and today's project is no exception!  I asked Flicky to pick something from the Sew Can She archives that I could adapt for my guest post and she chose the Fleece Dog Bed by Erin of Dog Under My Desk for our very own 'Tatty' dog to snuggle on.

Following Erin's instructions, which are clear and very simple, it's really easy to change the size of the bed to suit your own needs.   I wanted the dog bed to fit inside Tatty's playpen so I made it smaller, only 24" diameter, I also used 100% cotton quilting fabric rather than fleece and jazzed it up a bit by using pieced fabrics. 
To create the piecing I cut two 24" squares from Amy Butler's Alchemy 'Fountain' fabrics in Rosebud and Flora and folded each square into quarters ...

... and then in half to form a triangle - I ironed the fabric at this stage so the fold lines would be very obvious when it's opened out as a circle later.

From the centre point of the folded fabric I measured out 12" and repeated this in several places until I could join the marks in a smooth arc drawn on the fabric (I think you can just about see the pale blue water erasable arc line from the ruler edge to the opposite corner top of the fabric).  Keeping the fabric folded I cut along the arc line from edge to edge.

 Once the fabric is unfolded it's a circle and you can see all those fold lines on it.  Next, I cut along each of the fold lines to create the triangular sections to piece the dog bed top and bottom circles.

 Here're the cut sections - and then I did the same with the second piece of fabric.

Having laid the fabrics out in an alternating colourway I then sewed the triangles together using a 1/4" seam as above - I'd recommend that you do a double row of stitching to make the seams more durable - my dog's a digger, she just has to get to the stuffing in anything and one row of stitching isn't going to hold her back for long!

I made the circles up as two half circles and then sewed them together down the centre seam - the points joined more easily this way than by just working around the full circle.  

I repeated with the remaining pieces to make up the top and bottom circles of the dog bed.

 I didn't want the bed to be as high as the 9" in Erin's pattern so I cut out 6" x 3" sections of the alternating fabrics and sewed them together into a long strip and then I appliqued my dog's name (Tatty and Thatcher) on the side of the bed. 

Here I've attached the side panel to the top of the bed.

Erin was right, 2 pillows $7.00 from Target was the correct amount of stuffing and the bed's absolutely the perfect finished size for Tatty's playpen.

What I learnt:
  • Thinking that the bed would sag outwards once made (as in Erin's photos of her bed made with fleece) I wanted the letters to still be fully visible so I cut them quite small - 1.5" tall.  This didn't turn out to be the case - using 100% quilting cotton instead of fleece and reducing the height of the bed from 9" to 6" kept the sides of the bed pretty firm and upright - so I could have made the letters much taller.
  • The solid fabrics that I used to applique Tatty's name on the bed might have been the perfect colours to work alongside the Amy Butler prints in a quilt but they just weren't contrasting enough to be visible against such a busy print when used as an applique. Even appliquing the letters with white thread didn't make them obvious enough. Using one stronger solid colour or white fabric would have worked much better.
And the final verdict from Tatty - she absolutely loves her new bed and has been seen dragging it around the apartment with her - even out on to our 23rd-floor balcony! 


Much to Tatty's disgust my daughter, Flicky, has also been seen sitting on the bed - using it as a large floor cushion - she says it's the comfiest thing she's ever sat on.  So that got me thinking that there's lots of other uses for this pattern, not just as a dog bed but how about as a back cushion when reading in bed or go large and make floor cushions for a child's playroom, TV room or den? Just modify the fabric and size to change the look.


Tatty gives the bed her seal of approval - what do you think of it?

If you'd like to find out more about me and my work you can find me in the following places


Hope to catch up with you all soon :)

Updated on Friday, 6 June 2014


And check out this Aurifil feature along with a tweet from Amy Butler Design :D


Featured on:
 photo grabbutton2_zps7d635a69.png Tuesday To Do Party Weekend Bloggy Reading


Disclaimer: 
This post is for informational purposes only, no payment or commission is received on click-throughs and opinions are my own.

Follow on Bloglovin


Monday, 16 December 2013

"The Most Incredible Gift" - A Very Successful Secret Santa


So yesterday was The City Quilter's Staff Xmas Party and the main event of the evening was the Secret Santa Gift Swap. 

I'd been really nervous about whose name I'd draw for the swap - as a first timer I wasn't sure what type of gift was expected just that it should be handmade rather than bought - well we are a bunch of crafty ladies working in a quilting supplies store!.  I dropped lucky in the name draw - my swap partner was my good friend Karen and after some deliberation I knew that I couldn't go wrong with a present that included photos of her 1-year-old twins.

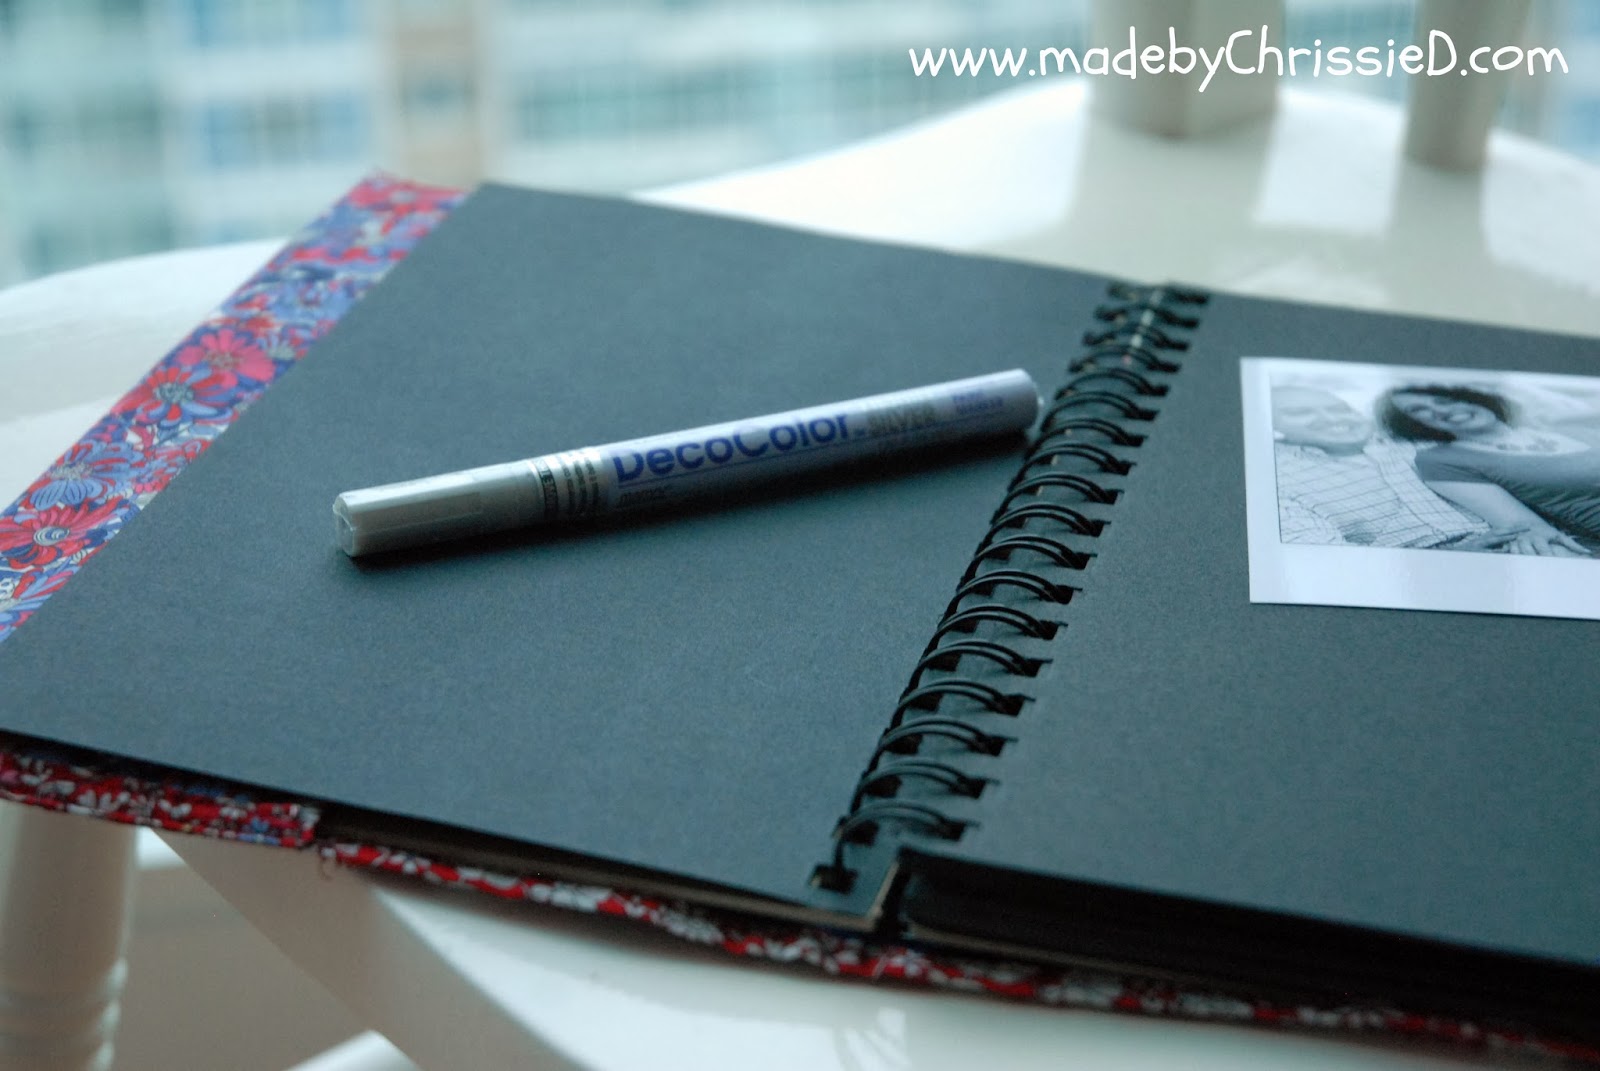
I decided to make a photo album - sure we all have photos on our phones and computers but how many of us have albums these days?

Here's How I Did It
  • I downloaded 28 photos from Karen's facebook page - photos just of Karen, her husband and their babies starting with a photo taken during Karen's pregnancy and over the last 15 months since the twins were born.
  •   I converted them to black & white images using Photoshop and then transformed them into Polaroids using Picmonkey.  
  • Next, I mounted the photos in an album with black pages, one per page using double sided tape.
  • I made a fabric cover for the album using two designs of Karen's favourite fabric: 70% cotton/30% silk blends from the Liberty Art Fabrics collection - Willows Garden Portsea Place Voile (blue & red) and  June's Meadow B Portsea Place Voile


  • For the front cover, I took a mini canvas and applied a photo of Karen, her husband, and their babies.
  •  I added "Our Family" text to the photo. 
  •  I used Diamond Glaze to create a clear protective finish over the photo/canvas surface.   
  • Once the surface was dry and hardened I attached the canvas to the album cover using double sided tape.


  • I included a silver DecoColor Paint Pen so Karen can add her own notes and doodles to each page.


I'm delighted to report back that Karen was thrilled with her present, yes there were even tears and in her own words, as posted on facebook last night, it was "the most incredible gift from my incredible friend".  I think we can safely say that was a very successful Secret Santa!!!

You might be wondering what I received from my Secret Santa?

Well my Secret Santa turned out to be my fellow Bernina Sales Person, Janell.  She made me the most amazing chocolate fudge along with peanut butter, chocolate and oatmeal cakes and some to die for cranberry and white chocolate chunk brownies.  The best part of that is that they're all gluten free, just for me and I'm not sharing!!!  Thanks Janell, you're such a sweetie :D


Update Tuesday, 17 December 2013 - Here's a link to The City Quilter's facebook party photo album

The City Quilter's Staff Holiday Party, 2013


Now it's your turn, spill the beans - what's the best or maybe even the worst Secret Santa gift you've ever received?


Click this link to see all my Tutorials, Hints & Tips

Disclaimer: This post is for informational purposes only, no payment or commission is received on click-throughs and opinions are my own.

Follow on Bloglovin


Friday, 1 November 2013

What's Your Favourite Wool? Mine's Got To Be Noro.


It's November and I thought it really was time I shared with you a crocheted blanket that I gave you a sneak peek of in a post back in August.  The facts are simple - I'm working far too many hours at The City Quilter (currently 4 days a week) and as a result, I'm neglecting my blog, not being as creative as I want to be and opening my Etsy store is waaaay past my 1 June 2013 deadline.  These are all areas that need addressing but for the moment I'll just show you the blanket!


My finished blanket is made up of 16 x 15" granny squares and it's final made size is 65" square.

My favourite wool brand is Noro and this is NORO Kochoran Yarn #76 (50% Wool, 30% Angora, 20% Silk) bordered and joined with Filatura Lanarota Easy Wool #389 (76% Acrylic, 24% Wool) 


It's wet and windy today so I resorted to taking photos on my balcony, trying to get some natural light, but there isn't room to lay the blanket out there so I had to hang it over my balcony door and oops I've just spotted that this photo below is actually the back of the blanket!


I've so many completed projects to share and it looks like I'm on borrowed time now weather wise to photograph them.  I'll keep grabbing my opportunities and hopefully my work/blog/creativity/business/home balance can be addressed before too long - does anyone know how to fit more hours in a day?!


Related Posts:
Where To Shop For Yarn In Manhattan - Lion Brand Yarn Studio
Sonia, You'll Never Believe It - I Just Found The Golden Ticket!!!  


Disclaimer: 

This post is for informational purposes only, no payment or commission is received on click-throughs and opinions are my own.


Follow on Bloglovin

Sunday, 21 July 2013

What Do You Think Of My Mini Adventure?

Been making cushions again - well just one cushion.  A batch of fat quarters arrived in The City Quilter last week - and as I was rolling them (for anyone who's new to my blog or wondering just what I was doing rolling fat quarters in The City Quilter, Manhattan then you can catch up by reading this post about my new job!) I just knew I had to have three of them - all England/London/America/New York related - they were meant for me and I knew exactly what I wanted to make with them so I bought them.

And this is what I've made using my own Quilted Pillow Cushion With Hidden Zipper tute: enjoy the front and back view!
Benartex Fabrics - London Bridge (Kanvas) Mini Coop; Pooch On Blue; News

I'm crazy about the Mini, I've owned 3 in my life - as a teenager, my first car was a red Mini identical to the bottom two Minis on the cushion front.  My second Mini was in my late twenties and was like the cushion's top red with white stripes Mini - I had to sell that Mini when I was ready to have Flicky - anyone who's ever owned an original Mini knows there's no room for a pram and three children under the age of 6 in a Mini!  In my forties the kids were grown and I wasn't always carting half a house with me everywhere I went so I went back to the Mini - meet Dolly, yes she was named after Dolly Parton, and she was my pride and joy until I had to sell her to move to the States - Flicky and I had our own 'Mini Adventures' in Dolly and lots of wonderful giggles and memories.


So now you know I love Minis, enough of all that reminiscing, let's get back to the cushion and some close-up details:


I'm loving the 'Best of British' and 'Soldier' ribbon details - I used some of the ribbon that Sarah @Quilt Candy sent me from one of her visits to Liberty, London (not been to Liberty, London?  Check out my photos/blog post from my visit last August, it's awesome!) and also the hidden zipper flap with all those cutesy dogs wearing the English and American flags.

And some front and back full shots:


 And here's some gratuitous front and back shots just because I kind of like the lighting!


I love this cushion - and I've got just the right person in mind to give it to, I'm pretty sure they're going to love it too and they can have their own Mini Adventure. :)


Disclaimer: 
This post is for informational purposes only, no payment or commission is received on click-throughs and opinions are my own.

Follow on Bloglovin


I've been featured:
Threading My Way_Featured