The Double Zipper Pouch/Pencil Case is wide enough to hold a 12" ruler and a notepad up to 5-5/8" wide alongside just about anything else you might need on your first day Back To School. It also has a separate zippered front pocket to hold your spare change and even your phone! Its size makes it versatile; how about using it as a makeup bag or a coupon pouch?
DOUBLE ZIPPER POUCH/PENCIL CASE
Note: I'm an Amazon affiliate and will receive a small commission, at no additional cost, on any purchase made by following a link.
Supplies Needed:
1 x 1/2" D-ring (optional)
2 x zippers (minimum length 14")
Fabrics Used:
The fabric I've used in the tute is Benartex's Simply Chic collection by Anna Stuart.
Cutting Fabric:
Back - 13-1/2" x 7" - Toile Check Sky Blue
Upper Front - 13-1/2" x 1-3/4" - Blossom Red
Lower Front - 13-1/2" x 5-1/4" - Flora Eye Ribbon Sky Blue
Lining (cut 2) - 13-1/2" x 7" - Floret White
Pocket Lining - 13-1/2" x 7" - Cherries White
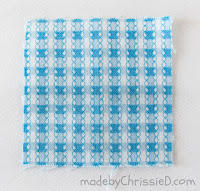
D-ring Tab (optional) - 2" x 2" - Gingham Sky Blue
Materials + Tools
My favourite sewing and quilting tools, notions and books, some fabrics I've used in this tute and more are detailed here on my Amazon Influencer Page.
Note: I'm an Amazon affiliate and will receive a small commission, at no additional cost, on any purchase made by following an Amazon link.
Let's Start Sewing:
Sew together the pouch as shown in the photos below. The images walk you through each stage step-by-step, laying your fabrics out precisely as I've done as you work through the project.
Pouch Front & Pocket
Layout out your Lower Front, Upper Front and zipper as shown.
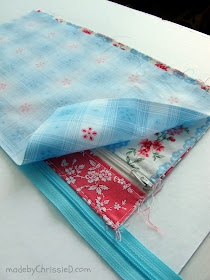
Flip the Upper Front over on top of the zipper and sew together.
Sew the zipper along the raised grain line approximately 1/4" from the edge of the zipper.
Lay the zipper and Upper face down on top of the Lower section, as shown below.
Sew along the zipper grain as before to join.
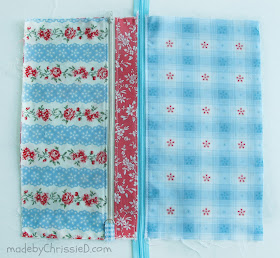
Press the Lower and Upper Fronts away from the zipper teeth.
Top stitch the Upper and Lower Fronts on both sides of the zipper at approximately 1/8".
From then on, I'll refer to the Upper and Lower Fronts as the Front.
Move the zipper pull within the body of the Front as shown below, and stitch 3 rows of straight stitches across the open zipper end to hold the zipper together (see far left of zipper below).
The zipper pull MUST BE to the right of the holding stitches, as shown.
Trim away excess zipper along the sides of the Front, as you can see I have in the photo below.
Place the Front on top of the Pocket Lining - Pocket Lining right side up and Front right side up.
Stitch around all 4 sides at 1/8" to secure the two sections together and create the pocket.
Remove the zipper holding stitches as the zipper is now held by the 1/8" stitch line you have just sewn around the Pocket Lining and Front.
D-Ring Tab (optional)
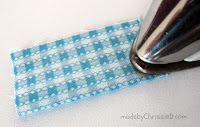
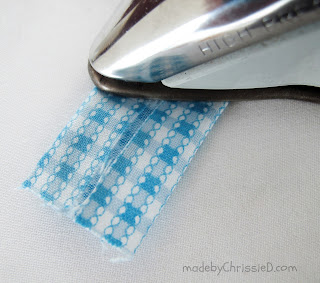
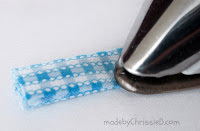
Press D-ring Tab fabric in half; open flat; press outside edges into the fold line; press in half again; stitch 1/16" around edges - the narrow ends will still have visible raw edges.
Fold the D-ring Tab in half and slip the D-ring on - the D-ring is optional; you could add a tab to the pouch without a D-ring. The tab itself is also optional.
Place the D-ring Tab folded over the right-hand end of the zipper on the Front; the ring/folded end should face inwards over the zipper.
Sew a few stitches at 1/8" to hold the D-ring Tab in place.
Attaching The Top Zipper
Layout out your Lining, Front and zipper as shown.
Flip over the zipper and sew it to the top of the Front along the zipper grain line as before.
Place the Lining on top of the zipper's right sides together with the Front - be sure to line the side edges up neatly, then sew over the same stitch line you've just created when you sewed the zipper and Front together.
The back now looks like this...
And the front looks like this.
Press the Front and Lining fabrics away from the zipper teeth, laying them flat against each other, wrong sides together.
Topstitch through all the layers along the fabric edge 1/8" from the zipper fabric.
Lay the Back, Front and zipper out as shown.
Flip the Back over onto the unsewn edge of the zipper, line up the side edges evenly and stitch together along the zipper grain line.
Lay your project out like this...
...and place the second section of lining fabric on top of the Back, wrong sides together.
Flip the Lining over on top of the last section of the zipper that doesn't already have a piece of fabric sewn to it. Line up the side edges and sew the Lining to the zipper over the previously sewn line attaching the Back to this zipper edge.
The Front/Back now look like this...
...and the lining looks like this.
Press Back and Lining away from zipper teeth and top stitch through all layers of the Back, zipper and Lining at 1/8" from the zipper fabric.
Trimming & Seaming The Pouch
As before, move the zipper pull so it's within the body of the pouch
and sew a few stitches across the open end of the zipper to hold it in place.
Place a horizontal line of your ruler along the line of your zipper teeth and the vertical edge of your ruler along the side edge of your Front/Back. Trim away the excess zipper length and, if necessary, straighten up your Front/Back sides.
Ensure your zipper is OPEN TO HALF WAY.
Lay the Front/Back right sides together and the Linings right sides together - zipper fabric should lay towards the Front/Back while the zipper teeth lay towards the Linings.
Pin around the sections. It's hard to spot the pins, but they are there in the pic below!
Sew around the edges with a 1/4" seam and leave a gap in the Lining seam for turning.
Snip diagonally across the 4 corners - don't cut into your stitches.
Finishing Touches
Turn to the right side through the Lining seam gap and the half-open zipper.
Take time to push the corner points out correctly.
Turn in the raw edges along the bottom of the Lining and stitch along the opening using a 1/8" seam.
Pop the Lining inside the Front/Back section, bring the corners together, and press the finished pouch.
DOUBLE ZIPPER POUCH/PENCIL CASE
Featured on:

Clicking on an image will take you to a new page of crafty goodness :)
Disclosure:
This post contains Amazon and Craftsy affiliate links for which I am paid a commission on click-through purchases (at no additional cost to you). Otherwise, no payment or commission is received for click-throughs to shared links; the post is for informational purposes only, and all opinions are my own.
Copyright:








such a detailed tutorial will save link to this as would like to try it though 2 zips are a bit daunting
ReplyDeleteA great tutorial with lots of helpful photo's. The next pouch I make I'll use your method. Thanks Chrissie :)
ReplyDeleteWhat a great and thorough tutorial! Thanks for all the photos, very helpful. I am looking forward to making one (or more) soon as I have the perfect recipient in mind. Thank you for sharing.
ReplyDeleteGreat tutorial !!! Thank you for sharing !
ReplyDeleteNext time my sewing machine is out I'm going to give this s go. I LOVE how you show every step, I find that so reassuring when I'm trying a project. I'll let you know how I get on (I'm imagining a pile of beautiful pencil cases in my future! )
ReplyDeleteI am very visual so thank you for the great tutorial!!!!
ReplyDeleteWonderful tutorial, Crissy. You have left no detail out and, though I read the instructions, I could have gotten through without the words because you have enough pictures. Really impressive and adorable little pouch. :)
ReplyDeleteVery thorough tutorial with lots of photos. I might just try this one. Thanks for all your hard work.
ReplyDeleteThanks for the wonderful tutorial.
ReplyDeleteWhat a sweet pouch, and the fabrics you used are perfectly coordinated!
ReplyDeleteLots of pictures! I’m definitely giving this tutorial a try!
ReplyDeletei have cross stitch a item that fits in my mind perfectly into your pouch pattern, i will give it a try, thank you for your good detailed tutorial.
ReplyDelete